

Table of Contents
- Why Guaranteed Sound Quality Improvement Starts With the Source
- Best Practices for Car Audio Upgrades: A Tiered Approach
- Car Audio DSP Tuning: The Single Biggest Guaranteed Improvement
- Subwoofer Enclosure Design Benefits: Why the Box Decides the Bass
- Reducing Ambient Noise and Distortion in the Cabin
- Software-Based AI Noise Suppression and Signal Processing
- A Troubleshooting Checklist for Guaranteed Sound Quality Improvement
- Conclusion
- Frequently Asked Questions
Last Updated: September 15, 2026
Why Guaranteed Sound Quality Improvement Starts With the Source
Guaranteed sound quality improvement begins at the source, not the speakers. A clean signal, correct gain staging, and a low noise floor matter more than any component swap, because every later stage amplifies whatever the source hands it.
At Audio Intensity, we build systems around that principle. Too many builds spend heavily on amplifiers and subwoofers, then feed the system a distorted signal from a factory head unit or cheap line converter, louder, not better.
Here is the uncomfortable truth most buying guides skip: sound quality improvement is a chain problem, not a parts problem. Fix the weakest link first and each upgrade pays off; skip it and every dollar downstream gets wasted.
The best part? The first fixes cost the least.
Best Practices for Car Audio Upgrades: A Tiered Approach
The best practices for car audio upgrades follow a clear order: source and signal first, then amplification and processing, then full system architecture. Spend in sequence and each tier multiplies the last; spend out of order and you chase problems you created.
Budget Tier: High-Value First Moves
Start with the signal path and the cabin. A quality line output converter or head unit with clean preamp outputs removes factory distortion, while sound deadening on doors and floorpan cuts road noise and raises your effective signal-to-noise ratio. Verify gain staging so no stage clips. This tier delivers the largest audible jump per dollar because it removes noise rather than adding output.
Mid Tier: Amplifiers and DSP
Here headroom and control enter. A dedicated amplifier with real dynamic range keeps transients intact. A DSP corrects time alignment, crossover points, and frequency response problems no speaker can fix alone. Watch impedance loads and confirm rated output at your actual load.
Competition Tier: Full System Architecture
Here you match every transducer to the cabin, choose components for fidelity over peak output, and treat the vehicle as a system. Active crossovers, dedicated midbass, and careful power and grounding design matter. Measure, adjust, listen, repeat.
| Tier | First Moves | Typical Focus | Biggest Gain |
|---|---|---|---|
| Budget | Line converter, deadening, gain staging | Noise floor | Cleaner signal |
| Mid | Amplifier, DSP, crossovers | Control | Tuning accuracy |
| Competition | Full architecture, active crossover | System matching | Reference fidelity |
Car Audio DSP Tuning: The Single Biggest Guaranteed Improvement
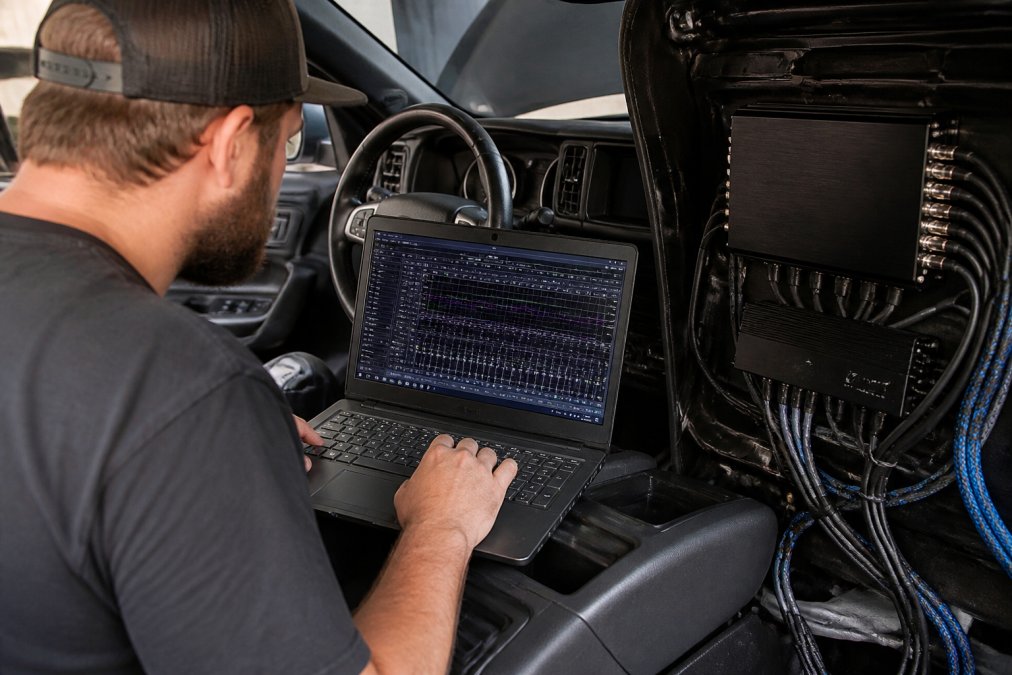
Car audio DSP tuning is the single most reliable way to improve sound quality in a vehicle, correcting the timing and frequency errors the cabin creates. A DSP applies delay, equalization, and crossover filters per channel, correction no speaker upgrade delivers.
What DSP Tuning Actually Fixes
A vehicle cabin is a hostile listening room: glass, plastic, and uneven speaker distances smear arrival times and create peaks and dips. DSP tuning addresses three problems at once:
- Time alignment: delays each channel so sound from every speaker arrives together
- Equalization: flattens response peaks and fills dips across the frequency range
- Crossover control: routes each frequency band to the transducer best suited for it
The result is intelligibility. Vocals stop sounding buried, bass stops bleeding into the midrange, and the stage stops collapsing into the door panel.
DIY vs. Professional Tuning
You can learn DSP tuning yourself with a measurement microphone, patience, and a willingness to redo your work. A common mistake is boosting frequencies to fix a dip, which eats headroom and can introduce distortion.
Professional tuning shortens that curve. Audio Intensity is the original US importer for Goldhorn DSP and keeps a sound quality competition judge on staff, often the difference between a system that measures well and one that sounds right.
Subwoofer Enclosure Design Benefits: Why the Box Decides the Bass
Subwoofer enclosure design benefits come down to one fact: the enclosure controls the driver, not the reverse. The same subwoofer sounds muddy, boomy, or thin in the wrong box and tight and extended in the right one. Enclosure volume, port tuning, and bracing determine how the driver loads the cabin.
A sealed box trades output for accuracy and a gentle rolloff. A ported box gains efficiency and low-end extension but demands correct tuning or the bass turns one-note. Bracing matters more than expected: an unbraced panel flexes and bleeds energy into distortion instead of the cabin.
This is where precision matters. Audio Intensity builds Proline X enclosures with CNC-cut panels in-house, designed per vehicle so there is no fabrication or guesswork. For truck owners especially, a direct-fit enclosure fits the space and loads the cabin the way the driver was designed to be loaded.
Reducing Ambient Noise and Distortion in the Cabin
Reducing ambient noise and distortion raises your effective signal-to-noise ratio, the real currency of car audio. Every decibel of road noise you remove is a decibel of music you no longer fight. Distortion comes from electronics pushed past clean output and panels that vibrate instead of staying still.
The Mechanism: Why Noise and Distortion Compound
A cabin at highway speed sits around 70 to 75 dB of ambient noise; music at a comfortable level peaks around 85 to 90 dB (nhtsa.gov). That leaves only about 15 dB of dynamic range. Compress it and quiet passages disappear into road roar, so you turn up the volume, pushing electronics toward clipping and adding distortion. Noise and distortion feed each other.
Sound deadening breaks that cycle by lowering the noise floor; distortion control keeps electronics in their clean range. You need both.
Tier 1: Zero-Cost Fixes
Before you buy anything, verify the basics. These cost nothing and often deliver an audible improvement:
- Set gains correctly. A gain set too high clips the signal before the amplifier reaches its rated output. Use a test tone and a multimeter or oscilloscope to set gain just before clipping.
- Confirm polarity on every speaker. One reversed driver cancels bass from the opposite side, the most common cause of "my system has no bass" complaints.
- Check crossover points. A midrange asked to reproduce frequencies below its usable range will distort. Set the high-pass filter to protect it.
- Seal door cavities. A door with open access holes is a leaky baffle. Sound from the back of the speaker cancels the front. Plugging the holes costs almost nothing and tightens midbass.
Tier 2: Low-Cost Improvements
- Apply sound deadening to the doors first. The doors are the largest vibrating panels closest to the listener. Butyl-based damping material on the outer door skin and inner panel cuts resonance and road noise at once.
- Seal the door with a closed-cell foam or vinyl barrier. This turns the door into a proper enclosure and reduces noise entering through the door cavity.
- Add a hood liner or firewall barrier. Engine noise enters through the firewall; a barrier mat on the cabin side reduces it.
Tier 3: Higher-Investment Fixes
- Floorpan and trunk deadening. The floorpan transmits road noise and tire roar. A damping layer plus a mass-loaded vinyl barrier is the most effective single upgrade for a quiet cabin.
- Wheel well treatment. Tire noise enters through the wheel wells; damping and sealing the liners cuts a significant noise path.
- Headliner and pillar treatment. Wind noise and roof resonance enter here. Often skipped, but it matters at highway speed.
Distortion: The Electronic Side
Electronic distortion comes from clipping, a signal pushed past the voltage the amplifier can cleanly produce.
The Payoff
Software-Based AI Noise Suppression and Signal Processing
How AI Noise Suppression Actually Works
Where AI Suppression Helps
Where AI Suppression Does Not Help
The Stacking Trap
What to Look For in a DSP or Head Unit
A Troubleshooting Checklist for Guaranteed Sound Quality Improvement
Conclusion
Frequently Asked Questions
Is there a way to improve sound quality in a factory car audio system?
Yes. The most reliable path is adding a DSP between the factory head unit and your speakers. A DSP corrects the equalization curves, time alignment, and crossover points that factory systems distort to protect cheap speakers. Pair that with sound deadening in the doors and floor, and you will hear a measurable difference in intelligibility and bass response without replacing the head unit.
How do DSPs contribute to guaranteed sound quality improvement?
A DSP gives you control over time alignment, equalization, crossover slopes, and gain staging for each channel. In a vehicle, speaker positions are fixed and asymmetric, so left and right arrival times never match. A DSP delays the closer speaker so both reach your ears at the same moment, which sharpens imaging and reduces distortion. It also lets you tame room modes and peaks that cause boomy or harsh sound.
Why is enclosure design critical for subwoofer sound quality?
A subwoofer is only as good as the box it sits in. Enclosure volume, port tuning, and internal bracing determine frequency response, dynamic range, and how clean the low end stays at high output. A poorly built box creates rattles, cancellation, and distortion that no amplifier or DSP can fix. A precision-built enclosure matched to your specific subwoofer and vehicle cabin delivers tighter, deeper bass with less power.
Can you turn low-quality audio into high-fidelity sound?
You can improve it, but you cannot create detail that was never recorded. A DSP can smooth harsh frequencies and improve staging, and better speakers and amplification will reveal more of what is there. However, a low-bitrate file still lacks the bandwidth and dynamic range of a lossless source. Start with the best source file you have, then let signal processing and hardware upgrades do the rest.


