
Let’s be honest: the first time you tried to connect amp to factory radio you probably felt a mix of excitement and dread.
And that feeling is totally normal. You’ve got a shiny new amplifier sitting on the passenger seat, the factory head unit humming with its own quirks, and a vague idea that "just hook the wires" will magically make the bass drop like you’re at a concert.
But the truth is a little messier. Factory radios are designed to work with the stock speakers, so their output levels, impedance and signal type can be quite different from what a high‑performance amp expects.
Here’s what I mean: the radio’s speaker‑level outputs are essentially a low‑power version of the sound signal, while most aftermarket amps want a clean line‑level source or a dedicated "high‑level" input that can handle the extra voltage.
Picture this: you’re in a garage, a friend watching, and you start twisting the speaker wire onto the amp’s input terminals. You get a burst of sound, then it cuts out, or worse, the radio sputters and the dash lights flicker. It’s the classic "factory radio error" that can leave even seasoned installers scratching their heads.
So, why does it feel tricky to connect amp to factory radio? Because you need a bridge between two worlds – the factory’s built‑in speaker outputs and the amp’s more demanding input stage. That’s where things like high‑level input adapters, speaker‑level to line‑level converters, or amps with built‑in adaptive loading come into play.
In our experience at Audio Intensity, we’ve seen the WavTech link300.4mini’s adaptive loading technology eliminate most of those headaches. It lets you run the factory speaker wires straight into the amp without a separate converter, preserving the radio’s voltage while still feeding the amp clean power. For a complete lineup built for Wavtech OEM integration, shop the WavTech collection here.
Quick tip: before you even reach for a tool, check whether your amp has "high‑level" (speaker‑level) inputs. If it does, you can often connect the factory radio directly, using the factory wiring harness or a simple splice.
And if it doesn’t, a small line‑level converter is a cheap, reliable fix that keeps the radio’s output safe and the amp happy.
By the end of this guide you’ll know exactly which wires to tap, what adapters to use, and how to avoid those dreaded factory radio errors, so you can finally enjoy that deep, controlled bass you’ve been dreaming of.
TL;DR
Connecting your amp to a factory radio is easier when you know whether your amp accepts high‑level inputs or needs a line‑level converter.
Check the amp’s input options, use the appropriate adapter, and you’ll avoid quickly voltage errors while easily getting clean, powerful sound straight from the stock head unit.
Step 1: Assess Your Vehicle’s Wiring and Compatibility
First thing you need to do before you even think about grabbing a wrench is to take a good look at the wiring that’s already in your car. Most factory radios feed speaker‑level signals straight to the speakers, and those wires are often tucked away behind the dash or tucked into the door panels. If you can locate the speaker leads without tearing the interior apart, you’ve already saved yourself a lot of hassle.
Grab the vehicle’s wiring diagram – you can usually find it in the service manual or on a reputable forum dedicated to your make and model. Look for the color codes that correspond to the front left, front right, rear left, and rear right speakers. Those are the wires you’ll be tapping into, whether you’re using a high‑level input on the amp or a line‑level converter.
Check the amp’s input options
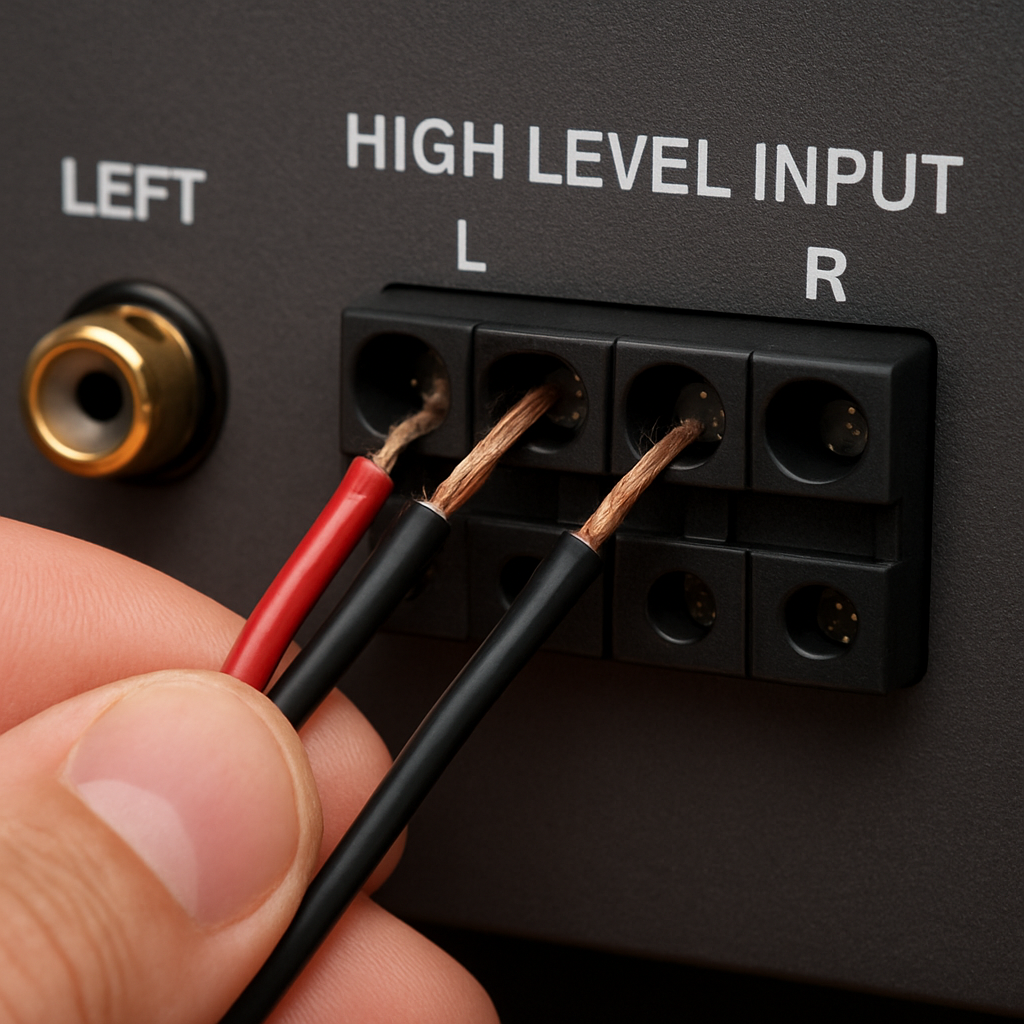
Not every amp is built the same. Some, like our WavTech link300.4mini, have dedicated high‑level (speaker‑level) inputs that let you plug the factory speaker wires directly. Others only accept line‑level signals and will need a small converter to step the voltage down. Take a quick look at the rear of the amp or the spec sheet – you’ll see labels like “HI‑LEVEL IN” or “RCA INPUT.”
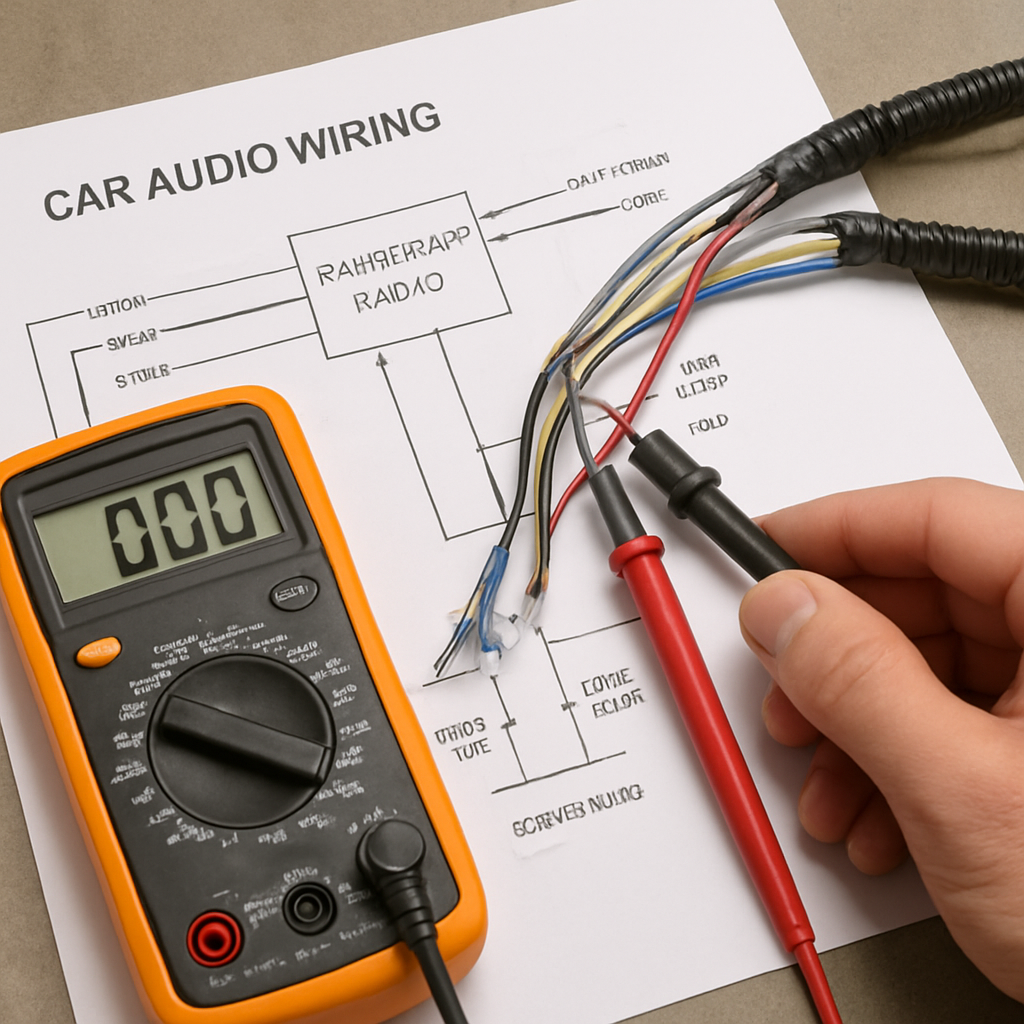
If you’re not sure, a simple test is to measure the voltage with a multimeter. Factory speaker outputs usually sit between 1 and 5 volts when music is playing. Line‑level inputs expect something around 0.5 volts. Anything higher can fry the amp’s front end.
Match impedance and power handling
Factory speakers are typically 4 Ω, but some vehicles use 2 Ω or 8 Ω loads. Your amp needs to be stable at whatever impedance the speakers present, especially if you plan to keep the factory speakers in the mix. If the amp’s rating says “stable down to 2 Ω,” you’re good to go. If it only likes 4 Ω, you might need to add a resistor network or upgrade the speakers.
Also, check the head unit’s output power. Older radios can only push a few watts per channel, which is fine for a line‑level converter but could leave a high‑gain amp starving for signal. In that case, a dedicated high‑level input on the amp can boost the signal without adding extra hardware.
So, what should you do next? Pull the wires, measure the voltage, and compare that data with the amp’s specifications. It sounds like a lot, but it’s basically a quick checklist that can spare you hours of troubleshooting later.
Now that you’ve seen a visual walk‑through of how to locate those speaker wires, let’s talk about the physical connection. You have three main options: splice directly into the factory speaker wire, use a factory harness adapter, or run a fresh short piece of speaker wire from the radio to the amp location. Splicing is the cheapest, but it can be messy if you’re not comfortable with soldering. A factory harness keeps everything neat and preserves the original wiring integrity.
Safety first
Before you cut anything, disconnect the battery. Even a tiny spark can fry delicate electronics, and you definitely don’t want to set off the airbag system. Once the battery is off, you can safely strip the speaker leads and make your connections. If you’re using a line‑level converter, follow the wiring diagram that comes with it – usually it’s speaker‑in, RCA‑out.
Finally, double‑check your work. Plug the amp in, turn the head unit on, and play a low‑volume track. Listen for any distortion or humming. If everything sounds clean, you’re ready to move on to the next step – fine‑tuning the gain and crossover settings.
Remember, taking the time to assess wiring and compatibility now saves you from a lot of guesswork later. It’s the foundation that lets you enjoy that deep, controlled bass without the dreaded factory radio errors.
Step 2: Gather Required Tools and Materials
Now that you know which wires you’ll be tapping, the next question is: do you have the right tools in hand? If you’re digging around a toolbox and pulling out a random screwdriver, you’re setting yourself up for frustration.
Here’s the simple truth – a clean install starts with the right gear, and it saves you time, headaches, and a lot of re‑work.
Core tool checklist
Wire strippers (12‑18 AWG) – you’ll be trimming speaker leads and possibly adding a short run of new wire. A quality stripper gives a clean cut without nicking the copper.
Crimping tool + compatible terminals – for splice connectors or bullet plugs. We’ve seen installers spend an extra $20 on a decent crimper and never look back.
Multimeter – essential for confirming speaker‑level voltage and ensuring a solid ground. Set it to AC voltage and you’ll spot any unexpected spikes before they fry your amp.
Screwdriver set (Phillips & flat‑head) – you’ll be removing panels, loosening ground bolts, and tightening terminal screws. A torque‑controlled driver helps avoid over‑tightening.
Heat‑shrink tubing & electrical tape – these keep your splices insulated and vibration‑proof. Heat‑shrink is especially useful in the engine bay where heat cycles are brutal.
Materials you’ll actually use
First up, the wire itself. Most factory speaker wires are 16‑18 AWG, which is perfect for short runs. If you need extra length, stick with the same gauge; going thinner can cause signal loss, while thicker is just bulk.
Next, the connector type. For a clean splice, we recommend butt‑splice connectors with heat‑shrink, or bullet plugs if you prefer a plug‑and‑play feel. Both options are widely used by professional installers.
Grounding is often overlooked. Grab a short piece of bare‑copper strap (about 1 mm thick) and a self‑tapping screw. A solid chassis ground eliminates hum and protects your amp from voltage drops.
Finally, if your amp only has RCA inputs, you’ll need a small high‑level‑to‑line‑level converter. The ones we stock are compact, cost under $30, and plug right into the speaker leads.
Safety gear you shouldn’t skip
Wear safety glasses when you’re cutting or crimping – stray wire ends can pop.
Gloves are a good idea, especially if you’re working in a hot engine bay. They protect your hands and give you a better grip on bolts.
And don’t forget a clean work surface. A cluttered bench leads to lost screws and mistaken connections.
Real‑world example
One of our customers, a DIY enthusiast installing a WavTech link300.4mini in a 2015 Subaru, started with just a basic screwdriver and a pair of scissors. Halfway through, the splice kept pulling apart because the connectors weren’t crimped properly. After swapping to a proper crimping tool and heat‑shrink, the connection held firm even on bumpy mountain roads.
Another pro installer working on a 2020 Jeep Wrangler opted for bullet plugs on the front‑left speaker run. The plug‑and‑play approach shaved 15 minutes off his install time, and the bullet’s lock‑away design prevented any accidental unplugging during off‑road adventures.
Pro tip from the shop floor
Before you cut any factory wire, label each pair with masking tape and a marker. It sounds trivial, but it prevents the “who‑goes‑where” moment when you’re halfway through the splice.
And here’s a quick sanity check: after you’ve spliced, use the multimeter to verify that the voltage on each positive lead matches the factory spec (usually 1‑4 V). If anything looks off, re‑check your ground strap and connector polarity.
For a visual walk‑through of the exact stripping and crimping steps, check out this video tutorial. It walks you through the process step‑by‑step, so you can see the right technique before you start.
Once you’ve gathered every item on this list, you’re ready to move on to actually routing the wires to your amp location. Having everything at arm’s length means you won’t need to pause mid‑install to hunt for a missing tool – and that’s the secret to a smooth, confidence‑filled install when you connect amp to factory radio.
Step 3: Wire the Amplifier to the Factory Radio
Alright, you’ve got your wires labeled, your tools laid out, and you know whether your amp wants a high‑level or line‑level feed. Now it’s time to actually get that amp talking to the factory radio. If you’ve ever felt that little knot in your stomach when you’re about to splice, you’re not alone – we’ve all been there, and the good news is the process is pretty straightforward once you break it into bite‑size pieces.
1. Double‑check your wiring diagram
Before you cut anything, pull up the wiring diagram you printed earlier (or the PDF on your phone). Look for the speaker‑level pairs: front left (+/‑), front right (+/‑), rear left (+/‑), rear right (+/‑). Those are the ones you’ll be tapping.
Does your amp have dedicated high‑level terminals? If yes, you’ll be splicing straight into those pairs. If it only has RCA inputs, you’ll need a tiny high‑level‑to‑line‑level converter sitting between the factory wires and the amp.
2. Strip, twist, and protect
Grab your wire stripper and remove about ¼‑inch of insulation from each factory speaker lead you plan to use. Same amount from the corresponding amp terminal lead. Twist the exposed strands together – a firm twist makes for a solid mechanical connection before you crimp.
Now slide a piece of heat‑shrink tubing over the joint (keep a few extra inches on hand). Crimp a butt‑splice connector or bullet plug, depending on your preference. If you’re using bullet plugs, you’ll hear that satisfying click when they lock – that’s the sound of a secure splice.
Once the connector is in place, slide the heat‑shrink up over the joint and apply a quick burst of heat. The tubing will snugly seal the splice, keeping out vibration and moisture – crucial when you’re on a bumpy trail.
3. Ground it right
A solid ground can make or break your install. Grab a short piece of bare‑copper strap, loop it around a clean, paint‑free metal spot on the chassis (the factory bolt near the amp bay works well), and tighten with a self‑tapping screw.
Run a short gauge of ground wire from that strap to the amp’s grounding post. Double‑check that the connection is tight; a loose ground shows up as hum or intermittent sound later on.
4. Verify polarity and voltage
Hook up your multimeter to the positive leads you just spliced. With the radio on low volume, you should see somewhere between 1 V and 4 V on each high‑level wire. If the reading is way off, you’ve probably hit a factory amp that’s already in the signal chain – backtrack and locate the correct speaker pair.
Make sure the negative (ground) leads read close to 0 V. Anything else means a bad ground, and you’ll want to re‑seat that strap before you move on.
5. Connect the amp inputs
If you’re using high‑level inputs, simply plug the spliced leads into the amp’s front‑left, front‑right, rear‑left, and rear‑right terminals. Most amps label the terminals clearly – front left on the left side, rear right on the right side. Keep the wire runs as short as possible to avoid picking up engine noise.
For line‑level setups, attach the converter’s input side to the factory speaker wires, then run the converter’s RCA outputs into the amp’s RCA inputs. The converter does the heavy lifting, dropping the voltage to a safe ~0.5 V level.
Now give the amp a quick power‑on test. Turn the radio up a notch and listen for clean, distortion‑free bass. If everything sounds solid, you’re golden.
Quick decision guide
| Connection Option | Wire Type | Key Note |
|---|---|---|
| High‑level direct splice | Factory speaker wire + bullet plug or butt splice | Fastest method; keep runs short and protect with heat‑shrink. |
| Line‑level converter | Speaker wire into converter, then RCA to amp | Needed when amp lacks high‑level inputs; adds a tiny voltage drop. |
| Hybrid adapter kit | Specialized high‑level to RCA kit | Good for mixed‑system builds; ensures consistent gain. |
That’s the meat of wiring your amp to the factory radio. It may feel a little messy at first, but once you’ve got the splices snug, the ground solid, and the voltage checked, the rest of the install just clicks into place. Remember, the goal isn’t to look perfect on paper – it’s to get a reliable, noise‑free connection that lets you crank the bass without frying anything.
Take a breath, give yourself a pat on the back, and move on to the next step – securing the amp and tuning the sound. You’ve earned it.
Step 4: Connect Power and Ground Safely
Alright, the signal side is finally tidy – now it’s time to give your amp the clean, rock‑solid power it deserves. If you’ve ever watched a car‑audio install go sideways because the amp kept hiccuping or the dash lights started flickering, you know the culprit is almost always a weak or noisy ground.
Why power matters more than you think
Think about it like this: the amp is the heart of your system, and the power wires are the arteries. Too thin, too long, or a loose connection, and you’ll feel it as distortion, whining, or even a total shutdown. In our experience, a well‑planned power run can shave a few decibels of noise and give you that buttery‑smooth bass you’re chasing.
Most factory‑grade head units run on a 12 V system that can deliver 30–45 A to an amp when you crank the volume. That means you need a gauge that can handle the current without heating up – typically 10‑12 AWG for a 500‑watt mono amp, and 8‑10 AWG if you’re feeding a four‑channel 600‑watt setup.
Step‑by‑step power hookup
1. Choose the right fuse location. We always start at the battery. Install a fuse holder within 12‑18 inches of the battery post and use a fuse rated 1.25× the amp’s maximum draw. For a 500 W mono amp (≈40 A), a 60 A ANL fuse is a safe bet. This protects your wiring and the vehicle’s electrical system.
2. Run the power cable. Strip the ends, slide on heat‑shrink, and crimp a ring terminal on the battery side. Keep the cable tucked away from moving parts and heat sources – the engine bay can get up to 150 °F on a hot day. Use zip ties with a little slack so the wire doesn’t chafe.
3. Ground it like a pro. A ground that’s merely bolted to a painted metal surface will give you a hiss you can’t get rid of. Find a clean, unpainted chassis spot – the factory bolt near the amp bay works great. Scrape off any paint, attach a 6‑mm self‑tapping screw, and clamp a short piece of bare‑copper strap to the amp’s ground post. Tighten until you feel resistance, then double‑check with a multimeter – you should see less than 0.05 Ω.
4. Verify polarity and voltage. Before you plug the amp in, measure the voltage at the fuse holder with the engine running. You should see a steady 13.8–14.5 V. If it wavers more than 0.2 V, you may have a loose battery connection or a short somewhere downstream.
Real‑world examples
One of our DIY customers retrofitted a WavTech link300.4mini: Compact 4-Channel Amplifier into a 2018 Honda Accord. He initially used 14‑AWG wire straight from the battery, but after a week of intermittent dropout he upgraded to 10‑AWG and re‑grounded to the subframe. The result? Zero noise, and the amp stayed cool even after 30 minutes of 80 % volume.
Another pro installer working on a 2021 Jeep Wrangler noticed the factory radio flickering after the amp was powered up. The culprit was a shared ground with the dash lights. He isolated the amp ground to the chassis bolt behind the driver’s side footwell, and the flicker vanished instantly.
Pro tips you can’t ignore
• Use a distribution block if you’re feeding more than one amp. It keeps each circuit tidy and makes future upgrades a breeze.
• Seal all connections with heat‑shrink and a dab of silicone. Vibration‑induced moisture is a silent killer for low‑current grounds.
• Check the alternator’s output. If you’re running a high‑power system (600 W+), a weak alternator can cause voltage sag. A quick scan with a multimeter while the engine is at 2000 rpm will tell you if you need a higher‑output alternator or a secondary battery.
Final sanity check
Turn the key to “ON” without the amp plugged in. Measure voltage at the fuse holder – you should see the same 13.8–14.5 V you saw earlier. Then plug the amp in, crank the volume, and listen for any hum or dropouts. If everything sounds clean, you’ve nailed the power and ground.
Remember, a solid power foundation doesn’t just keep the amp alive – it lets the entire sound system breathe. So take a moment, double‑check those bolts, and give yourself a pat on the back. You’ve just turned a potential failure point into a rock‑solid upgrade.
Step 5: Test, Tune, and Troubleshoot
Now that the power, ground, and signal wires are all snug, it’s time to see if the system actually sings—or if it’s just humming like a busted fridge. Testing isn’t just a checkbox; it’s where you catch the little things that can turn a solid install into a nightmare down the road.
1. Power‑up sanity check
Turn the key to the “ON” position without the amp plugged in. Grab a multimeter and probe the fuse holder. You should read a steady 13.8‑14.5 V with the engine running. If the voltage wavers more than 0.2 V, double‑check the battery terminals and any loose crimp you made on the power run.
Next, plug the amp in and repeat the measurement at the amp’s power input. The reading should be virtually identical. A drop of even half a volt often means a high‑resistance connection or a too‑thin power cable.
2. Ground verification
Ground issues are the sneakiest. With the amp powered, use the multimeter’s resistance setting between the amp’s ground post and a clean chassis bolt (the same spot you bolted the ground strap to). You want less than 0.05 Ω. Anything higher will introduce hum and can cause the amp to shut down under load.
If you hear a faint buzz when you crank the volume, lift the ground strap, re‑seat it, and scrape a bit more paint off the metal. A good ground is the quiet foundation for any clean bass line.
3. Signal integrity test
Set the factory radio to a steady tone—most head units have a test tone or you can play a pure sine wave from your phone. With the amp at low gain, listen at the speaker level. You should hear a clean, distortion‑free tone that matches the source pitch.
If the tone sounds “wobbly” or you notice clipping, check the high‑level input polarity. Swap the speaker‑level wires on the amp’s front‑left and front‑right inputs; sometimes a reversed polarity on just one channel creates phase cancellation that sounds like distortion.
Real‑world example
A hobbyist installing a WavTech link300.4mini in a 2016 Subaru found a faint whine that grew louder at higher volumes. By measuring resistance, he discovered the ground strap was attached to a painted bolt in the trunk. After moving the strap to a bare‑metal bolt under the driver’s side footwell, the hum disappeared and the amp stayed stable at full gain.
4. Gain and crossover tuning
Most modern amps ship with the gain knob set to about 2‑3 V. Start there, then play a favorite track with heavy bass. Watch the amp’s indicator LEDs (if it has them) or listen for any “grinding” sound. Increase the gain in small increments—about a quarter turn at a time—until the bass feels full but the amp isn’t straining.
Next, set the built‑in crossover (or external if you use one). For a four‑channel amp feeding the factory speakers, a low‑pass around 80 Hz usually gives the sub‑woofer room to breathe while keeping mids clean. If you’re driving a dedicated mono amp for a sub, aim for 60‑70 Hz low‑pass and a high‑pass on the front‑left/right channels around 120 Hz.
Pro tip: Use a smartphone app that shows SPL (sound pressure level) while you sweep the frequency range. If the meter spikes dramatically at a certain frequency, you’ve probably set the crossover too high and are overdriving the speakers.
5. Troubleshooting checklist
- Voltage at fuse holder matches battery voltage? If not, re‑inspect power run.
- Ground resistance <0.05 Ω? If higher, re‑seat strap and clean contact.
- Clean tone on test signal? If distorted, verify polarity and gain.
- No intermittent dropouts when you rev the engine? If you hear cut‑outs, check for moving‑part interference on the power cable.
- Heat check: after 15 minutes of 80 % volume, feel the power wire. It should be warm, not hot. Overheating indicates undersized gauge.
When you tick each box, you’ve essentially “debugged” the install the way a pro would. Most problems that creep up later—like the amp cutting out after a cold start or a faint hiss that grows louder—are traced back to one of these five items.
6. Final listening test
Pick a track you know inside and out—something with a deep kick drum and subtle bass runs. Start at low volume, then gradually crank it up to your typical listening level. Pay attention to three things: clarity of the mids, punch of the lows, and overall smoothness. If anything sounds “muddy,” dial back the gain or tighten the low‑pass point by a few hertz.
Finally, take the car for a short drive. Road vibration can shake loose a poorly secured splice. After a few minutes, pull over, re‑check all connections, and give the amp a quick voltage check. A clean install stays clean even when the road gets rough.
That’s it—testing, tuning, and troubleshooting wrapped up in a handful of practical steps. Follow this routine and you’ll turn a potentially fickle factory‑radio‑to‑amp hookup into a rock‑solid audio experience you can trust day after day.
FAQ
Do I need a high‑level input adapter to connect my amp to a factory radio?
Not always. If your amplifier lists “high‑level” or “speaker‑level” inputs, you can splice straight into the factory speaker wires and skip an extra adapter. When the amp only has RCA line‑level inputs, a small high‑to‑line converter protects the head‑unit and gives the amp a clean signal. Check the amp’s spec sheet; most modern four‑channel units include both options.
What gauge wire should I use for the power run when connecting an amp to a factory radio?
Gauge depends on the amp’s power draw. A 500‑watt mono amp typically pulls about 40 A, so 10‑12 AWG copper is safe. For a four‑channel setup that could demand 60 A, step up to 8‑10 AWG. Thicker wire keeps voltage drop low and prevents the wire from heating up under load. Always route the power cable away from signal wires to avoid interference.
How can I avoid ground‑loop hum after I connect my amp?
Ground‑loop hum usually means the amp’s ground isn’t bonded to a clean metal surface. Scrape paint off the chassis bolt, use a self‑tapping screw, and clamp a short piece of bare‑copper strap. Then double‑check resistance with a multimeter; you want less than 0.05 Ω. If you still hear buzz, try moving the ground to a different bolt or adding a star‑ground point.
Is it safe to run the amp’s power cable through the engine bay?
Yes, as long as you protect the cable. Secure it with zip ties, give a little slack, and keep it away from hot exhaust components or moving parts. Adding heat‑shrink or silicone tape over the terminals helps seal out moisture. A fuse holder placed within a foot of the battery adds a safety break in case of a short.
What’s the best way to test the signal after I splice the speaker wires?
Start with the factory radio set to a steady tone or a simple sine wave track. With the amp’s gain low, listen at the speakers for a clean, distortion‑free tone. Then raise the gain a notch at a time, watching the amp’s LEDs (if present) for clipping. If you hear “wobble” or harshness, re‑check polarity and make sure the splice is solid and insulated.
Can I use a single RCA cable for both left and right channels?
No. Each channel needs its own dedicated RCA pair so the amp can keep the left and right signals separate. Using one cable for both will cause phase issues and muddy sound. If you run a line‑level converter, it will give you two RCA outputs—one for front left and one for front right—plug them directly into the amp’s matching inputs.
What should I do if the amp cuts out when I rev the engine?
Engine‑rev cutouts often point to a power‑run issue. First, verify the fuse holder voltage stays steady at 13.8‑14.5 V while the engine is at 2000 rpm. If voltage dips, the power cable may be too thin or routed near a moving component that’s flexing. Reinforce the cable with a thicker gauge or add a distribution block, and make sure the ground strap is solid.
Conclusion
You made it to the end, and that means you’ve got the know‑how to connect amp to factory radio without pulling your hair out.
Remember the three pillars we’ve walked through: a solid power and ground foundation, a clean high‑level or line‑level signal path, and a quick sanity check before you hit the road.
If you ever catch a hum, a drop‑out when you rev, or just a muddy sound, go back to the checklist – tighten that ground strap, verify the voltage at the fuse holder, and double‑check polarity on those speaker splices.
What’s the easiest way to keep things tidy after the install? Label each wire as you go, snap a photo of the routing, and give the connections a gentle wiggle test before you close the panels.
For the DIY‑enthusiast or the pro installer, the real payoff shows up the first time you crank the bass and hear it hit clean and deep, knowing the amp is fed straight from the factory radio the right way.
So, what’s next? Take a short drive, listen for any strange noises, then lock down the bolts and enjoy the ride. And if you ever need a spare high‑level adapter or a quick power‑run sizing tip, our team at Audio Intensity is just a click away.


