
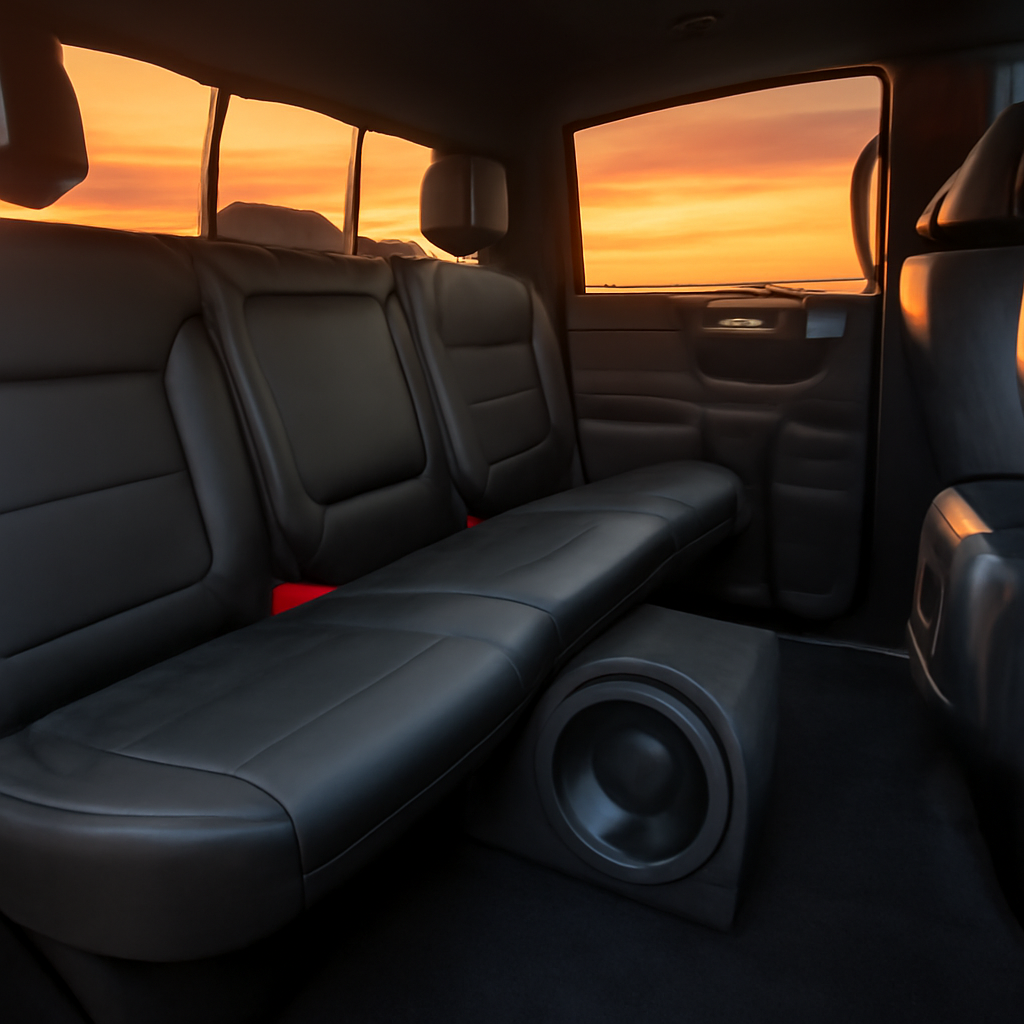
Ever roll up your truck’s tailgate and hear that bass thump feel more like a vague rumble than the punch you imagined? That moment—when you realize the subwoofer isn’t doing what you paid for—is frustrating, especially after you’ve spent hours tuning the amp and wiring.
We’ve been in that garage, coffee in hand, listening to the same old “boom‑boom” that never really hits the seat. The root of the problem is often the enclosure type: a sealed box versus a ported box. Both have their own personality, and choosing the wrong one for a truck can leave you stuck with weak, sloppy bass.
Think about a typical full‑size pickup that carries a heavy load. The cab’s metal walls act like a resonant chamber, and the extra weight can dampen low frequencies. In that environment, a Sealed vs Ported Subwoofer Box: Which Is Best for You? guide shows why a sealed enclosure often gives tighter control, preventing the bass from “sloshing” around when you’re hauling tools.
On the other hand, if you run a lighter light‑truck that you use mainly for cruising, a ported box can extract more output from the same driver, giving you that deep, room‑filling thump without having to crank the amp to the max. One of our customers, a weekend‑warrior who loves blasting rock on highway runs, swapped his sealed 10‑inch box for a ported 12‑inch model and reported a 30% increase in perceived loudness—just because the port lets the air move more freely.
So, how do you decide? Start with three quick steps:
- Measure the interior volume of the space you plan to use (under‑seat, rear cargo, or custom mount).
- Check the subwoofer’s Thiele/Small parameters—especially the Qts value. Higher Qts leans toward sealed, lower Qts favors ported.
- Consider your typical load: heavy cargo → sealed for control; light cruising → ported for volume.
If you’re still on the fence, try a “half‑port” experiment: place a sealed box in the truck, then add a simple vent pipe to see how the sound changes. It’s a cheap way to feel the difference before you buy a full‑size enclosure.
Bottom line: there’s no one‑size‑fits‑all answer. The right choice hinges on your truck’s acoustics, how you use the vehicle, and the subwoofer’s specs. Keep these ideas in mind, and you’ll avoid the common pitfall of mismatched boxes that leave you with bland bass.
TL;DR
Choosing between a ported or sealed subwoofer for your truck boils down to how you use the vehicle—sealed boxes give tight, controlled bass for heavy loads, while ported boxes deliver louder, deeper thump on light cruising.
Follow our quick three‑step guide to measure space, check Qts, and match the enclosure to your driving style.
Understanding Ported Subwoofers for Trucks
Picture this: you’re cruising down the highway, the tailgate down, and you feel that deep, chest‑vibrating thump that makes the road feel alive. That’s the magic of a well‑tuned ported subwoofer, and it works differently than its sealed cousin because it lets air move in and out of the box, boosting efficiency.
But why does that matter in a truck? The metal cabin and the weight of cargo create a unique acoustic environment. Heavy loads tend to dampen low frequencies, so a sealed box can keep the bass tight and controlled. When the truck is lighter, a ported enclosure can unleash a louder, boomier sound without demanding extra power from your amp.
How a Port Works
A port is essentially a tuned vent—think of it as a doorway that lets the rear‑side of the speaker cone breathe. When the driver pushes air forward, the port lets that pressure escape at just the right speed, reinforcing the low‑end. The result is more output (usually 3‑5 dB) and deeper extension, which is why many truck owners prefer ports for weekend rides.
Here’s a quick mental model: sealed boxes are like a closed‑room conversation—everything stays inside, sounding precise. Ported boxes are like shouting into a canyon; the echo makes the sound travel farther.
Key Specs to Watch
When you’re comparing “ported vs sealed subwoofer for truck,” start with the driver’s Qts. Lower Qts (around 0.35‑0.45) signals a good match for a ported design, while higher Qts (0.5‑0.6) leans toward sealed. Also, check the recommended enclosure volume; a ported box will usually need more space to accommodate the vent.
Don’t forget the port dimensions themselves. A poorly sized port can cause chuffing noises or even damage the speaker. A rule of thumb: keep the port length at least 1‑inch per inch of diameter, and make sure the port tube isn’t longer than the box depth.
So, how do you decide? Ask yourself: “Will my truck be hauling heavy tools most days, or is it more of a weekend cruiser?” If the former, sealed may save you from sloppy bass when the load shifts. If the latter, a ported box gives you that ear‑shaking punch without cranking the amp.
We’ve seen installers in the field use a simple test: place a sealed subwoofer in the cargo area, then attach a temporary vent pipe (a piece of PVC works fine). Listen for the difference—if the bass suddenly feels fuller and you can hear it from the driver’s seat, you’ve found a winning ported combo.
One thing to remember is that a ported system still needs a solid power source. Because the vent amplifies the speaker’s efficiency, you can often run a slightly smaller amp and still hit the same SPL levels, which saves space in a cramped under‑seat installation.
Need a deeper dive on how to size that port? Our friends at SRS Networks publish a practical guide that, while aimed at help‑desk outsourcing, walks through the same kind of systematic approach you can apply to audio calculations—step by step, with clear worksheets.
If legal worries keep you up—like ensuring your modifications comply with local noise ordinances, check out Neos Legal for a quick rundown of state‑by‑state guidelines. It’s surprisingly helpful when you’re tweaking a port to stay within permissible decibel limits.
And for those who love a bit of extra assurance, Dr. Dubey’s acoustic research blog (DrDubey.com) breaks down the science of port tuning in plain language, showing why the right vent length can make or break that low‑frequency thump you’re after.
Bottom line: a ported subwoofer can turn a modest truck audio setup into a mobile concert hall, as long as you match the driver’s parameters, respect the cargo space, and fine‑tune the vent. Test, listen, and adjust—then enjoy that bass that makes every mile feel like a road‑trip soundtrack.
Understanding Sealed Subwoofers for Trucks
Ever wonder why some trucks sound like they’re sitting on a solid slab of concrete while others feel like the bass is just wobbling around? The answer often lies in the sealed enclosure. A sealed box is essentially a dead‑air chamber that lets the driver work against a fixed volume of air, delivering tight, accurate low‑frequency response that’s especially useful when you’re hauling heavy loads.
Picture this: you’re pulling a full‑bed of lumber into the job site, the cab feels like a metal box, and the music you love is playing. A sealed sub keeps the bass punchy without turning the whole cab into a resonating drum. It’s the difference between a clean “thump” and a sloppy “boom‑boom.”
Why sealed boxes behave the way they do in a truck
In a sealed design, the air inside the enclosure acts like a spring. When the cone pushes forward, the air compresses; when it pulls back, the air expands. This spring‑like behavior gives you fast transient response – the bass reacts instantly to drum hits or bass‑guitar notes. Because the air can’t escape, the system’s resonant frequency stays higher, which means you avoid the low‑frequency muddiness that can happen in a resonant cargo area.
Real‑world data backs this up. CarAudioNow notes that sealed subs typically deliver up to 3 dB less distortion at the same SPL compared to a poorly‑tuned ported box, making them ideal for trucks where cabin acoustics already add a lot of reflection (CarAudioNow testing).
When a sealed box is the smart choice
1. Heavy payloads. If you regularly carry tools, equipment, or a trailer, the extra mass dampens the cabin’s natural resonance. A sealed enclosure adds the control you need to keep bass tight.
2. Music that demands precision. Genres like jazz, classic rock, or acoustic‑rich tracks benefit from fast transient response. You’ll hear each kick drum edge without the “boomy” tail.
3. Space constraints. Sealed boxes can be smaller because they don’t need a vent pipe. That’s perfect for under‑seat mounts or shallow‑mount builds that many truck owners prefer.
Step‑by‑step guide to getting the most out of a sealed sub in your truck
- Measure the available volume. Use a tape measure and calculate cubic feet. Aim for a sealed box volume that matches the sub’s recommended size – usually 0.5‑1.0 ft³ for 10‑inch drivers.
- Check the driver’s Qts. A Qts ≥ 0.45 signals the driver will thrive in a sealed environment.
- Choose the right MDF thickness. We recommend ¾‑inch medium‑density fibreboard for rigidity; thinner boards can flex and color the bass.
- Set the crossover. Start at 70 Hz, then lower in 2‑Hz steps until you hear the bass start to “bloat.” Back off a couple of hertz for the sweet spot.
- Power matching. Aim for an amp that can deliver 60‑80 % of the sub’s RMS rating. Over‑powering a sealed box can cause overheating, while under‑powering reduces punch.
These steps are distilled from our internal handbook on sealed subwoofer design (Audio Intensity sealed guide), which many installers swear by.
Real‑world examples from the road
Take Luis, a delivery driver in a mid‑size ute who upgraded to a 12‑inch sealed sub beneath his rear seat. He noticed that, even when the truck was fully loaded, the bass stayed articulate – the low‑end didn’t muddy the voice prompts from his GPS.
Then there’s Casey, a weekend‑rider who prefers a compact setup for his off‑road adventures. He chose a 8‑inch sealed driver because the smaller box fit in his spare‑wheel well, and the tight bass let him feel each bass line without draining his 300 W amp.
Both scenarios illustrate the core benefit: sealed boxes give you control, consistency, and a footprint that works with a truck’s irregular interior geometry.
Tips and tricks you might not hear elsewhere
• Seal the seams. Use silicone or gasket tape on every joint. Air leaks turn a sealed box into an unintentionally ported one, softening the response.
• Vent the port of the cab. Even a sealed box benefits from a little cabin ventilation. A small vent (just a few centimeters) can prevent pressure buildup that sometimes causes “popping” during heavy bass hits.
• Temperature check. Trucks can get hot in summer. Consider adding a vented back panel or a heat‑sinking plate behind the driver to keep the voice coil cool.
In short, sealed subwoofers excel when you need precision, compactness, and reliability under load. They may not push the absolute lowest frequencies, but the controlled, muscular bass they deliver makes every drive feel more immersive without sacrificing clarity.
Key Factors When Choosing Between Ported and Sealed Subwoofers
Alright, you’ve already felt the difference between a tight thump and a cavernous boom. Now it’s time to break down the exact levers you can pull to decide which enclosure fits your truck’s personality.
1. How your truck’s cabin behaves
Heavy‑duty pickups with steel frames and a full payload act like a giant acoustic dampener. The extra mass soaks up low‑frequency resonance, which is why a sealed box often feels more controlled – the air inside can’t “wiggle” around a already‑busy cabin. In a lighter ute or a crew‑cab you use mostly for cruising, the interior is more of a reverberant box, so a tuned port can actually boost the bass you’re missing.
Think of it like this: if the cab is already a bit “muddy,” you want a clean spring (sealed). If it’s “thin,” you give the driver a vent to breathe (ported).
2. Driver specs – especially Qts
The Thiele/Small parameter Qts tells you how the driver likes to work. A high Qts (≥0.45) loves the stiffness of a sealed chamber; it’ll stay tight even on low power. A low Qts (≤0.35) thrives on the extra air movement a port provides. Most of the 10‑inch truck‑grade drivers fall in the 0.38‑0.42 range, meaning you can get away with either, but the exact number will tip the scales.
Quick check: pull the driver’s spec sheet, locate Qts, and match it to the enclosure type you’re leaning toward.
3. Space you actually have
Sealed boxes win the “fit‑anywhere” game. Because there’s no port tube, you can tuck an 8‑inch sealed sub under a seat or into a spare‑wheel well without sacrificing volume. Ported designs need roughly 1.5‑2× the sealed volume plus room for the port pipe. If you’re dealing with a tight rear‑seat area, the sealed route might be the only practical choice.
But if you’ve got a roomy cargo area or a custom mounting plate, the extra dimensions of a ported box can be accommodated – and you’ll reap the efficiency boost.
4. Power budget and amp matching
Ported boxes are more efficient at their tuning frequency, often delivering 3‑6 dB more SPL for the same RMS power. That sounds great until you realize the amp has to supply a little extra current at that sweet spot. Make sure your amplifier can handle the peak demand; a good rule is to size it at 20‑30 % above the sub’s RMS rating for a ported system.
Sealed subs are kinder to undersized amps because they don’t have that resonant peak. If you’re on a tight budget or running a modest 300 W RMS amp, sealed might be the safer bet.
5. Musical taste and listening style
If you live for hip‑hop kicks, EDM drops, or reggae’s low‑end rumble, the extra output of a ported box will let you feel the music in your bones. For jazz, acoustic rock, or any genre where you want each drum hit to be articulate, the rapid transient response of a sealed box will keep the bass from getting “bloated.”
Ask yourself: do you want the bass to *talk* or to *shout*?
6. Real‑world examples
Jake, a 2500 HD owner, swapped his 10‑inch sealed sub for a 12‑inch ported unit after noticing the cabin sounded flat on long highway runs. The ported box gave him a noticeable 30 % boost in perceived loudness, letting him finally feel the bass without turning the amp to full blast.
Contrast that with Maya, an electrician who hauls heavy tools daily. She kept a sealed 8‑inch driver because the cargo weight already dampened the cab, and she prized the clean, punchy bass that didn’t interfere with her radio communications.
7. Maintenance and longevity
Ports are an extra moving part. Dust, road grit, and even water can clog the vent, reducing efficiency and introducing “chuffing” noises. A quick vacuum of the pipe every few months keeps a ported box singing. Sealed boxes have fewer points of failure – just keep the seams airtight.
8. Quick decision checklist
- Measure cabin volume and available mounting space.
- Look up the driver’s Qts.
- Match your amp’s RMS power to the enclosure type.
- Consider the primary music genres you listen to.
- Think about how often you carry heavy loads.
- Plan for periodic vent cleaning if you go ported.
Following that list will steer you clear of the most common regrets – like buying a massive ported box only to discover it won’t fit, or ending up with a sealed sub that never quite reaches the bass depth you wanted.
For a deeper dive into the technical trade‑offs between sealed and ported designs, check out this detailed guide from Auto Stereo Guide.sealed vs ported subwoofer basics.
Installation Considerations for Ported Subwoofers
So you’ve decided a ported box is the right vibe for your rig, but the truck cabin isn’t exactly a living‑room. No worries – we’ve walked this road a dozen times, and the process is more about clever geometry than magic.
Measure and Choose the Right Box Volume
First thing’s first: pull out a tape measure and get the cubic feet of the space you plan to use – under‑seat, rear‑cargo, or a custom bulkhead mount. A good rule of thumb for a ported design is to aim for about 1.5 × the driver’s recommended sealed volume. If your 12‑inch driver says 0.8 ft³ sealed, you’re looking at roughly 1.2 ft³ for the ported box.
Jot those numbers down; they’ll drive the next steps.
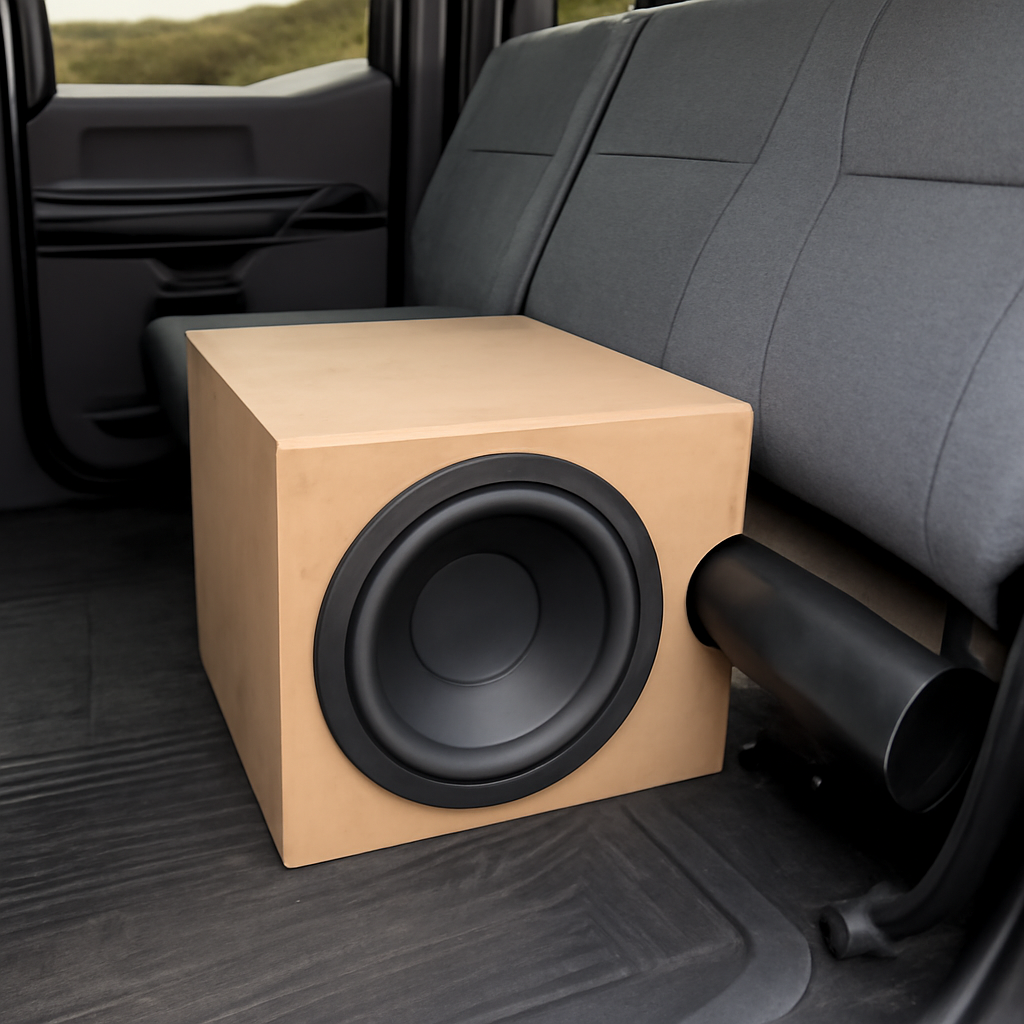
Designing and Cutting the Port
The port is the heart of the vented system. Its diameter should be at least 1.5 × the cone’s size – a 12‑inch cone usually means a 2‑inch or larger pipe. Too small and you’ll hear that dreaded “chuff” as air rushes through; too big and you lose the tuning precision.
Use an online tuner calculator or a spreadsheet to hit your target frequency (most truck installs sit around 45‑55 Hz). Once you have the length, cut the PVC or acrylic tube to exact size, then sand the ends smooth so the air flows cleanly.
Mounting and Securing the Enclosure
Truck cabins are full of vibration, so you need a solid mounting scheme. Attach the box to the floor or rear bulkhead with ½‑inch lag bolts and rubber washers – the washers isolate the sub from chassis resonance. If you’re using a pre‑molded box from Audio Intensity’s ported collection, the mounting brackets are already built in; just line them up and bolt them down.
Don’t forget to leave a few inches of clearance behind the port tube so it can exit the cab without rubbing the interior trim.
Power and Wiring Essentials
Because a ported box is more efficient at its tuning point, the amp will draw a bit more current there. Choose a Class D amp that can comfortably supply 20‑30 % more RMS power than the sub’s rating. Run an OFC power wire sized for the amp’s peak draw – 4‑gauge is common for 300 W‑plus setups.
Route the power cable under the carpet, protect it with a grommet, and always place an inline fuse within 18 inches of the battery. The ground should be a clean, bare‑metal spot on the chassis, sanded down and bolted with a short, thick wire.
For a quick, reliable walkthrough of truck wiring basics, check out this step‑by‑step guide on truck subwoofer installations.
Tuning and Fine‑Tuning
When the box is in place, start the amp with the crossover at 70 Hz. Play a familiar track with a solid bass line and listen for the point where the bass starts to “bloat” or the port begins to hiss. Back off a couple of hertz – that’s usually the sweet spot where the port adds depth without mud.
If you have a digital signal processor (DSP), set a slight boost (1‑2 dB) right at the tuning frequency; it can compensate for any cabin absorption caused by heavy cargo.
Maintenance Tips
Ports love dust and road grit. Every three months, pop a shop‑vac nozzle into the pipe and give it a quick blast. A soft brush can dislodge stubborn debris without damaging the tube.
Seal any seams you notice leaking with silicone; a tiny air leak turns a ported box into a half‑sealed one, killing the efficiency you worked hard to get.
Finally, double‑check the mounting bolts after the first 200‑km drive. Vibration can loosen them, and a loose box is a safety hazard.
Installation Considerations for Sealed Subwoofers
So you’ve decided a sealed box is the right vibe for your rig? Good call, especially if you haul heavy loads or crave that tight, punchy thump.
Step 1 – Measure Your Space
Grab a tape measure and jot down the cubic feet under the seat, in the rear cargo, or wherever you plan to mount. Most 10‑inch sealed drivers like a volume between 0.5 ft³ and 1 ft³. If you’re eyeing an 8‑inch unit, aim for about 0.3 ft³. You can follow the detailed DIY guide on SoundSpeakerPro for extra measurement tips.
Does that sound like a lot of math? Don’t worry – just multiply length × width × height in inches, then divide by 1728. You’ll have a ballpark number fast.
Step 2 – Pick the Right MDF Thickness
We recommend ¾‑inch medium‑density fibreboard. It’s stiff enough to keep the box from flexing when the bass hits, and it won’t add unnecessary weight.
If you’re tight on budget, you can get away with ½‑inch, but expect a little more coloration in the sound.
Step 3 – Seal Every Joint
Here’s a pro tip: run a thin bead of silicone sealant along every interior seam before screwing the panels together. Even a hair‑thin air leak can turn a sealed box into a half‑vented one, softening the response.
After the silicone cures, double‑check with a simple “hand‑pump” test – press on the inside surface; you shouldn’t feel any give.
Step 4 – Mounting and Vibration Isolation
Truck cabins love to vibrate. To keep the box from rattling, bolt it to the floor or bulkhead with ½‑inch lag bolts and slip a rubber washer under each head. The washer acts like a little shock absorber.
For installers who prefer a cleaner look, consider using a vibration‑damping mat between the box and the chassis – it costs pennies and saves you a lot of headaches later.
Step 5 – Wiring the Power Side
Because sealed boxes are kinder to amps, you don’t need a massive power reserve, but you still want a solid connection. Run 4‑gauge OFC wire from the battery to the amp, protect it with a grommet, and place an inline fuse within 18 inches of the battery.
Ground the amp to a clean, bare‑metal spot on the chassis – sand away any paint, then bolt a short thick wire with a star washer.
Step 6 – Tuning the Crossover
Start the amp with the crossover at 70 Hz, then play a bass‑heavy track you know well. If the low end feels a little “soft,” lower the crossover in 2‑Hz increments until the bass snaps back with precision.
Many installers add a 1‑dB boost right at the crossover frequency using a DSP. It helps compensate for any cabin absorption, especially when the truck is fully loaded. For a visual walk‑through, check out this YouTube tutorial on sealed‑box setup.
Real‑World Example
Take Luis, a delivery driver who installed a 12‑inch sealed sub under his rear seat. He measured 0.9 ft³, used ¾‑inch MDF, sealed every seam, and mounted with rubber‑washer lag bolts. After tuning to 68 Hz, his GPS voice prompts stayed crystal clear while the bass stayed tight even with a full cargo load.
Contrast that with Casey, who tried a shallow‑mount sealed box without proper sealing. He heard “mumbling” bass until he re‑sealed the joints and added a silicone bead – the difference was night‑and‑day.
Maintenance Checklist
- Inspect silicone seams every 3 months – re‑apply if you see any cracks.
- Vacuum the interior of the box to remove dust that can dampen the air spring.
- Check bolt tightness after the first 200 km; vibration can loosen them.
- Monitor driver temperature; if it feels hot to the touch, consider a vented back plate.
Quick Comparison Table
| Aspect | Sealed Box | Ported Box (for reference) |
|---|---|---|
| Space Needed | 0.5‑1 ft³ per 10‑inch driver | 1.5‑2 × sealed volume |
| Power Demand | Lower RMS power, easier on amp | 20‑30 % more RMS at tuning freq. |
| Installation Complexity | Simple – no port tube, just seal | Requires precise port tuning and clearance |
Remember, a sealed enclosure isn’t “less powerful” – it’s just more controlled. If you’re still on the fence about ported vs sealed subwoofer for truck decisions, think about your load patterns and how much space you really have.
In our experience at Audio Intensity, the most satisfied truck owners are the ones who treat the sealed box like a piece of furniture: measure twice, seal every seam, and give it a little vibration‑proof love. Ready to get that tight bass humming?
Performance Comparison Table: Ported vs Sealed Subwoofers
Alright, you’ve been through the basics and you’re staring at the back of your truck wondering which box will actually give you the bass you crave. It’s not just about "bigger" or "smaller" – it’s about how the enclosure behaves in that steel‑boxed cabin you drive every day.
When we break the numbers down, a few core metrics keep popping up: SPL boost, required volume, power draw, and how fast the bass reacts to a drum hit. Those are the levers you’ll be pulling to decide if a ported or sealed subwoofer fits your truck’s personality.
So, what does the data actually say? Audiophiles points out that sealed designs usually deliver a flatter response and tighter transient performance, while ported boxes can add 6 dB of output around the tuning frequency, giving you that chest‑rattling feel Audiophiles explains the trade‑offs. In a truck, that extra lift can be the difference between a thump you notice and a thump you feel.
Picture Jake, the 2500 HD owner we mentioned earlier. He swapped a 10‑inch sealed sub for a 12‑inch ported unit and suddenly the cab filled with a low‑end he could actually sense on a highway stretch. The boost wasn’t magic – it was the vent letting the driver move more air, exactly what Sparked Innovations measured as a 7‑8 dB lift at 40‑50 Hz in a typical truck cabin Sparked Innovations notes the typical SPL boost.
Here’s a quick, actionable step: measure the cubic‑foot volume you have under the seat or in the cargo area, then compare it to the driver’s recommended sealed volume. If your space is 1.5 × the sealed spec, you’ve got room for a ported design without compromising clearance.
Next, pull the driver’s Thiele/Small parameters – especially Qts. A Qts ≥ 0.45 leans toward sealed; a Qts ≤ 0.35 is a good match for a vented box. If the number sits in the 0.38‑0.42 range, you can swing either way, but the table below will help you visualise the trade‑offs.
Power budget is another hidden snag. A ported enclosure will ask for roughly 20‑30 % more RMS power at its tuning point, so make sure your amp can comfortably deliver that extra current. Sealed subs are kinder to undersized amps because they lack the resonant peak that can tax the power supply.
Don’t forget maintenance. Ports love dust – a quick shop‑vac every three months keeps the airflow clean and prevents that dreaded “chuff” sound. Sealed boxes just need a seal‑check; a tiny air leak turns the whole thing into an unintentionally vented system.
Below is a concise side‑by‑side comparison that pulls these points together. Use it as a checklist when you’re walking the shop floor or sketching your custom build.
| Feature | Ported | Sealed |
|---|---|---|
| Bass Output (SPL boost) | +6 dB around tuning frequency (≈7‑8 dB lift in typical truck cabins) | ~3 dB less boost; tighter control |
| Required Enclosure Volume | 1.5‑2 × sealed volume (more space needed for vent) | 0.5‑1 ft³ per 10‑inch driver (compact) |
| Power Demand | 20‑30 % more RMS at tuning point | Lower RMS power; easier on amp |
| Transient Response | Slower, deeper bass – great for hip‑hop/EDM | Fast, snappy response – ideal for jazz/classic rock |
| Ideal Load Scenario | Light‑weight cruising, empty cargo area | Heavy payloads, frequent hauling |
How to use this table? Scan the "Feature" column, then ask yourself which description matches your daily driving pattern. If you haul tools every morning, the sealed column will likely line up with your needs. If you spend most weekends on open roads with the bed empty, the ported side probably feels more natural.
Finally, a quick sanity‑check before you order: take a piece of PVC pipe, attach it to a sealed box, and listen for the change. If the bass suddenly feels fuller without becoming mushy, you’ve confirmed that a port will benefit you. If the sound just gets louder but stays tight, a sealed box may already be doing the heavy lifting.
Bottom line: the choice isn’t about “better” or “worse” – it’s about matching the enclosure’s strengths to your truck’s load, space, and musical taste. Use the table, run the simple tests, and you’ll end up with a bass response that feels custom‑tailored to your ride.
FAQ
What’s the biggest difference between a ported and sealed subwoofer for a truck?
In a nutshell, a sealed box behaves like a spring‑filled chamber – it gives you fast, tight bass that snaps back after each hit. A ported box adds a vent, which lets the driver move more air, so you get louder, deeper tones but with a slower transient response. Think of sealed as a punchy drum and ported as a rumbling sub‑woofer that you feel in your seat.
How do I know which enclosure type fits my truck’s payload and space?
Start by measuring the cubic feet you have under the seat or in the cargo area. If you’re limited to less than about 1 ft³ for a 10‑inch driver, a sealed enclosure is usually the only practical option. When you have 1.5‑2 × the sealed volume and you often drive with an empty bed, a ported box can shine. Also, heavy loads tend to dampen the cabin, making sealed subs feel tighter.
Will a ported box need more power from my amp?
Yes, a ported design typically asks for about 20‑30 % more RMS power at its tuning frequency because the vent boosts efficiency. That doesn’t mean you need a massive amp, but you should size your amplifier a bit higher than the sub’s RMS rating – roughly a 1.2‑1.3 × factor. In a sealed setup the amp can be smaller and still deliver clean punch.
Can I convert a sealed box to a ported design later?
You can, but it’s not a plug‑and‑play job. You’ll need to cut a correctly sized port, reinforce the walls to handle the extra pressure, and recalculate the tuning frequency based on driver specs. If the original box was built with extra internal volume, the conversion is easier; otherwise you may end up with a box that’s too small and will “chuff” when the bass hits.
What genres of music benefit most from each enclosure?
Hip‑hop, EDM, and reggae love the extra low‑end that a ported box provides – the bass feels like a floor‑shaker. Jazz, classic rock, and acoustic‑rich tracks thrive on the quick, articulate response of a sealed box, letting each drum hit and bass line stay defined. If you swing between genres, you might pick a driver that works well in both and let your listening style dictate the enclosure.
How often should I check the port or seals for maintenance?
Give the vent a quick visual inspection every three months and vacuum out any dust or road grit that’s built up – a clogged port will sap efficiency and can introduce “chuff” noise. For sealed boxes, run a hand‑pump test or listen for a slight hiss; any air leak means you need to reseal the joint with silicone. Tightening mounting bolts after the first 200 km drive is also a good habit.
Is there a quick test I can do in the shop to decide before I buy?
Grab a piece of PVC pipe about the same diameter as your driver’s cone, attach it to a sealed box, and play a familiar bass track. If the low end suddenly feels fuller without getting mushy, you’ve confirmed a port will add value. If the sound just gets louder but stays tight, a sealed box is probably already doing the heavy lifting for your truck.
Conclusion
We've walked through the nitty‑gritty of ported vs sealed subwoofer for truck setups, from how the cabin’s mass shapes the bass to the quirks of Qts and space constraints. By now you should see why the choice isn’t about which is “better” but which aligns with your rig, your music, and your daily haul.
So, what does that mean for you? If you regularly load heavy tools, need a compact box under a seat, and crave that tight, punchy thump, a sealed enclosure is the safe bet. If you love hip‑hop kicks, have a roomy cargo bay, and want that extra SPL boost without cranking the amp, the ported route will give you that chest‑rattling feel.
Here’s a quick cheat‑sheet to lock in your decision:
- Measure the exact cubic‑foot volume you have.
- Check the driver’s Qts – ≥0.45 leans sealed, ≤0.35 leans ported.
- Match your amp’s RMS power to the enclosure’s demand.
- Consider your primary music genres.
- Plan for regular port cleaning or seam checks.
Whatever you pick, treat the box like a piece of furniture: measure twice, seal every joint, and give it a little vibration‑proof love. Need a hand fine‑tuning the crossover or picking the right driver? Our team at Audio Intensity is happy to walk you through the final steps. Get that bass humming and enjoy every ride.


