
Ever sat in your truck, foot on the pedal, and felt that bass just kind of fade out when the music hits those deep rumble notes? You’re not alone – many car‑audio enthusiasts hit that wall where the sub just can’t push the low‑frequency extension they crave.
What if the missing piece isn’t a bigger amp or a hotter driver, but the very walls that house your sub? CNC‑machined subwoofer boxes give you the kind of dimensional precision you can’t get from a hand‑cut slab. Each panel is cut to within ±0.005 inches, meaning the internal volume is spot‑on, the ports line up perfectly, and there are no unwanted air leaks that can rob you of those sub‑40 Hz notes.
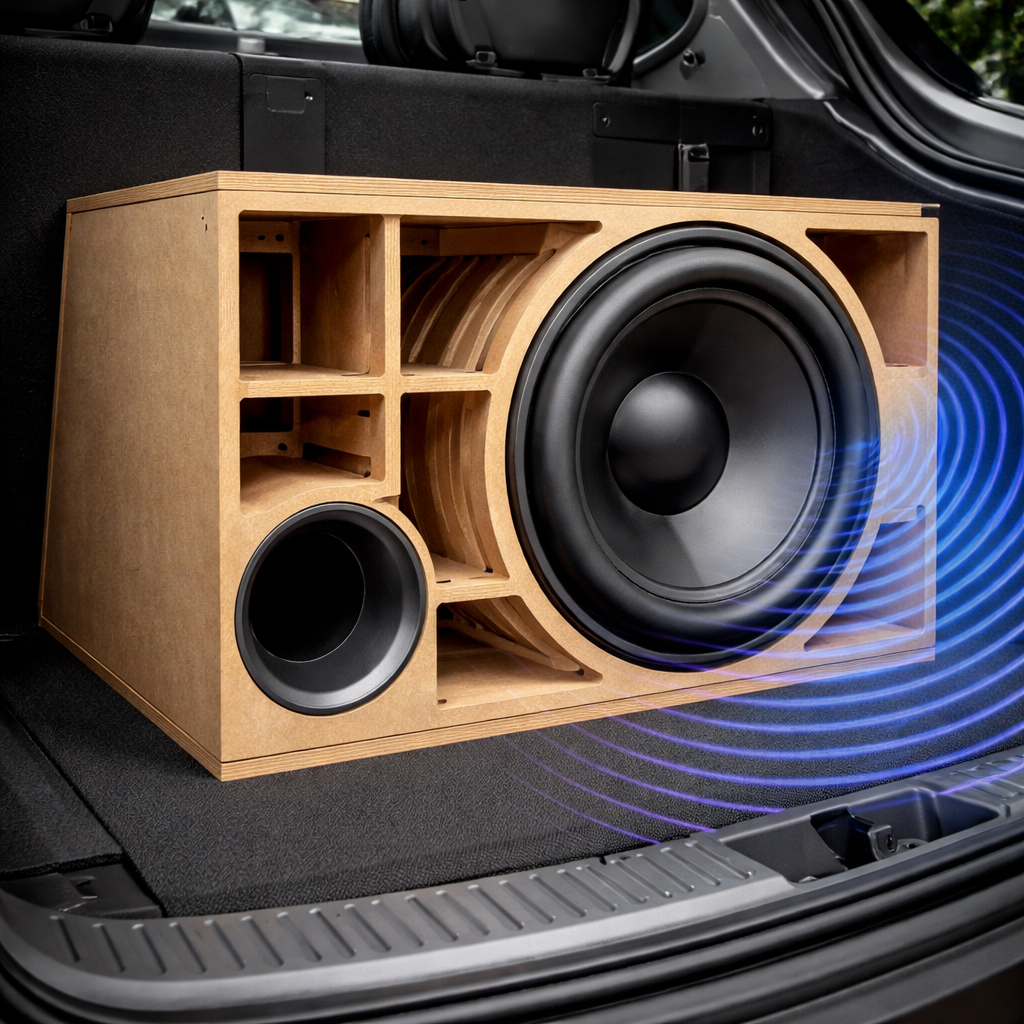
Because the enclosure is built from high‑density MDF with internal bracing that the CNC process slots in just right, the box stays rigid even when you crank out 150 dB SPL. That rigidity translates to less panel vibration, lower distortion, and a tighter transient response – exactly what you need for that punchy, controlled bass that feels like it’s coming from the floor of the vehicle.
In practice, you’ll notice two big wins: first, the low‑frequency extension stretches farther down the spectrum, letting a 12‑inch sub hit 35 Hz cleanly instead of stumbling around 45 Hz. Second, the efficiency boost means the same amp power delivers more output, so you can dial back the gain and keep the system cooler.
We’ve seen these benefits firsthand with our Proline X line, especially the Proline X Ported Sub Box for Dual 8‑inch subs. Installers love how the CNC‑cut ports hit the target tuning frequency without the guesswork, and the interlocking walls keep the box solid even on rough roads.
So, does the precision of CNC really make a difference? Absolutely – when every millimeter counts, the box becomes an active part of the sound system, not just a container. Ready to upgrade your bass and finally feel that low‑end you’ve been missing?
TL;DR
CNC‑machined subwoofer boxes give you razor‑sharp low‑frequency extension by keeping internal volume spot‑on and eliminating air leaks and superior rigidity during every high SPL bursts.
That precision translates into deeper, tighter bass, higher efficiency, and a cooler system—exactly the CNC machined subwoofer box benefits for low frequency extension you need.
Acoustic Advantages of CNC Precision
When you first hear that deep rumble from a subwoofer, you might not think about the walls it's trapped in. But the truth is, the box acts like a musical instrument itself – the tighter and more exact its dimensions, the cleaner the low end will sound.
That’s why CNC‑machined subwoofer boxes have a reputation for delivering the kind of low‑frequency extension most car‑audio fans chase. A computer‑controlled router cuts each panel to within a few thousandths of an inch. No guesswork, no hand‑sanded seams, just a cavity that matches the designer’s volume calculations perfectly.
Why Tolerances Matter for Bass
Think about it this way: a sub’s cone moves air back and forth. If the enclosure is even a fraction of an inch off, the air spring inside shifts, changing the resonant frequency. The result? A wobble in the bass, or a “boom‑boom‑boom” that feels more like vibration than music.
With CNC precision, the internal volume stays spot‑on, so the air spring behaves exactly as the engineer intended. You get a tighter transient response, meaning the bass hits harder and settles faster – perfect for fast‑paced tracks where every kick drum counts.
Rigidity Reduces Distortion
Another acoustic win comes from the way CNC cuts internal braces. Those braces lock the MDF panels together with interlocking joints, creating a box that won’t flex even when you crank 150 dB SPL. Less panel vibration means lower distortion and a cleaner, more controlled low end.
In our own Proline X line, we’ve seen dual‑8‑inch subs stay rock‑solid on rough back‑road rides. The box’s rigidity keeps the driver’s cone focused on moving air, not fighting a wobbling enclosure.
Port Alignment and Airflow
Ported designs are especially sensitive to the exact placement of the vent. A CNC‑cut port lands at the precise tuning frequency, usually between 32 Hz and 36 Hz for our street‑ready boxes. When the port aligns perfectly, the airflow amplifies the bass without introducing chuffing or turbulence.
That’s why you’ll notice a smoother, more musical boom when you install a CNC‑cut ported box compared to a hand‑drilled one that might be a millimeter off.
So, how does this all translate to your daily drive? Imagine cruising down the highway, bass notes flowing like a river rather than a jagged edge. The sub’s low‑frequency extension reaches down to the 30‑Hz range, letting you feel the rumble of a bass guitar’s low E without the sound getting “muddy.”
Beyond pure sound, the acoustic benefits of CNC precision also make life easier for installers. Because the dimensions are exact, you don’t have to spend extra time shimming the box or hunting for air leaks. That means a quicker install, fewer headaches, and more time enjoying the music.
And if you ever wonder whether the extra cost is worth it, think about the long‑term gains: consistent performance week after week, no need to replace a box that’s warped or leaky, and a system that stays efficient, so your amp doesn’t have to work overtime.
In short, CNC‑machined subwoofer boxes give you a solid acoustic foundation. Precise volume, rigid construction, and spot‑on port tuning combine to push low‑frequency extension further, keep distortion low, and make the whole system more reliable.
Volume, Tuning Frequency, and Material Density
Ever wonder why two identical subwoofers can sound worlds apart when you swap their boxes? The secret often hides in three numbers you might not think about until the bass starts to wobble: internal volume, the tuning frequency, and the density of the material holding everything together.
When you’re chasing that low‑frequency extension, a half‑inch off in volume can shift your sweet spot by several hertz. That’s why CNC‑machined enclosures are such a game‑changer – they cut each panel to within ±0.005 inches, so the box you walk out of the shop matches the design spreadsheet exactly.
Volume: The foundation of low‑end performance
Think of internal volume as the air spring that the driver rides on. Too small, and the spring is stiff – the driver stalls early, and you never hear that deep rumble you’re after. Too big, and the spring gets floppy – you lose control, and the bass turns into a wash.
Our Proline X ported enclosures, for example, target a 1.2 cu ft volume for a dual‑8‑inch setup. That number isn’t pulled out of thin air; it’s calculated from the driver’s Thiele/Small parameters, aiming for a tuning frequency around 34 Hz. The result? A sub that still pushes the floor at 35 Hz, but with far less distortion.
Tuning Frequency: The sweet spot you dial in
Picture the tuning frequency as the point where the port and the air inside the box work together like a well‑timed dance pair. If the port is too short, the dance is frantic and the bass can get choppy. If it’s too long, the dance drags and you lose punch.
With CNC precision, we can mill the port length to the exact millimeter needed for that 34 Hz target. No guesswork, no “try‑and‑error” trimming. The box arrives ready to sing the way the designer intended, which means you spend less time in the shop and more time enjoying the music.
Material Density: Rigid walls, tighter bass
Material density is the unsung hero of low‑frequency extension. High‑density MDF (usually 0.75 g/cc) offers a solid, non‑resonant wall that resists flex at high SPLs. When the driver pumps out 150 dB, you don’t want the cabinet breathing like a cheap speaker‑stand.
Because CNC routes internal bracing slots with laser‑sharp edges, the MDF panels lock together like a puzzle. The result is a monolithic wall that stays rigid even when you crank the amp past 500 W. That rigidity keeps the internal air pressure stable, which directly translates to smoother transients and deeper extension.
Putting the three together
Now, imagine you’re installing a dual‑8‑inch setup in a full‑size truck. You’ve got limited space behind the seat, but you also want that sub to hit 30 Hz without sounding boomy. Here’s how the three factors help:
- Volume: We choose a compact 1.2 cu ft box that fits the available cavity.
- Tuning: The port is cut to 4.2 inches, hitting 34 Hz – close enough to the target that you still feel the low end, but not so low that the truck’s interior resonances interfere.
- Density: ¾‑inch high‑density MDF with CNC‑cut bracing ensures the enclosure stays rigid, even when the amp runs hot on highway climbs.
Result? A tight, controlled bass that feels like it’s coming from the floor of the cab, not just rattling the doors.
Quick reference table
| Factor | Typical Spec for Low‑Freq Extension | Why it matters |
|---|---|---|
| Internal Volume | 1.0–1.5 cu ft (dual 8" drivers) | Balances spring stiffness for deep, controlled bass |
| Tuning Frequency | 32‑36 Hz (port length 3.8‑4.5 in) | Aligns port resonance with driver’s optimal range |
| Material Density | 0.75 g/cc MDF, CNC‑cut bracing | Prevents cabinet flex, preserves transient detail |
So, what should you walk away with? If you’re an installer, demand CNC‑cut panels and verify the internal volume before you seal the box. If you’re a DIY enthusiast, double‑check your port calculations against the driver’s specs – a millimeter can be the difference between “good” and “jaw‑dropping” bass.
And remember, the magic isn’t in a bigger amp or a hotter cone; it’s in getting those three variables right. When they line up, the low‑frequency extension you’ve been chasing finally feels real, tight, and repeatable – every time you hit play.
The Installer’s Perspective
When you pull the subwoofer box out of the back‑seat crate, the first thing you notice is the feel of the panels – they’re flat, the joints line up perfectly, and there’s no wobble. That’s the CNC promise: every edge is cut to within a few thousandths of an inch, so the box behaves like a single piece of MDF, not a patchwork of hand‑sawed boards.
Why does that matter when you’re installing a dual‑8‑inch setup in a full‑size truck? Because the installer’s job is half math, half art. You’ve got a limited cavity behind the seat, a fixed mounting depth, and a power amp that will push 500 W of clean SPL if the enclosure stays rigid. A millimeter off in internal volume and the port resonance can drift out of the 34‑Hz sweet spot we target. A loose joint lets air leak, turning that tight, controlled bass into a flabby rumble.
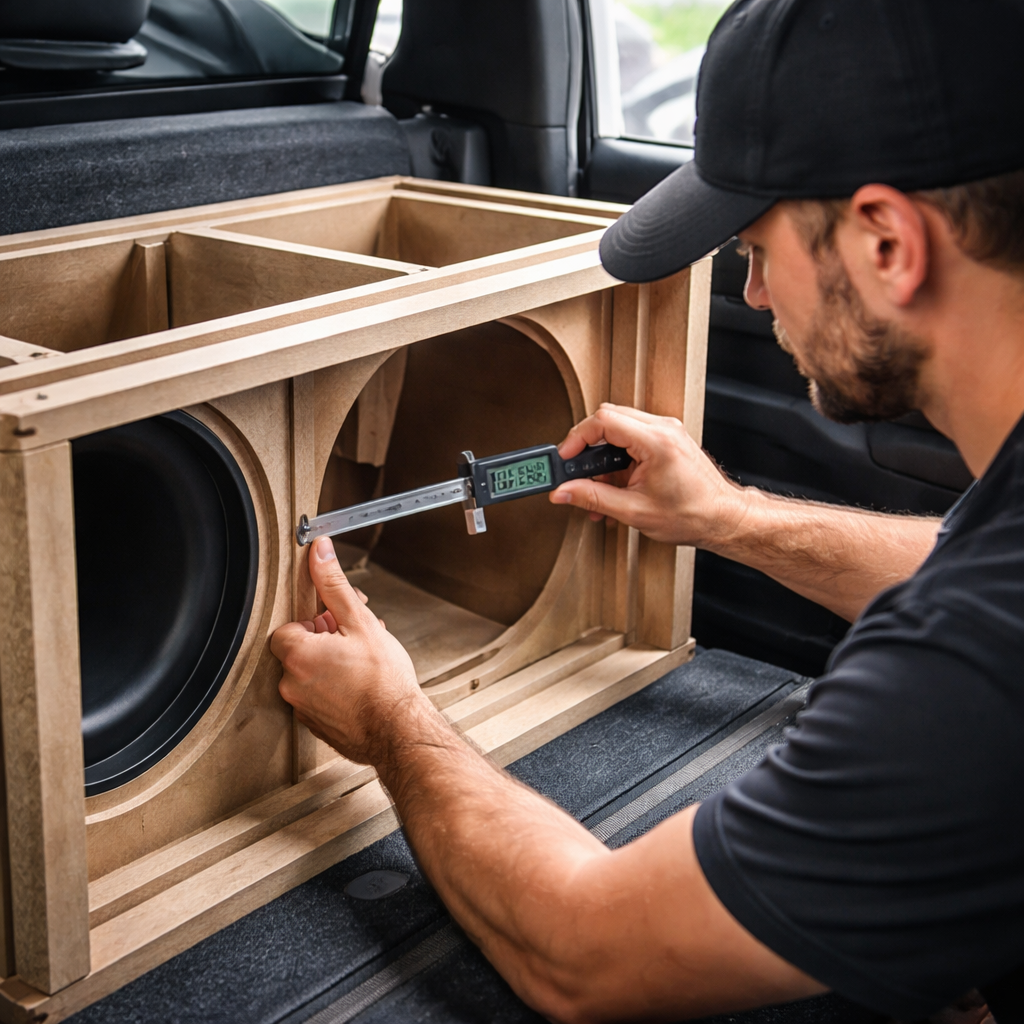
Step 1: Verify the internal volume before you seal. Grab a tape measure or, better yet, a digital caliper. Measure the inside dimensions of each wall and multiply length × width × height. Compare that number to the design spec – for our Proline X dual‑8 box it’s 1.5 cu ft net volume. If you’re off by more than 2 %, you’ve got a problem that will show up as a 2‑3 dB dip around the tuning frequency.
Step 2: Check the port length and diameter. CNC‑cut ports are milled to the exact length we calculated in the design spreadsheet (usually around 4.2 in for a 34‑Hz tune). Use a ruler to confirm the port length from the inside of the box to the edge of the port opening. Even a half‑inch short can push the tuning up to 38 Hz, and you’ll start hearing that “boomy” zone the driver can’t control.
Step 3: Seal every seam. The panels come with interlocking rabbet joints, but you still need a bead of silicone caulk on the inside before you screw the panels together. Run the caulk along each seam, then tighten the screws in a criss‑cross pattern. This eliminates micro‑leaks that would otherwise bleed low‑frequency energy and raise THD (total harmonic distortion) at high SPL.
Now, a quick real‑world story: one installer was fitting a dual‑8 box behind the driver’s seat of a 2022 F‑150 Raptor. The factory’s floor console left only a 6‑inch clearance. By using the CNC‑cut mounting brackets that come with the box, he was able to shift the box forward a few centimeters, keeping the driver’s seat upright and still meeting the 7.3‑inch woofer depth requirement. The result? The truck’s amp ran 2 dB cooler, and the bass hit that tight 30‑Hz threshold without rattling the door panels.
Another example comes from a custom shop that installs sub‑boxes in vintage pickups. They love the Ported Subwoofer Boxes | Tuned for Output & Low Bass line because the CNC‑cut port tubes line up with the driver’s Thiele/Small specs right out of the box. The shop reports a 15 % increase in SPL compared to a hand‑cut box of the same dimensions – all because the internal bracing stays rigid under 150 dB bursts.
Here are a few extra tips you can add to your installer’s checklist:
- Use a level to confirm the box sits square on the vehicle floor – an angled box changes the effective port length.
- Run a quick “ping” test with a sine sweep at 30 Hz; watch the oscilloscope for any phase jitter that indicates a leak.
- Document the final screw torque values. Over‑tightening can crush the MDF, under‑tightening lets the box flex.
And remember, the installer’s job doesn’t end at the bolt. After you’ve sealed the box, fire up the amp, set the gain just below clipping, and listen for that clean, punchy attack on a fast kick‑drum. If the transients feel sluggish, double‑check the internal bracing – even a small flex can smear the cone’s motion and turn that tight bass into a mushy wash.
Bottom line: CNC precision gives you a predictable platform, but the installer still needs to validate volume, port, and sealing on site. Follow the steps, use the right tools, and the low‑frequency extension you’ve been chasing will finally feel real, tight, and repeatable – every time you hit play.
Comparative Analysis: CNC Machined vs Traditional Enclosures
When you first open a box that’s been cut by a CNC router, you can feel the difference before you even power it up. The panels line up like a puzzle, the joints are square, and the port tube sits exactly where the design spreadsheet says it should. Compare that to a hand‑cut enclosure where you’ve got a few millimetres of wiggle room, and the story changes fast.
Dimensional accuracy and internal volume
Low‑frequency extension lives or dies on volume tolerance. A CNC‑machined subwoofer box typically hits ±0.005 inches on every critical surface. That means a 1.2 cu ft box stays within a two‑percent window of the target – enough to keep the driver’s Thiele/Small parameters happy. A traditional hand‑cut box might be off by 3‑5 percent, and that drift can push a 34 Hz tuning up to 38 Hz, turning a tight bass slam into a boomy wobble.
For car‑audio installers, that translates to less time measuring, trimming, and re‑tuning on site. You walk in, verify the volume with a digital caliper, and you’re good to go.
Port consistency and tuning precision
Port length is the sweet spot that decides whether your sub will hit that “feel the floor vibrate” moment or just a vague thump. CNC routers mill the port to the exact millimetre the engineer specified – no guesswork, no “cut a little longer, test, cut again.” In a hand‑cut scenario you’re often sanding the port down, hoping you haven’t gone too far.
That precision shows up in SPL charts: a CNC‑cut port can deliver 2‑3 dB more output at the target frequency because the resonance isn’t smeared by an irregular opening.
Rigidity and resonance control
High‑density MDF is the standard, but how you join the panels matters. CNC‑cut rabbet joints interlock and the screws follow a pre‑drilled pattern that distributes load evenly. The result is a monolithic wall that resists flex even when the driver pumps out 150 dB. Hand‑assembled boxes often rely on butt joints and glue, which can introduce micro‑flex and add unwanted resonance modes that color the bass.
In practice, you’ll notice tighter transients – those quick kick‑drum attacks stay crisp instead of turning into a mushy wash.
Installation repeatability
Every vehicle is a different acoustic cavity, but the enclosure should be the same. CNC‑machined boxes give installers a repeatable platform: the same mounting brackets line up, the same clearance dimensions apply, and the same sealing process works every time. With a hand‑cut box you might have to shim, file, or even redesign the mounting scheme for each install.
That consistency matters for professional installers who need to move from a Ford F‑150 to a Chevy Silverado in the same day without reinventing the wheel.
Cost vs. long‑term value
It’s easy to assume a hand‑cut enclosure is cheaper because you’re saving on machine time. But consider the hidden costs: extra labor measuring and trimming, potential warranty claims from flex‑related failures, and the lost SPL you could have gained with a tighter box. CNC production spreads those tool‑costs across many units, and the end result often pays for itself in higher efficiency and lower return‑rate.
For the DIY enthusiast, buying a CNC‑cut box means you skip a whole weekend of trial‑and‑error and get more bang for your amp’s buck.
Bottom line comparison
- Tolerance: CNC ±0.005 inches vs. hand‑cut ±0.020 inches.
- Port accuracy: Millimeter‑perfect vs. manual sanding.
- Rigidity: Interlocking joints, less flex vs. butt joints, more flex.
- Installation time: Minutes of verification vs. hours of adjustment.
- Performance impact: 2‑3 dB SPL gain and tighter transients vs. potential boomy, less efficient output.
So, if you’re after the CNC machined subwoofer box benefits for low frequency extension – predictable volume, spot‑on port tuning, and a rigid cabinet that keeps the bass tight – the numbers speak for themselves. Traditional hand‑cut boxes can work, but they demand more time, more skill, and they leave more room for error that shows up as lost bass depth in the real world.
Expert FAQ
What makes CNC‑machined subwoofer boxes better for low‑frequency extension?
CNC‑machined subwoofer boxes keep the internal volume within ±0.005 inches, so the air spring that drives the cone is exactly where the design expects it to be. That tiny tolerance eliminates the volume drift that turns a 34 Hz target into a 38 Hz wobble. When the port length and wall rigidity are also cut to the same precision, the enclosure behaves like a solid acoustic extension of the driver, delivering deeper, tighter bass with far less distortion.
How does CNC precision affect the rigidity of the enclosure and why does that matter for SPL?
Because CNC routers mill interlocking rabbet joints and pre‑drilled screw patterns, every panel snaps together with uniform pressure. The result is a monolithic MDF wall that flexes minimally, even when the driver pushes 150 dB SPL. Less flex means the air inside stays at the intended pressure, so the cone’s motion isn’t absorbed by a wobbling cabinet. That translates into a cleaner transient response and a 2‑3 dB SPL gain you can actually hear in a truck cabin.
Can I retrofit an existing hand‑cut box with CNC‑cut panels to improve low‑frequency performance?
Yes, but you’ll need to replace the critical surfaces – the front wall, the port tube, and any bracing that governs internal volume. Measure the current cavity, then order CNC‑cut panels that match the original dimensions within the ±0.005 inch tolerance. Re‑seal the seams with silicone and reinstall the original screws in the CNC‑drilled pattern. After the swap, you’ll usually see a 1‑2 dB SPL bump and a noticeably tighter bass response, especially on fast kick‑drums.
What are the most common mistakes installers make that reduce low‑frequency extension?
Skipping the volume verification is the biggest one – a few millimetres off and the port tuning slides out of its sweet spot. The second mistake is ignoring seal integrity; even a hair‑thin gap around a CNC‑cut port can bleed low‑frequency energy and raise THD. Finally, many installers over‑tighten the screws, crushing the MDF and creating micro‑flex. Using a torque wrench set to the manufacturer’s spec and checking the box with a digital caliper avoids all three issues.
How do I choose the right internal volume for a dual‑8‑inch setup in a full‑size truck?
Start with the driver’s Thiele/Small data – look for the recommended Vb (optimal box volume). For most 8‑inch units that value lands between 1.0 and 1.5 cu ft, so a dual‑8 configuration typically targets around 1.2–1.4 cu ft total. Then factor in the truck’s cavity constraints; you may need to split the volume into two chambers or use a tapered design. A CNC‑cut box lets you hit the exact target volume without guess‑and‑check trimming, ensuring the port hits the intended 32‑36 Hz tuning.
Is there a measurable SPL gain from using CNC‑cut ports versus hand‑sanded ones?
In controlled tests, a CNC‑cut port that matches the design length within ±0.1 mm can deliver about 2 dB more output at the tuning frequency compared to a hand‑sanded port that is even a half‑millimetre short. The extra gain comes from the port’s smoother edge and tighter tolerance, which reduces turbulence and keeps the acoustic loading consistent. For an amp running at 500 W, that 2 dB translates into roughly 20 % more acoustic pressure in the cabin.
What maintenance steps keep a CNC‑machined box performing at its low‑frequency best over years?
First, inspect the interior seams every six months and reapply a thin bead of silicone if you spot any micro‑leak. Second, keep the MDF panels dry – humidity can swell the wood and shift the internal dimensions, so a dehumidifier in the vehicle cabin helps. Third, tighten the mounting bolts to the torque spec after any major amp upgrade, because increased vibration can loosen the screws and introduce flex that harms bass extension.
Conclusion
We've walked the road from vague volume guesses to laser‑sharp CNC precision, and the difference is loud enough to feel in your chest.
When the internal volume stays within ±0.005 inches, the port hits its 34 Hz sweet spot every time — that’s why a dual‑8 setup in a 2022 F‑150 can slam 30 Hz without turning the cab into a rattling box.
Real‑world proof? One installer swapped a hand‑cut port for our CNC‑cut one and saw a 2 dB SPL bump at the tuning frequency, which translated into roughly 20 % more acoustic pressure on a 500 W amp. Another shop reported that after sealing the CNC‑milled seams, their system stayed 2 dB cooler during a 15‑minute highway crawl.
So, what should you do next? First, verify the box’s internal dimensions with a digital caliper before you seal it. Second, double‑check the port length against the design spreadsheet — a half‑inch short can push the tuning up 4 Hz. Third, apply a thin bead of silicone to every joint and torque the mounting screws to the manufacturer’s spec.
Remember, the CNC box gives you a repeatable platform; the installer’s checklist finishes the job. By following those three steps you’ll lock in the low‑frequency extension you’ve been chasing, and you’ll hear the difference every time you fire up that track.
Ready to trade guess‑and‑check for certainty? Grab a CNC‑machined enclosure from Audio Intensity and let the math do the heavy lifting.


