How to Test an Amplifier Without a Car: Step-by-Step Guide - Audio Intensity
Car Amplifiers

How to Test an Amplifier Without a Car: Step-by-Step Guide

Key Highlights

  • You can check your amplifier even without a car with the correct tools, such as a power wire and test leads.
  • Assessing the sound quality of your amplifier is important to ensure it's working at its best.
  • Understanding what different amplifiers do and where they're used can make picking the right one for your needs easier.
  • Getting ready to examine your amplifier without a car means having all the necessary gear, including a multimeter, test leads, and power wire.
  • Taking steps to ensure safety before beginning any tests is key to avoiding accidents or harm to equipment.
  • A step-by-step guide will steer you through properly conducting these tests without needing a car.
  • Figuring out common amplifier issues, such as when no power or audio gets distorted, helps fix problems quickly.
  • Using advanced techniques like employing a multimeter for checking an amplifier’s power gives deeper insights into its efficiency.
  • In summary, testing an amplifier outside of using it in cars is achievable by utilizing appropriate instruments and acquiring sufficient knowledge while being cautious; this ensures that your audio system maintains excellent sound quality without experiencing unwanted distortion.

Introduction

Amplifiers are crucial for ensuring the sound you hear from audio systems, like guitar amps or car stereos, is top-notch. If you're trying to figure out how to check if an amplifier is working right without having a car around, it's pretty handy. You must familiarize yourself with tools such as multimeters and power supplies. These can help you find problems like blown fuses or when the sound gets all messed up and distorted. This guide will show you what to do so your amplifier can work its best and make everything sound great.

Understanding Amplifiers and How They Work

Understanding Amplifiers and How They Work


Amplifiers play a key role in making the music we listen to through speakers louder and clearer. They need a car battery to work, especially when part of a car stereo system. To get how they do their job, it's essential to know about things such as voltage and how power wires are connected, not forgetting the safety that fuses bring. By boosting the strength of what you hear, amplifiers enhance sound quality by making bass deeper, expanding the range of sounds you can hear, and sharpening up all those details in your favorite tunes. Understanding amplifiers is essential for anyone interested in audio tech or setting up sound systems.

The Basics of Amplifier Operation

The Basics of Amplifier Operation


Amplifiers work by taking a small audio signal and making it louder so we can hear our music or whatever sound at a higher volume. They're important in any audio system because they boost the signal's power, improving speakers' performance and improving how good everything sounds. When looking into amplifiers, especially if you want to test one without using a car, it's key to know that their main job is turning the volume from quiet to much louder. There are all sorts of amplifiers out there for different needs - like guitar amps for musicians or ones made just for car stereos. Each type is made specially to ensure it does its best with certain sounds across various frequency ranges.

Types of Amplifiers and Their Applications

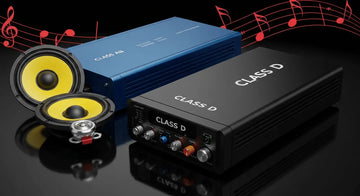
In amplifiers, you'll find a bunch for different uses. For instance, mono amplifiers pump up the bass in subwoofers. Then, with 2-channel amps, you get that classic stereo sound filling your space. If you've got more speakers to handle, a 4-channel amp is what you're looking at. On top of these options, some amps, like class-D, focus on not using too much power while still giving a great performance, and tube amps stand out because they produce a warm sound quality that's pretty unique. Knowing exactly which amplifier fits your setup is key to ensuring everything sounds right in your audio system.

Preparing to Test Your Amplifier Without a Car

Before diving into your project, ensure a few key things are on hand. With a multimeter, test leads, and a power supply, you're off to a good start. Safety can't be overlooked either, so goggles should be part of your gear. Before getting to business, cut off any power source and securely place the amplifier in a stable spot. It's also important to round up all the cables you need beforehand. Lastly, ensure that your workspace is well-lit and spacious enough for easy movement around it.

Essential Tools and Equipment Needed

To check an amplifier correctly without using a car, you should have a dependable multimeter with test leads to check voltage. For testing, Ensure access to a steady power supply and suitable audio sources, such as a smartphone or portable music player. To avoid any harm, it's wise to keep extra fuses ready in case one gets blown while you're working on it. Also, setting up your work area where there's plenty of light and not much noise can help you concentrate when evaluating the amplifier accurately.

Safety Precautions Before Starting

To make sure you stay safe while checking out your amplifier without a car, it's crucial to keep a few safety tips in mind. First, cut off the power supply; this helps dodge any risky electric shocks. When handling the equipment, using the right test leads and tools is key to avoid mishaps. With voltage being something you can't see but feel, be extra careful about how much of it is around so you don’t get shocked. It’s also wise not to touch bare wires during your tests - better safe than sorry! Always look into what the manual for your amplifier says about staying safe because those guidelines are there for a reason. Testing goes smoothly without trouble by putting safety first and disconnecting the connecting wires.

Step-by-Step Guide to Testing an Amplifier

The first thing you need to do is figure out where the inputs and outputs on your amplifier are. With a multimeter, look at the voltage from your power supply to ensure everything's okay there. It's essential to connect the test leads properly when setting things up. Keep an eye (or ear) out for any changes in how things sound that might not be right, like distortion. Also, watch for signs of trouble such as protect lights turning on or fuses that have blown. By taking these steps individually, you can pinpoint problems related to bass levels, how wide the frequency range is, or if there’s something off with the voltage. Additionally, for sub-amplifiers, it is best to wire a sub to the amp for testing, while for full-ranged multi-channel amps, a full-range speaker will generally work best. Ensure to set the gain appropriately for the input voltage and check that the crossover filters on the amp are not gated to prevent output.

Identifying the Amplifier Inputs and Outputs

Find the spots for the power wire, RCA connections, and wires that go to speakers to figure out where things plug into the amplifier. Usually, places where you should put stuff in are marked with "In" or "Input," and places where things come out are tagged as "Out" or "Output." If you need more help figuring it all out, check the user manual of your amplifier; it's got lots of helpful info. It's crucial to ensure everything is hooked up right so you don't mess up your amplifier or any gadgets connected. Before trying anything else with your amp, you'll want to complete this step.

Using a Multimeter to Test the Amplifier's Power

To check how strong your amplifier is with a multimeter, you need to switch the multimeter to DC voltage mode first. With the black probe touching the ground terminal of the amplifier and the red one on its power spot, turn on your amp. Watch what number shows up for voltage on your multimeter. If things are working right, you'll see a reading close to 12 volts, indicating that your amplifier is working correctly. This way of testing can point out if there are any blown fuses or issues with the power supply messing with how well your amplifier works and its sound quality.

Troubleshooting Common Amplifier Issues

Troubleshooting Common Amplifier Issues


When dealing with typical amplifier problems, it's good to begin by figuring out why there might be no power and then move on to fix any sound distortion or interference. For issues where the amplifier won't turn on, you should look at the fuse and connections of the power wire first. If you're having trouble with how your audio sounds, check for any unusual noises like vibrations or squeals, which could mean there's a blown fuse or something else wrong inside. By paying attention to these signs, you can get your audio system working smoothly again and keep its sound quality top-notch.

How to Diagnose No-Power Situations

How to Diagnose No-Power Situations


When figuring out why something isn't powering up, ensure the power supply is working, and the amplifier is getting voltage. With a multimeter, measure how much voltage goes through the power wire. It's also important to check if fuses have blown or if there are any loose connections. Sometimes, an amp won't turn on because its protective light stays off; this could be a clue, too. If your setup uses a car battery for juice, look at its condition. Problems can also arise from not-so-great ground connections or when the remote turn-on isn't doing its job right. Lastly, watch for anything that might cause resistance in your setup or if any leads got disconnected since these issues can lead to power failures, too.

Solving Audio Distortion and Interference Problems

To tackle problems with audio distortion or interference, examine the RCA cables to see if they're connected correctly or if there's any damage. Make sure both the amp and its source have a good ground connection. Tweaking the gain levels on your amplifier can also stop distortion from happening. Using shielded cables is another way to cut down on interference. You'll likely hear less noise by keeping the amp at a distance from power sources. Adding ferrite cores is smart for blocking out electromagnetic interference that messes with your sound quality. Don't forget to regularly check up on all your cables, connectors, and parts involved in your setup to keep everything sounding great.

Advanced Testing Methods

When figuring out amplifiers, signal tracing is a way to find where the audio gets lost or messed up in the circuit. This approach needs someone who knows their stuff and can use tools like oscilloscopes carefully. On another note, bench testing checks how well an amplifier works when not in a car, ensuring everything functions as it should. These strategies are key for pinpointing tricky problems accurately. Additionally, advanced techniques like enclosure testing can reveal potential issues caused by vibrations or sound waves, making it an essential step in testing. Advanced methods like these take us past simple tests and are often what professional technicians do to solve complicated amplifier issues effectively.

Signal Tracing for Amplifiers

Signal tracing is a key method for finding problems with how an amplifier handles input and output audio. It involves tracking the signal's journey from where it starts, like a car stereo or any audio player, to the amplifier, and finally, to the speakers.

To start signal tracing, look at the input signal coming from your source device. To make sure the amplifier is getting the signal correctly, you can use music or a test tone with a specific frequency range.

Then, move on to checking what comes out of the amplifier. Hook up either headphones or a speaker to its output spots and play some sounds that hit different frequencies. Pay attention to any weird noises, moments when sound cuts out completely, or if there are changes in loudness.

By following this path—from your stereo through your amp down into those speakers—you get clues about what might not be working right with how strong signals come out of it (like low volume) or issues related specifically to certain tones (frequency response troubles). This step-by-step process helps you determine whether to dig deeper into problems or maybe even fix something inside.

Bench Testing Techniques

adjustable power supply

Bench testing an amplifier allows you to simulate a car audio system without needing a car. Here is a step-by-step guide to bench-testing your amplifier:

  1. Set up a power supply: Use a power supply with the appropriate voltage and current rating for your amplifier. Connect the power supply's positive and negative terminals to the amplifier's corresponding terminals.
  2. Connect the test leads: Use test leads to connect the amplifier's input to an audio source, such as a phone or MP3 player. Connect the amplifier's output to a speaker or headphones.
  3. Power on the amplifier: Turn on the power supply and the amplifier. Adjust the amplifier's settings, such as gain and crossover, to the desired levels.
  4. Test the audio signal: Play different types of audio content through the amplifier and listen for any distortions, dropouts, or variations in sound quality. Use a frequency sweep test to check the amplifier's frequency response.
  5. Measure voltage and current: Use a multimeter to measure the voltage and current levels at various points in the amplifier circuit. Refer to the amplifier's manual for the recommended voltage and current values.

By bench-testing your amplifier, you can ensure it functions correctly and produces the desired sound quality. Use the table below to record the voltage and current measurements during the bench testing.

Measurement Point

Voltage (V)

Current (A)

Power supply output


Amplifier input


Amplifier output


Maintaining Your Amplifier for Optimal Performance

Maintaining Your Amplifier for Optimal Performance


Taking good care of your amplifier is vital to getting the best sound quality and ensuring it lasts a long time. Here's how you can keep your amplifier in top shape:

  • Make it a habit to clean and check over your amplifier regularly. Use something soft like a cloth or brush to clean its outside. Look closely at all the connections, wires, and parts for any damage or signs they wear out.
  • Keep an eye on the power supply, ensuring it provides just the right voltage and current for your stereo. If it’s defective or too old, get a new one.
  • Amplifiers can get pretty warm when they’re working hard. To help them stay cool, ensure there's enough air moving around them and avoid putting them in tight spots without airflow.
  • Choosing high-quality wiring and cables helps reduce signal loss and keep unwanted noise away from your car stereo system. It’s essential to check these connections often so everything stays hooked up tightly.

By sticking with these upkeep steps, you'll not only boost the lifespan of your amplifier but also enjoy better sound quality from your car stereo system.

Regular Cleaning and Inspection Tips

To keep your amplifier in top shape and make sure it works perfectly, giving you the best sound quality for your audio system, here's what you need to do:

  • For cleaning the outside: use a gentle cloth or brush to remove dust or bits on its surface. Avoid strong cleaners or rough stuff that could ruin its look.
  • On the inside: If you can open up your amp without trouble, use some compressed air or a soft brush to tidy up the inside. Just be careful not to poke around the electrical parts.
  • Looking at connections: Go over every connection, including power and audio inputs and outputs. Look for rusting, loose connections, or damage. Make sure everything is plugged in snugly.
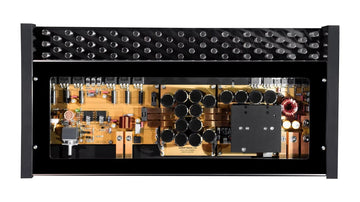
  • Checking components: Look closely at parts like capacitors and resistors for swelling, leaks, or other damage. Swap out any that don't look right.

Doing these checks now and then—at least twice a year—can help catch problems early so they won't mess with your music enjoyment later on.

When to Seek Professional Repair Services

While you can fix some amplifier problems by yourself with a bit of troubleshooting and upkeep, there are times when you need to get help from the pros. Here's how to tell it's time for that:

  • When your amplifier won't turn on or seems completely dead, professional repair might be needed. This could be due to something inside not working right or issues with the wiring.
  • With sound quality taking a hit, if your amp sounds off even after you've tried cleaning it up and tweaking its settings, this could mean a more significant issue at play, needing expert eyes.
  • If your amp keeps getting too hot or turns itself off because it’s overheating, fixing it or changing it so it stays cooler might be necessary.
  • Seeing any clear damage inside your amp, such as parts that look burned or melted, is a sure sign that professionals should take over.

Experts in professional repair services have the know-how and special tools required to diagnose amplifier problems and fix them properly. They ensure that everything works and is new again while helping prevent further problems.

Conclusion

Wrapping things up and checking your amplifier is essential, even if you don't have a car. By sticking to the steps we've discussed here, you can figure out what's wrong with your amp, do the tests that need doing, and ensure everything works as it should. Always remember safety first—use the right tools and gear for the job. And if something seems too tricky, there's no shame in calling an expert for help. Keeping up with regular checks and care will keep your amplifier going strong for longer. So whether you're trying to fix issues where there’s no power or sort out any audio distortion messes, this guide has all you need to test and look after your amplifier correctly.

Frequently Asked Questions

Can I test an amplifier with just a multimeter?

Indeed, with a multimeter in hand, you can check an amplifier. By checking the voltage and current at different spots within the amplifier's circuitry, you can determine whether it's getting the right amount of power and working as expected within its designated voltage limits.

What are the signs of a failing amplifier?

When an amplifier isn't working properly, you might notice a few things. The sound quality can become really bad or distorted, and sometimes, the sound might cut in and out. Also, if your amplifier keeps getting too hot or switches to protection mode frequently, it could mean there's something wrong inside it or with its connections.

How do I know if my amplifier needs recalibration?

If the sound quality seems off, like there's a significant change in how things sound, if you can't hear high and low sounds, or if one side is louder, it might mean your amplifier isn't set up right anymore. You should look at the manual with your amplifier or contact the people who made it to find out how to fix it.

Is it possible to repair an amplifier at home?

You can manage things at home for simple fixes and upkeep. However, when it comes to tricky stuff like fixing an amplifier, it's smarter to let the experts handle it. They've got the right know-how, tools, and gear needed to figure out what's wrong and get it fixed up properly.

Previous
Amplifier Subsonic Filter: Everything You Need to Know
Next
Do You Need an Amplifier for Car Speakers? Expert Advice