
Ever stared at a 2‑channel amp and wondered if you could squeeze out the power of a single, beefier channel? You're not alone – many car‑audio fans hit that wall when they first try to get a subwoofer to thump the way they'd like.
The trick is called bridging, and it basically tells the amp to treat two outputs as one. In practice you tie the positive terminal of channel 1 to the negative of channel 2, feed the source into the remaining terminals, and you end up with roughly double the voltage swing. That translates into more wattage for a low‑impedance sub or a big mid‑bass driver.
But before you grab your soldering iron, there are a few safety checks. First, confirm your amp’s manual actually lists “bridgeable” – some cheap models will overheat or shut down if you try. Second, make sure the speaker you plan to power can handle the lower impedance; a 4 Ω sub will look like 2 Ω when bridged, and not every driver likes that. Finally, verify your vehicle’s fuse rating can cope with the extra current draw, or you risk blowing a fuse in a few minutes of bass.
Here’s a quick walk‑through that many of our install‑shop customers swear by. 1️⃣ Pull the amp’s rear panel and locate the speaker terminals – they’re usually color‑coded: red for positive, black for negative. 2️⃣ Use a short piece of speaker wire to jumper red + from channel 1 to black – of channel 2. 3️⃣ Connect your RCA source to the input of channel 1 only; leave channel 2’s input unplugged. 4️⃣ Wire your subwoofer’s + lead to the remaining red terminal (channel 2) and the – lead to the remaining black terminal (channel 1). 5️⃣ Double‑check every connection, then power up and listen for a deeper, tighter boom.
If you’re still unsure, our 2‑Channel Amplifiers: Power Your Car Audio page walks you through model‑specific bridging charts, and our tech‑support team can walk you through the wiring over the phone. With the right prep, bridging turns a modest amp into a powerhouse without spending a fortune on a brand‑new unit.
TL;DR
Bridging a 2‑channel amp lets you combine both channels into a single, higher‑output channel, delivering the extra power your subwoofer craves without buying a new amp. Follow our quick step‑by‑step guide, double‑check impedance and fuse ratings, and you’ll hear tighter, deeper bass in minutes, all while keeping your installation safe and budget‑friendly.
Deep Dive: Understanding 2‑Channel Amplifiers
Before we start wiring, it helps to know what a 2‑channel amp actually does for your car audio system. At its core, each channel is a little power plant that takes a line‑level signal and boosts it enough to move a speaker. When you have two of those plants side by side, you get flexibility: one channel can drive a pair of tweeters, the other a mid‑bass stack, or you can merge them for a single, hungry sub.
So, why does that matter when you’re thinking about bridging? In a normal stereo setup each channel sees the full speaker impedance – typically 4 Ω – and delivers its rated wattage. Bridge the amp, and you effectively double the voltage swing across the speaker, which means roughly four times the power if the sub can handle the lower impedance. That’s the magic that turns a modest 200 W per channel amp into a 400‑plus W monster for a single subwoofer.
Key specs you need to read
First, grab the amp’s spec sheet. Look for a line that says “bridgeable” or lists a bridged output rating. Not every 2‑channel amp can be bridged safely – some cheap models will over‑heat or trigger protection mode the moment you try.
Second, note the impedance range for bridged mode. If the amp says 2 Ω–4 Ω bridged, a 4 Ω sub will look like 2 Ω when you bridge, and you need a sub that can handle that load. Many sub‑woofer manufacturers list a minimum impedance; stay within that limit.
What to check before you start
1️⃣ Fuse rating – bridging pulls more current, so make sure your vehicle’s fuse matches the amp’s recommended amperage. 2️⃣ Power wiring – thicker gauge (e.g., 4 AWG) helps keep voltage drop low when you’re demanding extra watts. 3️⃣ Cooling – a bridged amp runs hotter; verify the stock heat‑sink or add a vent if you’re in a hot climate.
Does this feel overwhelming? Not really. Think of it like swapping a two‑lane road for a four‑lane highway – the destination is the same, you just need a wider path to handle the traffic.
Typical use‑cases for car‑audio fans
Automotive installers love bridging when they’re working with limited space but need big bass. A popular scenario is a compact 2‑channel Class‑D amp that fits under a seat; bridge it, and you get enough juice to drive a 12‑inch sub without adding a bulky mono block.
DIY hobbyists often bridge because it saves money. Instead of buying a separate mono amp, they repurpose a spare 2‑channel that’s already in the vehicle. The result is a cleaner install and fewer wires to manage.
And if you’re an installer serving a client who wants a luxury vibe, you can explain that bridging lets you keep the visual profile low while still delivering that thunderous low end that makes a car feel like a concert hall.
Here’s a quick mental checklist before you crack open the amp:
- Is the amp listed as bridgeable?
- Does the subwoofer support the resulting impedance?
- Are your power and ground wires sized for the extra draw?
- Is the fuse rating adequate?
Answer “yes” to all three, and you’re golden.
Now, if you’re still visualizing the wiring, the video below walks you through a real‑world bridge on a popular 2‑channel model. Pause, rewind, and follow along with your own amp – it’s the fastest way to turn theory into sound.
Once the video is done, give your connections a double‑check: red to red, black to black, and make sure the source RCA plugs into the channel you left un‑bridged. Power up, crank the volume, and listen for that deep, tight boom that only a properly bridged amp can produce.
Bottom line: understanding the electrical basics, respecting the amp’s specs, and double‑checking your hardware will let you bridge confidently and safely. Your subwoofer will thank you, and your friends will notice the extra punch the next time you roll through town.
Step 1: Gather the Required Tools and Materials
Before you even think about swapping wires, you need to know exactly what you're reaching for. Have you ever started a bridge and realized halfway through that you left the crimping tool at home? That moment of panic is avoidable.
First up, grab a solid pair of needle‑nose pliers and a wire‑stripping cutter. You’ll be trimming 12‑AWG and 16‑AWG speaker leads, and you want clean, nick‑free ends so the connections stay snug.
A reliable crimping tool (or a set of good quality screw‑terminal connectors) is next. When you press the speaker‑wire onto the amp’s terminals, a firm crimp prevents the metal from vibrating loose under bass thumps.
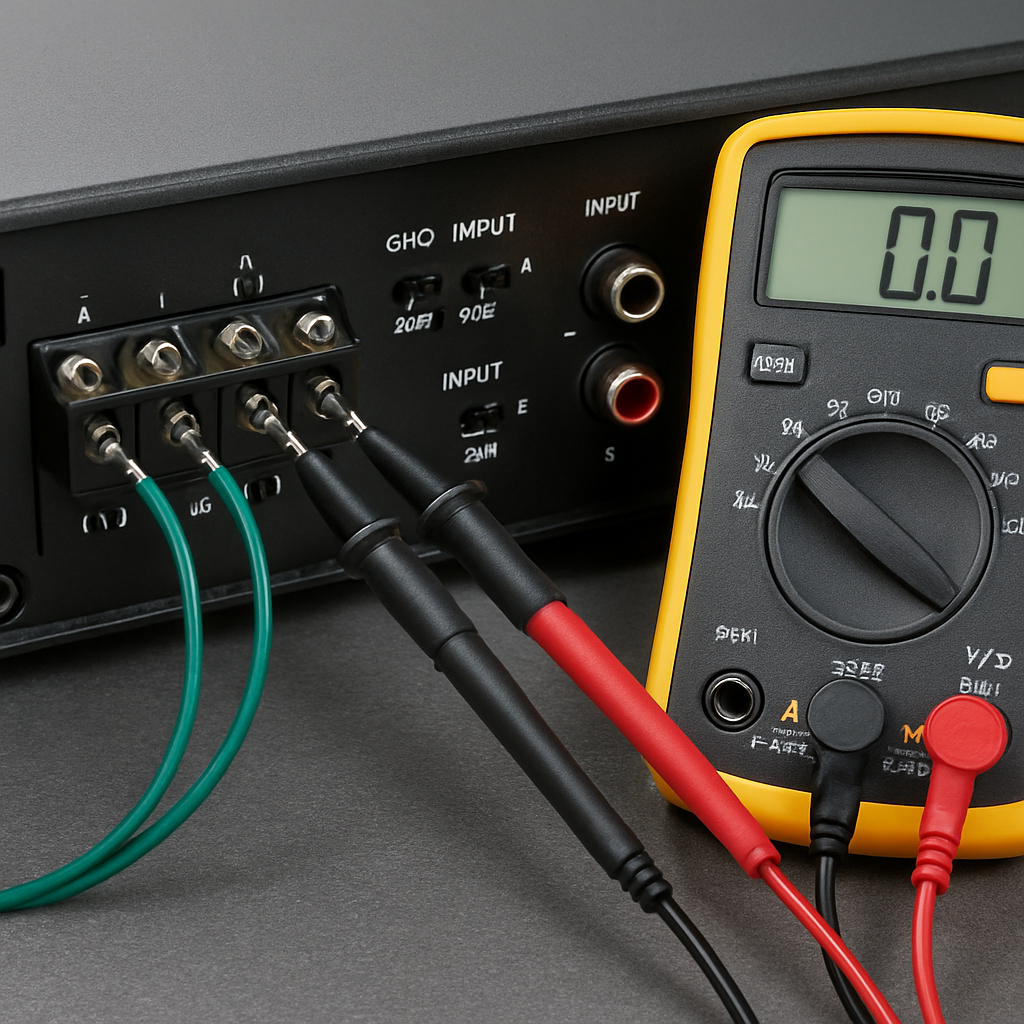
Don’t forget a multimeter. A quick resistance check tells you whether the speaker wire is intact and whether the amp’s bridgeable pins are really shorted together as the manual promises.
Now the power side. You’ll need an 8‑AWG power cable to feed the amp, a fuse holder with the correct amperage (most bridges run at 25 A or higher), and a set of ring terminals that match your battery post.
On the low‑level side, you’ll use the existing RCA cables that came with your head unit, or a fresh pair if the originals are frayed. For the high‑level bridge jumper, a short piece of 12‑AWG speaker wire does the trick.
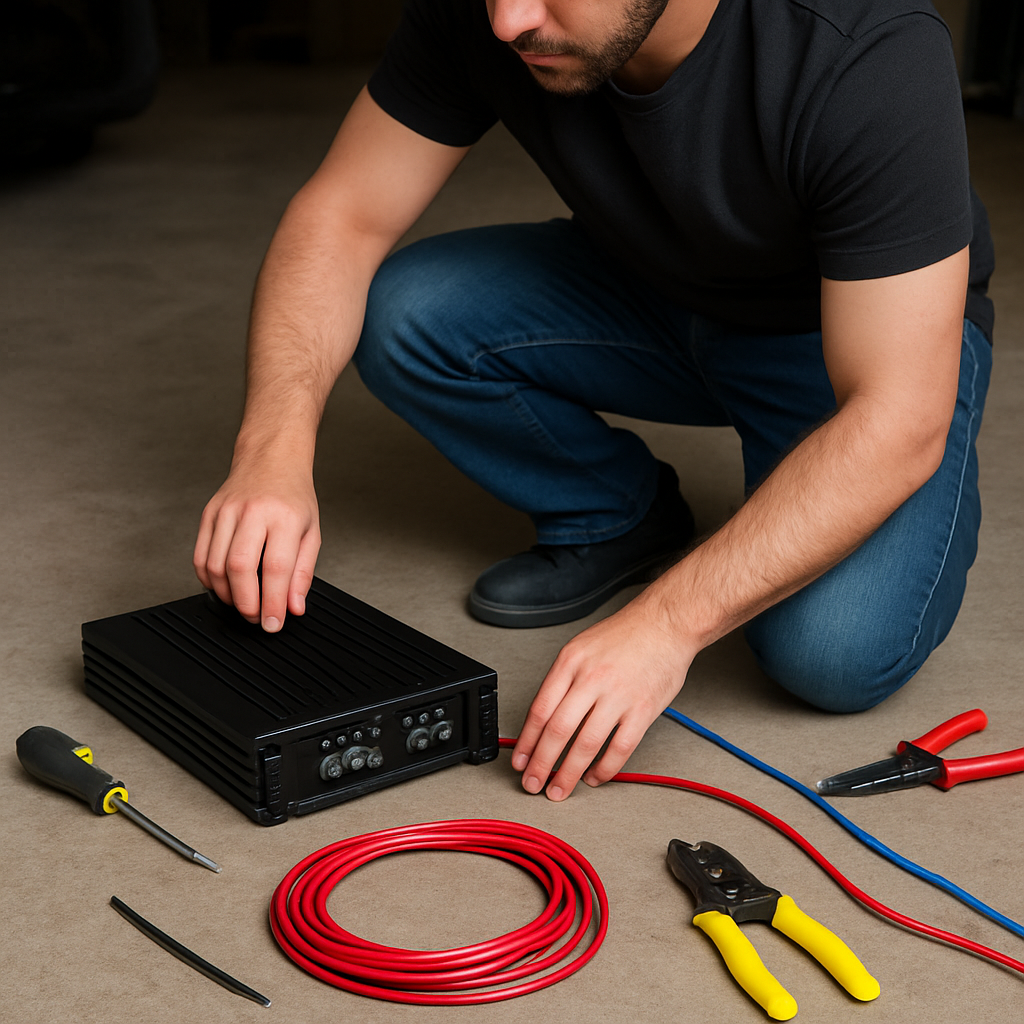
A small screwdriver set (flat‑head and Phillips) helps you loosen the amp’s rear panel, tighten the new jumper, and secure any loose screws you may have loosened while threading the power cable through the chassis.
Heat‑shrink tubing or quality electrical tape is a cheap but effective way to insulate the bridge jumper and any exposed terminals. It also keeps the wiring neat, which is a bonus when you need to troubleshoot later.
If you’re working in a tight dash cavity, a flashlight or a magnetic pick‑up tool can save you from wrestling with hidden bolts. A piece of zip‑tie will keep the power cable tidy and out of the way of moving parts.
Before you even open the amp, double‑check that your specific model is bridgeable. The bridgeable amp specifications list “Bridgeable: Yes,” which gives you confidence that the two channels can be safely tied together.
And finally, have a pen and a notepad handy. Jot down the original wiring layout, the color code of each speaker lead, and any torque specs the manufacturer recommends. A quick photo of the rear panel never hurts either.
Safety first: disconnect the battery before you start pulling any connectors. A quick disconnect prevents accidental shorts that could blow the fuse or, worse, damage the amp.
For a more detailed walk‑through, the official amplifier installation guide walks you through each step with diagrams, ensuring you don’t miss a crucial detail.
Step 2: Identify Bridgeable Channels on Your Amp
Now that you’ve got your tools ready, the next thing you need to know is which pair of channels you can actually bridge. Not every amp lets you tie the outputs together, and trying to force it can end in a fried speaker or a blown fuse.
First, pop the rear panel off and take a quick look at the labeling. Most manufacturers print “CH1”, “CH2”, etc., and often include a tiny “B” or the word “Bridgeable” right next to the channel pair. If you see that little flag, you’ve found your candidates.
Spot the bridge pins
On a lot of dual‑channel amps the bridge pins are simply the positive terminal of one channel and the negative terminal of the other. They’re usually color‑coded – red for +, black for – – but the exact layout can vary. Grab a flashlight and trace the copper traces from the output terminals to the circuit board; the two pins that sit directly opposite each other are the ones you’ll jumper.
What if the amp doesn’t have any obvious markings? That’s where the manual comes in handy. Look for a table that lists “Bridge Mode” or “B‑mode” specifications. It will tell you the exact channel numbers (e.g., 1 & 2 or 3 & 4) and the minimum impedance you can safely load when bridged.
Double‑check the impedance rating
Bridging halves the effective load, so a 4 Ω channel pair becomes a 2 Ω load. Make sure your subwoofer is rated for that lower impedance; most modern subs handle 2 Ω, but it’s worth confirming. If you’re unsure, measure the resistance with a multimeter after you’ve made the jumper but before you connect power.
Another quick sanity check: some amps lock you out of bridge mode unless the power supply can deliver enough current. Scan the spec sheet for a “Current Draw (Bridge)” figure. If it’s higher than your vehicle’s alternator can comfortably provide, you might need a larger fuse or a beefier battery cable.
Write it down before you wire
Grab that notepad you set aside earlier and jot down the exact channel numbers, the colour of each terminal, and any torque specs the manufacturer mentions for the terminal screws. A tiny sketch of the rear panel can save you from swapping wires later.
Pro tip: take a photo of the panel with your phone. When you’re under the dash with limited visibility, a quick glance at the picture can be a lifesaver.
So, how do you actually identify the bridgeable channels? In short: locate the “Bridgeable” label or B‑mode table in the manual, confirm the positive‑negative pin pairing on the board, verify the impedance and current limits, and document everything before you start soldering. Once you’ve crossed those boxes, you’re ready to move on to the wiring stage and finish the how to bridge a 2 channel amp process.
Step 3: Wiring the Bridge – Connect the Channels
Alright, you’ve got your notes, you’ve marked the bridge‑able pins, and the battery’s been disconnected. Now it’s time to actually run the wire and make those two channels behave like a single, hungry mono block.
First thing’s first – grab that short piece of 12‑AWG speaker wire you set aside. It’s the bridge jumper, the little hero that will tie the positive terminal of channel 1 to the negative terminal of channel 2 (or vice‑versa, depending on what your amp’s diagram shows). Cut it a little longer than the distance between the two terminals; you’ll want a little slack to avoid pulling on the solder joints later.
Strip, Twist, and Tin
Strip about ½ inch of insulation from each end. Give the exposed strands a quick twist with your needle‑nose pliers so they stay together. If you’re comfortable with a soldering iron, tin each end – a thin coat of solder makes the final crimp or screw‑terminal connection solid and less likely to vibrate loose under bass thumps.
But what if you don’t have a soldering iron handy? No worries. A good quality crimp connector does the trick just as well. The key is a firm crimp that feels like a tiny bite; you’ll hear a satisfying click when it’s right.
Make the Connection
Place the stripped end onto the positive (+) terminal of the first channel. Tighten the screw just enough to hold the wire snugly – you don’t need to over‑torque, just enough that the wire won’t wiggle. Then repeat the process on the negative (‑) terminal of the second channel. Double‑check that you haven’t mixed up polarity; a quick glance at your earlier sketch will save you a headache.
Once the jumper is in place, give each connection a gentle tug. If anything feels loose, re‑crimp or re‑solder. A solid mechanical bond is half the battle against the inevitable rumble of a subwoofer.
Secure the Rest of the Leads
Now wire your subwoofer’s + lead to the remaining red terminal (the one you didn’t use for the jumper) and the – lead to the remaining black terminal. Use heat‑shrink tubing or electrical tape to insulate any exposed metal – it keeps the dash tidy and prevents accidental shorts when you close the panel back up. Don't forget to route the power cable and ground strap away from any moving parts. Zip‑ties are your friends; a clean bundle not only looks professional but also makes future troubleshooting a breeze.
At this point you might be wondering: "Do I need any extra components?" The short answer is usually no – most bridge‑able amps are designed to handle the extra current as long as you stay within the manufacturer’s impedance limits. If you’re pushing the limits, a beefier fuse (as we mentioned in Step 2) is a wise safety net.
Quick Checklist Before You Power Up
| Task | Tool/Material | What to Verify |
|---|---|---|
| Strip & tin jumper | Wire‑strippers, soldering iron | Clean, tight ends; no stray strands |
| Secure bridge terminals | Crimp tool or screwdriver | Correct polarity, firm screw torque |
| Insulate & route wires | Heat‑shrink, zip‑ties | No exposed conductors, tidy bundle |
Give everything one last visual inspection. Does the jumper sit neatly between the two pins? Are all screws snug but not stripped? Is the subwoofer’s wiring opposite the jumper’s polarity? If you can answer “yes” to all of those, you’re ready for the moment of truth.
Turn the ignition on, let the engine run, and slowly power the amp. Listen for a clean, distortion‑free boom. If you hear any crackle or the amp goes into protection mode, shut it down immediately and re‑check your connections – most issues trace back to a loose jumper or a shorted wire.
Need a little extra reassurance on the theory behind bridging? Sound Certified breaks down the push‑pull concept and why the two channels add their voltages together. Knowing the why can make the how feel a lot less intimidating.
And that’s it. You’ve just turned two modest 4‑ohm channels into a single, beefier output that can drive that subwoofer you’ve been dreaming about. Remember, the magic isn’t in the wire itself but in the careful preparation, the right tools, and a little patience. Happy bridging!
Step 4: Test the Bridge and Fine‑Tune Settings
Alright, the jumper is in place and the subwoofer is wired – now it’s time for the moment that makes all that prep feel worthwhile.
Power‑up checklist
First, double‑check the battery is still disconnected. Re‑attach the negative terminal, then turn the ignition to "run" so the alternator is feeding the amp. Keep a spare fuse handy; if the amp trips, you’ll want to swap it in without hunting for a spare later.
Next, turn the amp on at a low volume. If the unit has a “bridge mode” LED, make sure it’s lit. A quick visual cue tells you the amp has recognised the jumper.
Listening test
Play a familiar bass‑heavy track – something you know inside‑out, like a club remix you’ve listened to a hundred times. Does the sub thump solidly, or is there a thin, tinny squeal?
If you hear distortion, back off the gain knob a few clicks and listen again. The sweet spot is usually a little below the point where the amp starts to “crackle”. Remember, bridging doubles the voltage swing, so the amp can hit its protection circuit sooner than in stereo mode.
So, what should you do if the amp goes into protection? Shut it down, re‑inspect the jumper for any stray strands, and verify the polarity again. A loose strand can look perfect until the bass hits a few seconds later and short‑circuits the bridge.
Fine‑tuning the gain and crossover
Most installers set the gain based on the head‑unit’s output voltage. A good rule of thumb is to start at 50 % of the amp’s max gain, then increase until you hear a clean, punchy bass without any “squealing” when the track peaks.
Adjust the low‑pass filter so the sub only receives frequencies below the speaker’s natural roll‑off – typically 80 Hz to 120 Hz for a 12‑inch sub. If you’re driving a smaller driver, shift the cutoff higher; if it’s a massive 15‑inch, drop it lower for that rumble you love.
Take a moment to walk around the vehicle with the doors closed. Feel the bass in the seat, the trunk, even the dashboard. Small tweaks to the crossover can make the difference between “good” and “wow”.
Troubleshooting with a scope
If you have an oscilloscope handy, probe the speaker outputs while a test tone plays. You should see two clean sine waves that are perfectly in‑phase. Any clipping or asymmetry hints at a bad connection or an over‑driven amp.
For a quick primer on which probe to use and how to set the time base, check out this oscilloscope probe guide. It walks you through the basics without drowning you in jargon.
Need a second perspective? The same forum thread also includes a detailed probe discussion that covers tip capacitance and why a 10× probe is usually best for low‑level speaker signals.
When you’ve dialed in a clean wave, the amp stays out of protection, the sub sings, and you’ve officially turned two modest channels into a single, beefy output. That’s the payoff for taking the time to test and fine‑tune.
Finally, jot down the final gain and crossover settings in your install log. It saves you a headache if you ever need to revisit the system – and it’s a habit we see professional installers at Audio Intensity swear by.
Step 5: Common Mistakes & Troubleshooting
So you’ve wired the bridge and the sub looks ready to roar. But a few tiny oversights can turn that roar into a whimper or, worse, a blown fuse. Let’s walk through the most common slip‑ups we see in the shop and how to sniff them out before they bite you.
Mistake #1 – Swapping polarity on the jumper
It sounds simple, but putting the positive lead on the wrong terminal is a classic “oh‑no” moment. The amp will either go into protection mode or, if you’re lucky, produce a thin, tinny thump. Grab a multimeter, set it to continuity, and give the jumper a quick probe. You should hear a click only when the two pins you intend to tie are touched.
Pro tip: label the ends with a piece of masking tape before you crimp. That extra second saves a lot of head‑scratching later.
Messy wiring – Loose strands or stray wires
Even a single stray strand can short the bridge when the bass kicks in. After you’ve crimped, give each connection a firm tug. If anything wiggles, re‑crimp or re‑solder. Then wrap the joint with heat‑shrink or electrical tape – it’s not just for looks, it’s a safety net.
When we’re troubleshooting a customer’s install, the first thing we ask them to do is a “visual wiggle test.” It catches the majority of intermittent shorts.
Mistake #2 – Ignoring the new impedance load
Bridging halves the effective impedance. A pair of 4 Ω channels becomes a 2 Ω load. If your sub isn’t rated for that, the amp will overheat or shut down. Before you power up, measure the combined resistance with a multimeter. You should see roughly half the original value.
One of our favourite reference points is the Emotiva XPA‑2 Gen3 specs, which clearly list a minimum load of 4 Ω per channel – a good reminder that not every amp can handle a 2 Ω bridge.
Mistake #3 – Forgetting to upgrade the fuse
The bridge draws roughly twice the current. If you keep the stock fuse, you’ll get a sudden pop as soon as the bass hits a peak. Check the amp’s manual for the recommended bridge‑mode fuse rating, then swap it out before the first test.
And don’t just grab the cheapest glass fuse; a slow‑blow type handles the short surge when you first turn the amp on.
Mistake #4 – Skipping the final visual inspection
It’s tempting to rush to “turn it on” after the jumper is in place. But a quick once‑over catches loose screws, mis‑routed power cables, and any exposed conductors that could short against the chassis.
Take a photo of the rear panel once you’re satisfied – it’s a lifesaver when you need to retrace steps later.
Now, if you’ve run into a hiccup despite checking all the above, here’s a rapid‑fire troubleshooting checklist:
- Power off, disconnect the battery.
- Re‑measure the bridge resistance – should be half the single‑channel value.
- Confirm the jumper is solid, no stray strands.
- Verify the fuse rating matches the amp’s bridge specs.
- Reconnect battery, power the amp with the ignition running.
- Listen for a clean, distortion‑free bass note. If you hear clipping, back off the gain by a few clicks.
- If the amp flashes a fault LED, reset the internal circuit breaker (if equipped) and re‑check polarity.
And remember, the quiet moments are where most mistakes surface. Let the amp sit idle for a minute after the first power‑up, then tap the sub’s cone gently. A solid thump without wobble means the bridge is stable.
By keeping an eye on polarity, impedance, fuse size, and that final visual sweep, you’ll turn those common pitfalls into just another check‑list item.
FAQ
Can I bridge any 2‑channel amp?
Short answer: no. Only amps that specifically list “bridgeable” in the manual or spec sheet can handle the extra voltage swing. If the manufacturer doesn’t call out bridge mode, the internal circuitry may overheat or shut down the moment you tie the channels together. That’s why we always double‑check the product sheet before you even reach for a jumper wire.
What impedance will I see after I bridge?
When you bridge, the two speaker outputs end up in series, so the effective load is roughly half the single‑channel rating. A pair of 4 Ω channels becomes a 2 Ω load, while 8 Ω channels become about 4 Ω. Measure the resistance with a multimeter after you’ve made the jumper but before you power up – it’s a quick sanity check that catches wiring mistakes.
Do I need a bigger fuse when I bridge?
Yes, the bridge draws roughly twice the current of a single channel at the same output level. Keep the stock fuse handy for the first test, but swap it for the rating the amp’s bridge‑mode specs recommend – usually a slow‑blow 30 A or 35 A for a 4‑channel, 200 W per channel unit. A proper fuse protects both the wiring harness and your vehicle’s electrical system.
How can I confirm my amp is actually bridgeable?
Open the rear panel and look for a “B” or the word “Bridgeable” next to the channel pair. If the labeling is vague, dig into the user manual – there’s usually a table titled “Bridge Mode” that lists the channel numbers and minimum impedance. When in doubt, give the amp’s support line a call; we at Audio Intensity love helping installers verify specs.
What’s the safest way to test the bridge before I crank the volume?
Start with the battery disconnected, then reconnect it and turn the ignition on while the amp sits at the lowest gain setting. Play a low‑frequency test tone and listen for a clean thump without distortion. If you hear any crackle, power down, re‑inspect the jumper for stray strands, and double‑check polarity. A quick “wiggle test” of each terminal helps spot loose connections before the bass gets aggressive.
Will bridging void the warranty on my amp?
Most manufacturers state that using the amp outside its listed specifications voids the warranty. Since bridging changes the load, you’ll want to follow the exact bridge‑mode guidelines in the manual. If you stay within the recommended impedance and fuse ratings, you’re usually safe. Keep a copy of the installation notes and photos – they’re handy if you ever need to claim warranty support.
Is there any downside to bridging a 2‑channel amp for a subwoofer?
Bridge mode sacrifices stereo separation, so you lose the ability to drive two separate speakers from the same amp. It also puts extra stress on the power supply and can generate more heat, meaning you may need a better ventilation setup or a beefier alternator in high‑power builds. For most car‑audio hobbyists the gain in output outweighs these trade‑offs, especially when the sub is the star of the show.
Conclusion
So you've walked through every step of how to bridge a 2 channel amp, from checking the specs to tightening the jumper and fine‑tuning the gain.
What matters most is that you double‑checked the amp is listed as bridgeable, matched the subwoofer to the new 2 Ω load, and upgraded the fuse before you hit the road. Those three habits keep your system safe and let the bass hit hard without blowing a fuse.
Remember the quick “wiggle test” we mentioned earlier – a loose strand is the silent culprit behind most protection‑mode trips. A solid crimp, a tidy bundle, and a final visual sweep are worth the few extra seconds before you power up.
For car‑audio enthusiasts and professional installers alike, the payoff is simple: a single, beefier channel that lets your subwoofer sing the way you imagined it would. And if you ever need a second opinion, the Audio Intensity team is always ready to help troubleshoot or suggest a bridge‑ready amp.
What’s your next move? Grab your tools, snap a photo of the rear panel, and enjoy that clean, deep thump the first time you fire up the system. Happy bridging!
Remember, a well‑bridged amp can turn any modest sub into a concert‑level rumble that turns heads at the next meetup.


