
Ever grabbed a multimeter and stared at a silent subwoofer, wondering if the problem lives in the speaker itself or somewhere else in the chain? You're not alone – many car‑audio enthusiasts hit that exact moment when the bass just won't rumble, and the first instinct is to reach for a tool that can tell you what's really going on.
Testing a subwoofer with a multimeter is basically a quick health check. It lets you verify that the voice coil isn’t burned out, that the wiring isn’t open or shorted, and that the impedance matches what the amplifier expects. In practice, you’ll be measuring resistance (ohms) across the terminals and comparing that figure to the sub’s specifications.
Here’s a simple three‑step routine we use at Audio Intensity: first, disconnect the sub from the amp and any crossover to isolate it; second, set your digital multimeter to the lowest resistance range and place the probes on the positive and negative terminals; third, read the value. A healthy 12‑inch sub typically shows 2 – 4 Ω for a single‑voice‑coil design, while a dual‑coil model will read half that on each coil.
Real‑world example: a friend was installing a 4‑ohm sub in his 2008 sedan and kept getting distortion. The multimeter read 0 Ω – a dead short. He discovered a stray screw had pierced the voice coil during mounting. Removing the screw restored the correct 4 Ω reading and the bass sounded clean again.
Another scenario involves checking continuity after a long‑term install. Over time, vibration can loosen terminals. By confirming the resistance stays within spec, you avoid surprise amp shutdowns that can fry equipment. If you ever see a wildly higher reading, it usually means a coil is open – the sub will need rewinding or replacement.
Need a deeper dive into why those numbers matter? Our troubleshooting subwoofer impedance guide walks you through interpreting each measurement and matching it to the right amplifier load.
So, grab that multimeter, follow the three steps, and you’ll quickly know whether your subwoofer is ready to deliver thunder or needs a little TLC. Let’s get that low‑end punch back where it belongs.
TL;DR
If your subwoofer sounds weak or silent, a quick multimeter check of resistance tells you whether the voice coil is intact, shorted, or open. Just disconnect the speaker, set the meter to the lowest ohm range, probe the terminals and compare the reading to the spec – you’ll know instantly if the sub needs rewiring, a coil repair, or is ready to roar.
Step 1: Gather Tools and Safety Precautions
Before you even think about probing the terminals, pause and ask yourself: do you have the right gear and a safe workspace? It’s easy to rush in, especially when the bass is dead, but a little prep saves you from a shocked hand or a fried amp.
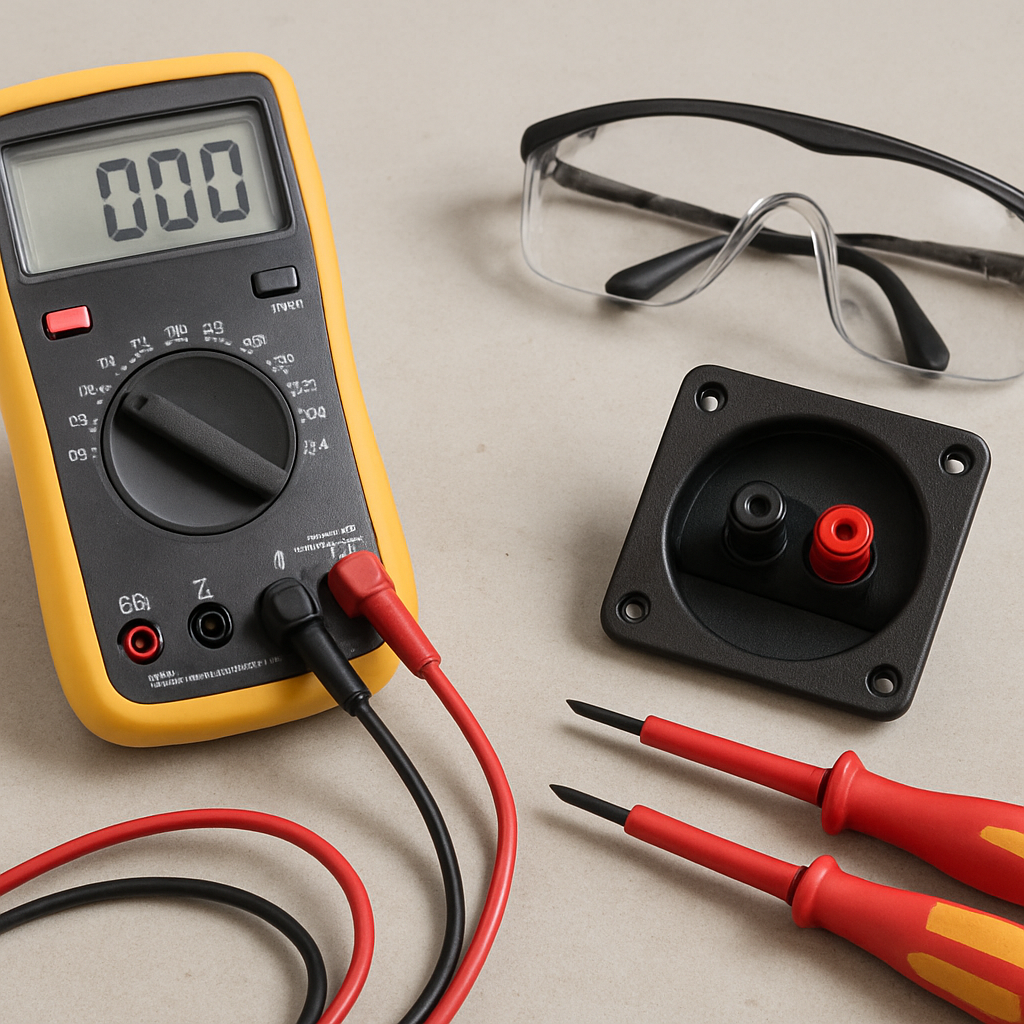
Here’s a quick checklist that we keep in our shop for every sub‑woofer diagnostic:
- A digital multimeter with a dedicated resistance (Ω) setting.
- Insulated screwdrivers – flat‑head and Phillips – for removing panel screws without nicking wires.
- Safety glasses and a pair of snug work gloves; they’re cheap insurance.
- Needle‑nose pliers with insulated grips for coaxing tight terminals.
- Electrical tape or heat‑shrink tubing in case you need to re‑secure a loose splice.
- A small flashlight or a headlamp – car interiors can be a maze of shadows.
Now, safety isn’t just about eye protection. Car audio installations live alongside the vehicle’s high‑current wiring, so you want to make sure the system is completely isolated.
First thing: disconnect the battery’s negative terminal. Even if you’re only dealing with the speaker wires, a stray ground can send a nasty jolt straight through the multimeter probes.
Next, pull the fuse for the amplifier circuit. This does two things – it guarantees the amp is off, and it protects the multimeter from any sudden voltage spikes if you accidentally touch the wrong lead.
Do you remember that one time you tried to test a sub while the amp was still powered? The multimeter fried, and the whole project stalled for days. Yeah, don’t go there.
While you’ve got the battery disconnected, it’s a good moment to clear the work area. Remove any loose tools, trash, or coffee cups that could roll under the seat and become a hazard later.
Another safety tip that often slips by: wear hearing protection if you’re planning to power the sub for a quick sound check after you finish testing. Even a short burst of low‑frequency rumble can be surprisingly loud in a confined car cabin.
Once you’ve got all the tools laid out and the power isolated, you’re ready to move on to the actual measurement. But before you do, double‑check that your multimeter probes are clean and not bent – a damaged tip can give you a false reading and lead you down the wrong troubleshooting path.
That short video walks you through how to safely hook up the multimeter probes to the sub‑woofer terminals. Notice how the presenter always confirms the amp is off before touching any wires – a habit you’ll want to make second nature.
After the video, take a minute to glance at your workspace again. Is there any loose wiring dangling near the battery? If so, tuck it away with zip ties or a piece of electrical tape. A tidy job not only looks professional, it also reduces the chance of a short later on.
When you finally place the multimeter leads on the positive and negative terminals, you should hear a faint click as the probes make contact. That’s the sound of confidence building – you’re about to see a clear resistance value that tells you whether the voice coil is intact, shorted, or open.
Remember, the goal of this step isn’t just to grab a tool and snap a reading. It’s to create a controlled environment where your measurements are reliable and your hands stay safe. Treat the prep as the foundation of the whole troubleshooting process, and the rest of the steps will fall into place much more smoothly.
When you’re done gathering tools and confirming safety, you’ll be set to move on to the actual resistance check without any unwanted surprises.
Step 2: Identify Subwoofer Terminals
Now that your multimeter is ready and the subwoofer is safely unplugged, the next thing you need to do is locate the terminals you’re about to probe. It sounds simple, but a quick glance can save you from a mis‑read later.
Why does it matter? Because the resistance you read is only as good as the points you touch. Hitting a stray metal tab or a grounding screw will show 0 Ω and make you think the coil is shorted.
Start by removing any dust cover or grille that hides the terminal block. Most car‑audio subs have a metal plate with two or four little screws – those are your entry points.
If you’re dealing with a single‑voice‑coil (SVC) sub, you’ll see just one pair of terminals: a plus (+) and a minus (‑). A dual‑voice‑coil (DVC) model doubles that, giving you two pairs that can be wired in series or parallel. For a visual reference, check out these subwoofer wiring diagrams.
On an SVC, the positive terminal is often marked with a red dot, a small “+” stamp, or a copper‑coloured screw. The negative side might have a black‑coloured screw or a “‑” engraving. If the markings are faded, a quick continuity test between the two points will confirm they’re opposite ends of the coil.
A DVC subwoofer will have two sets of +/‑ terminals, usually side by side. One coil might be labelled “A” and the other “B”. When you’re only checking resistance, you can treat each coil separately – just place the probes on one pair at a time.
A small LED flashlight is a cheap but mighty ally here. Shine it into the cavity and you’ll spot the tiny metal tabs that are easy to miss in dim car interiors. Clean any corrosion with a cotton swab and a dab of contact cleaner – a dirty contact can read as infinite resistance.
Polarity matters not just for the multimeter reading but later when you hook the sub back up to the amp. Reversing the leads can cause the sub to be out of phase, resulting in that dreaded ‘thin‑bass’ sound you hate.
Before you snap the probes together, slap a piece of masking tape on each lead and write “+” or “‑” with a permanent marker. When you finish measuring, you can simply match the tape to the terminal markings and reconnect without guessing.
A common pitfall is assuming the chassis ground screw is a speaker terminal. That screw is meant to keep the enclosure grounded and will always read 0 Ω to the negative terminal. If you accidentally probe it, you’ll think the coil is shorted.
Quick checklist before you measure: 1) Identify if it’s SVC or DVC. 2) Locate the + and – markings or colour‑coded screws. 3) Clean any rust or debris. 4) Label each lead. 5) Double‑check you’re not touching the chassis ground.
Once you’ve pinned down the correct terminals, you’re ready to move on to actually measuring the coil resistance. Trust the process, take a breath, and remember that a clean, correctly identified terminal pair is the foundation of an accurate “how to test subwoofer with multimeter” result.
Step 3: Measuring Voice Coil Resistance
Alright, you’ve isolated the terminals and labeled the leads – now it’s time to actually read the coil. This is the moment most car‑audio enthusiasts get nervous about, because a single ohm reading can tell you whether you’re looking at a healthy sub or a dead‑short waiting to fry your amp.
First thing’s first: set your digital multimeter to the lowest resistance range, usually 200 Ω. If your meter has a “µΩ” or “1 Ω” setting, those are even better for catching a short. Turn the dial, hear that tiny click, and you’re ready.
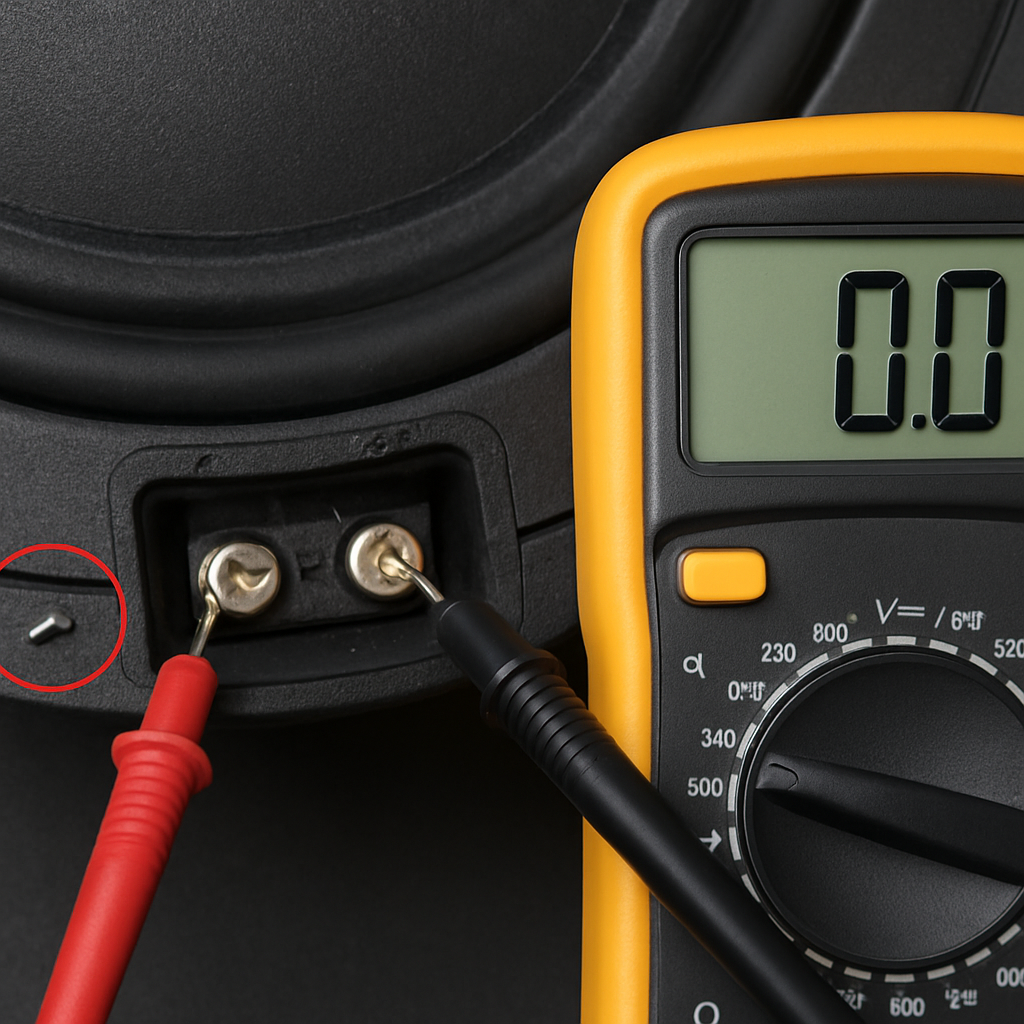
Step‑by‑step probe placement
1️⃣ Grab the red (positive) probe and touch it to the terminal you marked “+”. 2️⃣ With the black (negative) probe, make contact on the “‑” terminal. 3️⃣ Keep both tips steady – even a slight slip can introduce a false reading.
What you’ll see on the display is the coil’s DC resistance. For a typical 12‑inch single‑voice‑coil (SVC) sub, you’re looking at somewhere between 2 Ω and 4 Ω. Dual‑voice‑coil (DVC) models will read roughly half that per coil, so 1 Ω‑2 Ω is normal.
Does the number look odd? Let’s break down the three most common scenarios you might encounter.
What the numbers mean
0 Ω (or a very low reading) – That’s a dead short. It usually means the voice coil wire has touched the frame or a stray screw is bridging the terminals. One of our customers found a tiny mounting screw that had migrated into the coil after a bumpy road trip. Removing the screw brought the reading back up to the spec 4 Ω.
Within spec (e.g., 2.2 Ω for a 4 Ω rated sub) – Good news! Your coil is intact. Remember, the DC resistance will always be a bit lower than the nominal impedance because impedance includes the coil’s inductance at audio frequencies.
Much higher than spec (e.g., 10 Ω or “OL”) – That’s an open circuit. The wire inside the coil has likely broken or the windings have become disconnected. In a recent shop install, a DVC sub’s one coil read 0 Ω while the other read 1.8 Ω. The amp kept tripping because the short was dragging the whole system down. The fix was to replace the coil entirely.
Now, you might wonder: “Should I trust a single reading?” Absolutely not. A quick double‑check eliminates the chance you’re reading a stray metal contact.
Quick double‑check checklist
• Release the probes, then re‑apply them in the opposite order (black first, then red). The reading should stay the same. • Wiggle each probe gently; the value shouldn’t fluctuate wildly. • If you have a second multimeter handy, compare results – a variance of more than 0.2 Ω could signal a meter issue. • For DVC subs, repeat the process on the second coil and note both values.
Pro tip: if you’re dealing with a sub that’s been installed for years, give the terminals a quick spray of contact cleaner before you probe. Corrosion can add a few ohms of resistance and mask a healthy coil.
What about temperature? Resistance rises about 0.4 % per degree Celsius. In a hot summer garage, a 4 Ω coil might read 4.2 Ω – still acceptable. If you see a jump of more than 0.5 Ω, it’s worth letting the sub cool down and measuring again.
Finally, record your numbers. Write them on a sticky note next to the sub or snap a photo of the meter display. When you reconnect the speaker, you’ll have a baseline to compare against after any future work.
So, you’ve taken the multimeter, set the range, probed the terminals, and interpreted the reading. That’s the core of how to test subwoofer with multimeter – a quick, reliable health check that can save you hours of guesswork and protect your amp from nasty overloads.
Next up, we’ll walk through how to wire the coil for series or parallel configurations, but for now, pat yourself on the back. You’ve just turned a mystery into a measurable fact.
Step 4: Interpreting Resistance Values
Now that you’ve got a solid number on the meter, the real question is: what does that ohm reading actually mean for your sub? That’s the part where the magic (or the trouble) happens, and it’s where you turn a simple measurement into a clear diagnosis.
First, remember the spec sheet that came with your subwoofer. Most 12‑inch single‑voice‑coil (SVC) units are rated at 4 Ω nominal, but their DC resistance will sit a little lower – usually between 2 Ω and 3.5 Ω. Dual‑voice‑coil (DVC) models split that, so you’ll see roughly half the value on each coil. If your reading falls comfortably inside those bands, you’ve got a healthy voice coil.
Three‑point sanity check
Before you write a conclusion, run through this quick checklist:
- Is the number within the spec‑range you noted?
- Did you measure both coils (if it’s DVC) and get consistent results?
- Did you re‑probe the terminals in reverse polarity to confirm the reading stays the same?
If you answer “yes” to all three, the sub is likely fine – the problem probably lies elsewhere in the signal chain.
What the numbers tell you
0 Ω or a very low value (‑0.2 Ω to 0.1 Ω) – That’s a dead short. Something is bridging the coil: a stray screw, a busted terminal, or the coil wire rubbing the frame. In the shop, we’ve seen a mounting screw that migrated after a bumpy road trip and caused exactly this. Pull the sub apart, locate the metal contact, and clean or replace the offending piece.
Within spec (e.g., 2.2 Ω for a 4 Ω rated SVC) – Good news. Your coil’s DC resistance is spot on, meaning the wire is intact and the magnetic gap is healthy. Keep in mind that temperature will nudge the number up about 0.4 % per °C; a hot garage can add a few tenths of an ohm, and that’s still okay.
Significantly higher than spec (e.g., 8 Ω, “OL”, or infinite) – That’s an open circuit. The winding has likely broken or the voice coil is disconnected from the terminals. A coil that’s gone open won’t produce any bass, and the amp will see an “infinite” load, often triggering protection mode. The fix usually means rewinding or replacing the sub.
Temperature and age factors
Heat is a silent influencer. As the coil warms up during play, resistance climbs. If you notice a jump of more than 0.5 Ω after a long listening session, let the sub cool and measure again. Consistent drift upward over weeks could hint at a developing short or degraded winding.
Age‑related corrosion on the terminals can also add a few ohms. A quick spray of contact cleaner, followed by a dry wipe, often restores the original reading. We always recommend a visual inspection first – any greenish crust or rust is a red flag.
Quick decision table
| Resistance Reading | What It Means | Next Step |
|---|---|---|
| 0 Ω – 0.1 Ω | Dead short | Inspect for metal bridges, loose screws, or coil contact; clean or replace damaged parts. |
| Within spec (±0.3 Ω of spec) | Healthy coil | Proceed to check wiring, crossover, or amp settings – the sub itself is fine. |
| Above spec >0.5 Ω or “OL” | Open circuit | Confirm with reverse polarity test; likely coil damage – consider rewinding or replacement. |
So, you’ve got a number, you’ve run the sanity check, and you’ve consulted the table. If the reading lines up with “healthy coil,” congratulations – you’ve just eliminated a big chunk of the mystery. If not, you now know exactly where to look next, saving you time and protecting your amplifier from costly overloads.
One last tip: jot the measurement down in your build log, or snap a photo of the meter display. Future upgrades or warranty claims become a breeze when you have that baseline documented.
Armed with this interpretation skill, you can move on to wiring the coil for series or parallel setups with confidence, knowing the voice coil itself is solid. Happy measuring!
Step 5: Checking for Shorts and Opens
Now that you’ve got a clean resistance number, the next thing to ask yourself is: does that number hide a hidden short or an open circuit? A quick sanity check can save you from swapping out a perfectly good sub later on.
First, grab the multimeter again and keep it on the same low‑ohm range you used before. You’re not looking for a new value – you’re looking for consistency.
Confirm the reading twice
Touch the probes to the same terminals you used earlier, then lift them off and swap sides. The display should stay within a few hundredths of an ohm. If it jumps from 2.2 Ω to “OL” the moment you move a probe, you probably have a loose connection or a stray piece of metal touching the coil.
Pro tip: give each probe a gentle wiggle while watching the meter. A stable reading means the contact is solid; a flickering number means something is shifting under the probe.
Spotting a dead short
A dead short shows up as 0 Ω or a reading so low you can’t even see it on the screen. In our shop we’ve seen a tiny mounting screw that migrated into the voice‑coil gap after a rough road trip – the meter instantly read 0 Ω and the amp went into protection mode.
If you suspect a short, disconnect the sub from any crossover or amp, then inspect the back of the enclosure. Look for any stray screws, broken tab, or a piece of wire that might be bridging the + and – terminals. A quick spray of contact cleaner can sometimes dissolve a thin film of corrosion that’s acting like a resistor.
Detecting an open circuit
An open circuit reads “OL”, “1”, or a very high number that’s way outside the spec. That usually means the coil wire has snapped somewhere inside the magnet gap, or the terminal leads have pulled away from the winding.
To double‑check, reverse the polarity of the probes. The reading should still be “OL”. If it flips to a low value, you might be seeing a partial short on one side of the coil – a classic sign of a broken wire that’s still touching the frame.
One trick we use is to apply a tiny amount of voltage (the multimeter’s continuity beep works fine) and listen for a faint click. No click? That’s a strong hint the coil is open.
Quick checklist before you move on
- Read the same value twice, swapping probe order.
- Wiggle each probe – the number should stay steady.
- Visually inspect for metal shavings, stray screws, or corroded terminals.
- Use contact cleaner on dirty contacts and re‑measure.
- If you see “OL”, test both coil halves (for DVC) and reverse polarity.
- Document the final reading in your build log.
Now, picture this: you’ve just measured 2.3 Ω on a 4‑Ω sub, but the amp still complains about a short. You run the checklist, wiggle the probes, and notice the reading spikes when you touch the metal chassis screw. A single stray grounding screw was the culprit – tighten it, re‑measure, and the meter stays steady at 2.3 Ω. Problem solved, no need to replace the sub.
And if you get an open reading? That’s the moment you decide whether to rewind the coil yourself, send the unit back to the manufacturer, or swap it for a fresh sub. Knowing the exact state of the coil saves you time, money, and a lot of frustration when you finally crank the bass.
With the short/open check out of the way, you can move on to wiring the coil for series or parallel configurations with confidence. Remember, a healthy coil is the foundation of any great bass system – and a quick double‑check now prevents a costly amp failure later.
Step 6: Documenting Results and Next Steps
Alright, you’ve finally got that resistance number on the meter – now what? Most installers just stare at the read‑out, celebrate a win, and move on. The real magic happens when you actually write down what you saw and decide what to do next.
Why documentation matters
Think about the last time you swapped a sub in a friend’s car. Did you remember the exact ohm reading you got before you took the sub apart? Probably not, and you probably had to re‑measure just to be sure. A quick note saves you that extra minute of guesswork and, more importantly, gives you a baseline for future troubleshooting.
When you’re testing a subwoofer with a multimeter, the numbers you record become the story you’ll tell your amp, your installer, or even yourself months down the road. It’s the difference between “I think it’s fine” and “I have proof it was X Ω on day Y.”
What to write down
Grab a scrap of paper, a phone note, or a printable worksheet – whatever you keep handy. Include these fields:
- Date and time: a quick timestamp helps when you compare results after a long drive or a hot summer day.
- Vehicle make/model: some cars have grounding quirks that affect readings.
- Subwoofer model and rating: note the manufacturer’s nominal impedance (4 Ω, 2 Ω, etc.).
- Measured resistance: write the exact value the meter displayed, including any “OL” or “1” flags.
- Temperature (if you can guess): a warm garage can add a few tenths of an ohm.
- Observations: “tiny screw touching coil”, “corrosion on terminal”, or “reading jumped after 10 min of play”.
Even a single sentence like “2.3 Ω at 22 °C, no visible debris” can be a lifesaver later.
Creating a simple log
If you’re a car‑audio enthusiast who loves spreadsheets, set up a tiny table with the columns above. For an installer on the go, a quick photo of the meter display next to the sub’s label works just as well – just make sure the date stamp on the phone is visible.
Pro tip: colour‑code the result. Green for “within spec”, amber for “slightly high”, red for “short or open”. Your brain will pick up the pattern at a glance next time you open the file.
Next steps after testing
Now that the data is in front of you, ask yourself: does the reading match what the spec says? If yes, you can move on to wiring the coil for series or parallel configurations with confidence – the coil itself is healthy.
If the number is off, the log tells you exactly where to look. A 0 Ω reading? Pull the sub out, hunt for stray metal or a mounting screw (we’ve all seen that happen after a bumpy road trip). A high‑ohm or “OL” reading? You probably have an open circuit – time to consider rewinding the coil or swapping the sub.
Document the corrective action too. Write “removed stray screw, re‑measured 2.4 Ω” or “sent to factory for rewind, expected replacement date 2026‑03‑15”. That way you won’t forget what you already tried when the amp starts complaining again.
When to revisit the numbers
Resistance can drift over time, especially in a hot engine bay. Schedule a quick check after the first 100 hours of play or after a major temperature swing (like a summer road trip). Compare the new reading to your original log – a jump of more than 0.3 Ω is a red flag worth investigating.
For professional installers, add a line to your service checklist: “Verify subwoofer resistance matches logged value before final amp hookup.” It’s a tiny habit that catches issues before the customer even hears a pop.
And if you ever hand the car off to someone else – a fellow hobbyist, a shop, or a new owner – hand over the log. It’s the ultimate proof that you did the work right, and it builds trust.
Bottom line: documenting the results of how to test subwoofer with multimeter isn’t just paperwork; it’s a roadmap that turns a one‑off measurement into a repeatable, reliable process. So, write it down, note the next move, and keep that bass thumping without surprise failures.
FAQ
What should I do before I start how to test subwoofer with multimeter?
First, disconnect the subwoofer from the amp and any crossover so the circuit is isolated. Then double‑check that the speaker terminals are clean – a quick wipe with a lint‑free cloth and a spray of contact cleaner removes corrosion that can fake a high reading. Finally, set your digital multimeter to the lowest ohm range (usually 200 Ω) and verify the battery is fresh; a weak battery will give jittery numbers that send you down the wrong troubleshooting path.
How do I actually place the probes for an accurate resistance reading?
Grab the red probe and touch it to the terminal marked "+" (or the red‑coloured screw). With the black probe, press the "‑" terminal (often black or marked with a minus sign). Keep both tips steady and avoid touching any metal chassis parts – even a stray screw can short the coil and display 0 Ω. Once the probes are seated, note the value; it should stay steady for a few seconds before you record it.
What resistance value indicates a healthy single‑voice‑coil sub?
For a typical 4 Ω rated sub, the DC resistance you’ll see is usually between 2 Ω and 3.5 Ω. Anything inside that window, give or take 0.3 Ω, means the voice‑coil wire is intact and the magnetic gap is in good shape. Remember, DC resistance is always a bit lower than the nominal impedance because impedance includes the coil’s inductance at audio frequencies.
What does a reading of 0 Ω or near‑zero mean?
A 0 Ω reading is a dead short – the coil’s wire is touching the frame, a mounting screw, or a stray piece of metal. In our shop we’ve found a tiny screw that migrated into the voice‑coil gap after a rough road trip and caused exactly this. The fix is to locate and remove the offending metal, then re‑measure. If the reading stays at zero, the coil itself may be burnt out and needs replacement.
How can I tell if the subwoofer has an open circuit?
An open circuit shows up as "OL", "1" or a very high number far beyond the spec. That usually means the winding inside the coil has broken or the terminal leads have pulled away. To confirm, reverse the probe polarity – the display should still read "OL". If it flips to a low value, you may have a partial short on one side of the coil, which still requires a visual inspection.
Do temperature changes affect my resistance reading?
Yes. Resistance rises about 0.4 % for every degree Celsius the coil warms up. A sub that reads 2.2 Ω at room temperature might show 2.4 Ω after an hour of heavy bass play. That small shift is normal. If you notice a jump of more than 0.5 Ω after the sub cools down, it could signal a developing short or corrosion on the terminals, so give the contacts another clean and re‑test.
How often should I repeat the how to test subwoofer with multimeter process?
We recommend a quick check after the first 100 hours of use or any time you experience a temperature swing – for example after a long summer road trip. Professional installers often add a line to their service checklist: “Verify subwoofer resistance matches logged value before final amp hookup.” Keeping a simple log (date, model, measured ohms, temperature) makes it easy to spot drift and prevents surprise amp failures down the line.
Conclusion
We've walked through every step of how to test subwoofer with multimeter, from spotting the terminals to reading and interpreting the ohms.
So, what does that mean for you? It means you now have a reliable shortcut that catches a bad coil before it burns out an amp, and you can log the numbers to spot drift over time.
Remember the three‑point sanity check: compare the reading to the spec, reverse the probes, and wiggle the leads. If the value stays steady, you’ve got a healthy voice coil.
And if it doesn’t? A quick visual inspection for stray screws or corrosion usually saves the day, and a fresh contact‑cleaner spray can bring a marginally high reading back into spec.
For car‑audio enthusiasts and installers alike, making this a habit after the first 100 hours of play or after a hot summer road trip will keep your system humming.
Take a minute right now to jot down today’s measurement, the temperature, and any quirks you noticed. That tiny note becomes a powerful reference the next time you tweak the amp or swap a sub.
Ready to put your new confidence to work? Grab your multimeter, measure that coil, and enjoy bass that’s solid, safe, and perfectly tuned.