Have Questions? (707) 999-3071
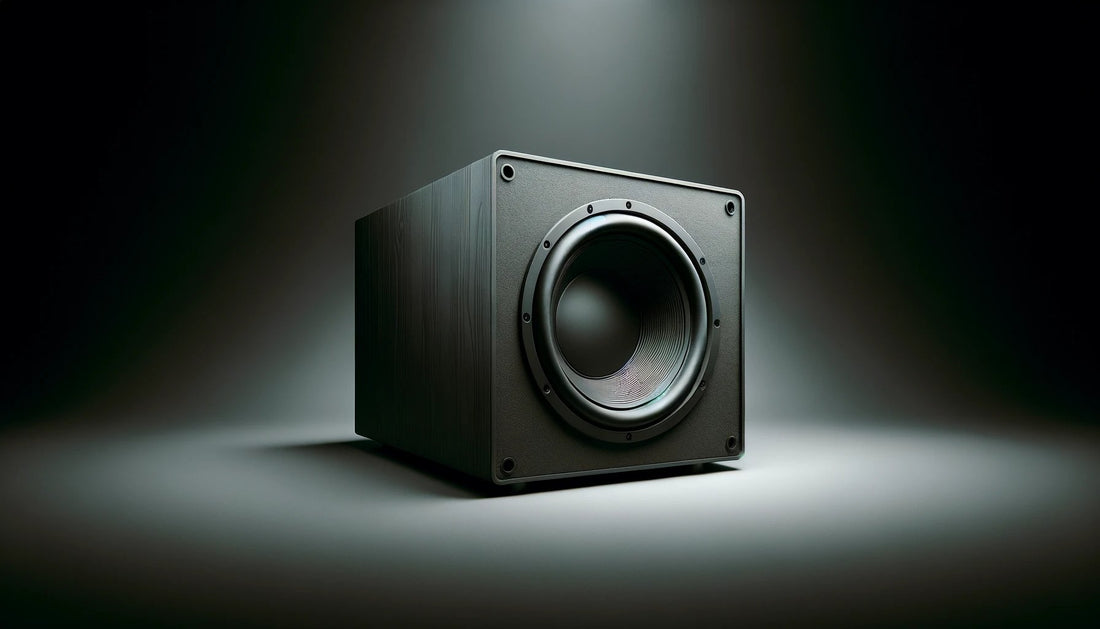
Sealed Subwoofer Box Design Made Easy
Are you a music enthusiast who wants to take your car's audio system to the next level? If so, then you've come to the right place. This article will guide you through designing a sealed subwoofer box. A sealed subwoofer box is an enclosure that houses your subwoofer, enhancing its performance and delivering deep, tight bass.
Understanding the importance of a sealed subwoofer box design and the essential components for building one are the first steps towards achieving the best sound quality in your car's audio system. So, let's dive in and make sealed subwoofer box design easy!
Enhance your car audio system with a sealed enclosure for cleaner bass. Browse our Sealed Subwoofer Enclosures.
Understanding the Importance of a Sealed Subwoofer Box
Regarding subwoofer enclosures, there are two main types: sealed and ported. A sealed enclosure, also known as an acoustic suspension, is a box design that provides airtight, sealed containment for the subwoofer. This design is precisely engineered to deliver deep, accurate bass response without relying on the bass reflex of a ported enclosure. Sealed subwoofer boxes excel in small internal volumes, making them popular for car audio systems with limited space. Their design allows for a flat frequency response and superior transient response, resulting in a tight, accurate bass. Let's compare sealed and ported enclosures and determine which is better for your specific needs.
Subwoofer in Sound Quality
The subwoofer delivers deep, impactful bass in a car audio system that improves sound quality. A sealed subwoofer box enhances the deep bass response, allowing you to feel the music as it was intended. Sealed enclosures excel in small internal volumes, making them perfect for car audio systems.
The subwoofer box volume directly impacts the bass response, and a well-designed sealed subwoofer box ensures a flat frequency response, providing accurate bass reproduction. Additionally, the superior transient response of a sealed subwoofer box allows for precise and quick bass delivery, resulting in a more immersive listening experience.
Sealed vs. Ported: Which is Better?
Now, let's discuss the differences between sealed and ported enclosures. Sealed subwoofer boxes are compact, making them easily fit in tight spaces. They excel in internal volume control, enabling precise tuning of the bass response. Sealed enclosures provide a flat frequency response, ensuring accurate bass reproduction across various frequencies.
On the other hand, ported enclosures utilize a bass reflex port to enhance bass response. While ported enclosures can offer higher bass output at specific frequencies, sealed enclosures typically deliver cleaner, tighter bass. Ultimately, the choice between sealed and ported enclosures depends on your preferences and the specific characteristics you are looking for in your car audio system.
How do you determine the optimal size for a sealed subwoofer box?
Consider the subwoofer's specifications and design goals to determine the optimal size for a sealed subwoofer box. Factors such as cone area, power handling, and desired low-frequency response play a role. It's best to consult with a professional or use online calculators for accurate box-sizing.
Building a Sealed Subwoofer Box
Now that we understand the importance of a sealed subwoofer box let's explore the essential components required for building one. A sealed subwoofer box consists of a speaker driver, box enclosure, and various construction materials. Choosing the right speaker for your box is crucial, as the resonant frequency of the box influences the speaker's performance. Selecting a driver with good power-handling capabilities is essential to ensure optimal sound reproduction.
Additionally, the material selection for the box, such as Medium-Density Fiberboard (MDF), internal bracing, and thickness, plays a significant role in the box's overall performance. Proper measurements and a volume calculator are essential in determining the correct box volume and external dimensions for your sealed subwoofer box design.
Choosing the Right Speaker for Your Box
Several factors come into play when selecting a speaker for your sealed subwoofer box. The resonant frequency of the box plays a crucial role in determining the speaker's performance. Choosing a driver that resonates well with the box's volume is essential, ensuring optimal sound reproduction.
Additionally, the power handling capabilities of the speaker should be considered, as a sealed subwoofer box requires a driver that can handle the required power. The speaker's dimensions, including its total volume and number of drivers, should match the speaker box volume to achieve the best possible sound. You can ensure the highest performance and compatibility by selecting the right speaker for your sealed subwoofer box.
Material Selection for the Box
Choosing materials for constructing a sealed subwoofer box is paramount in achieving the best sound quality. Medium-density fiberboard (MDF) is popular due to its density and rigidity, which helps reduce unwanted resonance. The thickness of the box material also plays a crucial role, as thicker panels provide better sound insulation and reduce panel vibrations. Internal bracing is another critical component, as it adds structural support and reduces box resonances, resulting in cleaner bass reproduction.
The enclosure design, including the dimensions and internal volume, should be considered to ensure a properly sealed subwoofer box design. By carefully selecting the materials for your sealed subwoofer box, you can create a sturdy, well-constructed enclosure that enhances the overall sound quality of your car's audio system.
The Importance of Correct Measurements
Accurate measurements are essential in designing and constructing a sealed subwoofer box. The box volume, external dimensions, and internal bracing must be calculated precisely to ensure optimal performance. Using a volume calculator, you can determine the appropriate box volume based on the specifications of your driver.
This volume directly affects the bass response of the subwoofer. Additionally, the external dimensions of the box must be carefully considered to fit the available space in your vehicle. Accurate measurements are crucial in achieving the desired sound quality and ensuring the sealed subwoofer box performs at its best.
With the help of a volume calculator, you can calculate the correct dimensions for a perfectly tailored sealed subwoofer box.
Designing Your Sealed Subwoofer Box
Now that we have covered the essential components and measurements, let's explore the simple steps in designing a sealed subwoofer box. The design of a sealed subwoofer box starts with determining the correct box dimensions, including the internal volume, cubic feet, and box dimensions. Utilizing an Excel spreadsheet or a specialized box calculator can simplify the design process, providing the necessary dimensions for the box.
To avoid common mistakes, it's crucial to consider the resonant frequency of the box and the displacement of the internal volume due to the speaker driver and port, if applicable. By following these simple steps, you can design a sealed subwoofer box that enhances the bass response of your audio system.
Getting the Right Box Dimensions
The dimensions of the sealed subwoofer box are critical in achieving optimum bass response. Getting the right box dimensions starts with determining the internal volume of the box. The internal volume is typically measured in cubic feet or liters, depending on the design specifications.
Once the internal volume is determined, the dimensions of the box, such as height, width, and depth, can be calculated using the appropriate formulas. An Excel spreadsheet or a specialized box calculator can be used to simplify the design process.
These tools provide the necessary calculations, ensuring accurate box dimensions for the best sound performance. By getting the correct box dimensions, you can create a sealed subwoofer box that maximizes the potential of your subwoofer and delivers the deep, tight bass you desire.
Use an Excel Spreadsheet for Easy Designing
An Excel spreadsheet is a convenient way to design a sealed subwoofer box, as it simplifies the calculations and provides accurate dimensions. Here are some steps to guide you through the process using an Excel spreadsheet:
- Input the desired internal volume of the sealed box into the spreadsheet.
- The spreadsheet will calculate the box's external dimensions based on the enclosure material's internal volume and thickness.
- Use the volume calculator built into the spreadsheet to determine the optimal box volume, considering the resonant frequency of the subwoofer driver.
- Incorporate the box calculator feature of the spreadsheet to adjust the dimensions and internal bracing of the box for optimal sound quality.
- The Excel spreadsheet provides a user-friendly interface, making the design process of a sealed subwoofer box quick and easy. By utilizing the spreadsheet, you can take the guesswork out of designing the box, resulting in a well-tailored enclosure that enhances the performance of your subwoofer.
Avoid Common Mistakes
Designing a sealed subwoofer box requires attention to detail and consideration of various factors. Here are some tips to help you avoid common mistakes and ensure the best performance of your subwoofer box:
- Utilize internal bracing to increase the box's durability and reduce the internal volume.
- Ensure the box design complements the power handling capabilities of your subwoofer.
- Pay careful attention to the dimensions of the box, including external dimensions and internal volume.
- Consider the sealed enclosure's acoustic suspension and transient response for optimal bass reproduction.
- Use a volume calculator to accurately determine the box volume, taking into account the resonant frequency of the box, air spring, and potential port displacement. Following these tips, you can design a sealed subwoofer box with the best possible sound quality and performance.
Building a Sealed Subwoofer Box
Now that you have the design and dimensions of your sealed subwoofer box, it's time to bring it into reality. Building a sealed subwoofer box involves a step-by-step process, including assembling the box, sealing, mounting the subwoofer, and internal bracing. The enclosure volume, calculated during the design phase, will determine the internal dimensions of the box. With the help of the appropriate tools, such as a saw, screwdriver, and adhesive, you can assemble the box, ensuring airtight construction. By systematically following the assembly steps, sealing the box, and incorporating internal bracing, you can create a sealed subwoofer box that maximizes the performance of your subwoofer.
Tools You'll Need
You'll need a few essential tools to build a sealed subwoofer box successfully. Here are the tools you should have on hand:
- Saw: A saw is necessary for cutting the box panels to the correct dimensions.
- Screwdriver: You'll need a screwdriver to secure the box panels together.
- Adhesive: An adhesive, such as wood glue, helps reinforce the connections between the box panels, ensuring a sturdy construction.
- Tape Measure: A tape measure is essential for accurately measuring the box's dimensions.
- Clamps: Clamps come in handy during the assembly process, helping to hold the box panels in place while the adhesive dries.
With these tools readily available, you'll be well-equipped to build a sealed subwoofer box that enhances the bass response of your audio system.
Step-by-Step Guide to Assembly
Assembling a sealed subwoofer box requires a systematic approach to ensure a properly constructed enclosure. Here is a step-by-step guide to help you through the process:
- Cut the box panels to the dimensions determined during the design phase using a saw.
- Apply adhesive to the edges of the box panels and secure them together, using a screwdriver to insert screws for added reinforcement.
- Ensure the box is airtight by sealing all panel joints with adhesive or silicone caulk.
- Mount the subwoofer securely in the box, ensuring a tight fit and proper alignment.
- Incorporate internal bracing within the box to reduce vibrations and reinforce the structure.
- Test the box's airtightness by pressing down on the panels to check for any air leaks and seal if necessary.
- Install the sealed subwoofer box into your car's audio system, connecting it to the amplifier.
- Following these step-by-step instructions, you can assemble a sealed subwoofer box that delivers the best possible sound quality, bass response, and durability.
Fine-Tuning and Testing Your Subwoofer Box
Now that you have constructed your sealed subwoofer box, it's time to fine-tune and test it to ensure optimal performance. Fine-tuning involves optimizing the subwoofer box design and speaker parameters to achieve the desired sound characteristics. You can fine-tune the box by adjusting the internal volume using sound-damping materials, such as stuffing or acoustic foam. Testing the subwoofer box involves measuring the resonant frequency, frequency response, and overall sound quality. By fine-tuning and testing your sealed subwoofer box, you can optimize its performance and achieve the best possible bass response.
The Role of 'Stuffing' in a Subwoofer Box
Stuffing, or damping material, plays a significant role in a subwoofer box design, particularly in sealed enclosures. Stuffing refers to placing sound-absorbing materials inside the subwoofer box, such as acoustic foam or polyfill. The purpose of stuffing is to reduce internal resonances and eliminate unwanted vibrations, resulting in a cleaner and better-defined bass response. Additionally, stuffing can increase the perceived volume of the box, making the subwoofer appear more significant than its actual size. Placing stuffing material within the sealed subwoofer box can enhance the overall bass response and achieve a more immersive listening experience.
How to Measure the Resonant Frequency of Your Subwoofer
Measuring the resonant frequency of your subwoofer is an essential step in optimizing its performance. The resonant frequency is the frequency the subwoofer naturally resonates, producing the best bass response.
To measure the resonant frequency, you can use a frequency response chart, which plots the subwoofer's output at different frequencies. By analyzing the response curve, you can identify the resonant frequency of the subwoofer. Another technique is using a resonant frequency calculator, which calculates the resonant frequency based on the subwoofer driver's parameters and the subwoofer box's dimensions. By measuring the resonant frequency, you can fine-tune the subwoofer box design and optimize its performance for the best bass response.
Advanced Techniques for Subwoofer Box Design
For those seeking the utmost in subwoofer box design, advanced techniques involving acoustic engineering and precision crafting can take your audio system to the next level. Acoustic engineering involves a deep understanding of the physics of sound, allowing for the design of subwoofer enclosures that minimize resonances and maximize bass response.
Precision crafting ensures the highest level of construction quality, with precise measurements, tight tolerances, and attention to detail. By implementing these advanced techniques, you can achieve unparalleled sound quality, accuracy, and bass reproduction in your subwoofer box design.
Understanding Loudspeaker Measurements
Understanding loudspeaker measurements is essential for advanced subwoofer box design. The Thiele-Small parameters are a set of measurements describing a loudspeaker driver's behavior. These parameters include resonant frequency, compliance, and electrical impedance. By analyzing the Thiele-Small parameters, you can gain insights into the driver's characteristics and design a subwoofer box that optimizes performance.
Frequency response measurements are also crucial, as they indicate the range of frequencies the subwoofer can accurately reproduce. By considering loudspeaker measurements, you can design a subwoofer box that complements the driver's characteristics, resulting in the best possible bass response and overall sound quality.
How to Design Speaker Crossovers
Another advanced technique in subwoofer box design is the design of speaker crossovers. Crossovers are electronic circuits that divide the audio signal into different frequency bands, directing bass frequencies to the subwoofer and other frequencies to the main speakers. Designing speaker crossovers involves determining the crossover frequency, slope, and phase alignment to optimize the subwoofer's performance.
By carefully designing the crossovers, you can seamlessly integrate the subwoofer with the main speakers, ensuring a balanced frequency response and optimizing loudspeaker output. Loudspeaker optimization through the design of speaker crossovers allows for precise control over the subwoofer's bass response, resulting in a highly accurate and immersive listening experience.
Reviewing the Impact of Your Sealed Subwoofer Box Design
As you have learned, an adequately designed sealed subwoofer box can significantly impact the sound quality of your car's audio system. By selecting the right speaker, materials, and dimensions, you can optimize the subwoofer's bass response, transient response, and overall sound reproduction.
The sealed enclosure design ensures a flat frequency response, deep bass, and improved transient response, resulting in a more accurate and immersive listening experience. Carefully considering the resonant frequency, volume, and internal bracing further enhances the sealed subwoofer box's performance.
By reviewing the impact of your sealed subwoofer box design, you can appreciate the improvements in sound quality and bass response achieved through the design and construction process.
How Did Your Subwoofer Box Design Improve Your Sound Quality?
By designing and constructing a sealed subwoofer box, you have taken a step towards improving the sound quality of your car's audio system. With the perfect volume and dimensions, the sealed box design enhances the deep bass response, resulting in a more impactful and immersive listening experience.
The flat frequency response of a sealed subwoofer box ensures accurate sound reproduction, allowing you to hear the music as the artist intended. Additionally, the improved transient response of the subwoofer, provided by the sealed enclosure, contributes to the clarity and definition of low-frequency notes.
Overall, your subwoofer box design has the potential to bring out the best in your subwoofer, delivering deep, tight bass and a flat frequency response, ultimately enhancing the overall sound quality of your car audio system.
Conclusion
In conclusion, designing a sealed subwoofer box is essential for achieving optimal sound quality. By understanding the importance of a sealed box and its role in enhancing the performance of your subwoofer, you can make informed decisions during the design process. Selecting the right components, such as the speaker and materials, and taking accurate measurements are crucial for a successful design.
Additionally, following the step-by-step guide and avoiding common mistakes will ensure a well-built box. Fine-tuning and testing your subwoofer box, including stuffing and measuring the resonant frequency, allows you to optimize its performance. For those looking to take their skills to the next level, advanced techniques like understanding loudspeaker measurements and designing speaker crossovers can further enhance your design.
Ultimately, reviewing the impact of your sealed subwoofer box design on sound quality will demonstrate the effectiveness of your efforts.