Have Questions? (707) 999-3071

Mastering How to Build a Subwoofer Box: Expert Advice
Mastering How to Build a Subwoofer Box: Expert Advice
For audiophiles eager to enhance the bass in their vehicle's sound system, mastering how to build a subwoofer box for deep bass is invaluable. This DIY endeavor amplifies the depth and clarity of your music and adds a personalized touch to your car's audio setup. Throughout this article, we'll guide you through the nuances of creating a custom subwoofer box, covering everything from the acoustic benefits of a well-designed enclosure to a detailed walkthrough of the construction process. Embarking on this project will elevate your listening experience and provide a sense of achievement in tailoring your car's audio system to your preferences.
Diving into the project of how to build a subwoofer box is a thrilling challenge for any music lover looking to boost their car audio system's performance. This hands-on task allows you to customize your audio experience, ensuring your subwoofer delivers powerful and precise bass. As we explore the critical aspects of subwoofer box construction, including subwoofer box design, material selection, dimension calculations, and assembly techniques, you'll gain the knowledge and confidence needed to construct an enclosure that complements your subwoofer and enhances the overall sound quality of your system. Let's begin this exciting journey to crafting a subwoofer box that brings out the best in your car's audio capabilities.
How to Build a Subwoofer Enclosure

Regarding car audio, the subwoofer box plays a crucial role in the overall sound quality of your system. A subwoofer box, also known as a subwoofer enclosure, is a specially designed enclosure for your subwoofer that helps to enhance the bass response and deep bass extension. Without a proper subwoofer box, your subwoofer may sound boomy, lack definition, and produce muddled bass. Explore why a subwoofer box is essential for your car audio system.
Role of a Subwoofer Box in Enhancing Sound Quality
A subwoofer box serves several vital purposes when it comes to sound quality. Firstly, it prevents sound leaks, ensuring that the bass produced by your subwoofer is directed into your car's cabin rather than escaping into the trunk or other areas of the vehicle. Sound containment helps improve the bass reproduction and prevents the bass from sounding weak or muffled.
Secondly, a subwoofer box's enclosure helps eliminate resonance and distortion. When a subwoofer operates, it produces sound waves at various frequencies, including the resonant frequency of the subwoofer itself. Without a box to control the resonance, the sound waves can interact with the internal components of the subwoofer, causing distortion and muddiness in the bass.
Additionally, a subwoofer box provides the appropriate volume for the subwoofer to operate optimally. Subwoofers are designed to work within a specific air volume, known as the box volume, to achieve the best sound quality. Having the proper box volume for your subwoofer ensures it can move the appropriate air to produce deep, impactful bass.
Lastly, the subwoofer box's design can significantly impact your system's sound quality. Different box designs have unique characteristics and sound signatures, such as ported boxes, sealed boxes, bandpass boxes, infinite baffle boxes, and transmission line boxes. Choosing the right box design for your subwoofer can significantly affect your system's sound quality, bass response, and accuracy.
Choosing the Right Subwoofer for Your Box

Before building your subwoofer box, you must choose the right one for your system. There are a few key factors to consider when selecting a subwoofer to ensure compatibility with your box design and desired sound quality.
Firstly, you need to consider the specifications of the subwoofer, such as power handling and sensitivity. Power handling refers to how much power the subwoofer can handle, while sensitivity refers to how efficiently the subwoofer converts power into sound. Matching the specifications of the subwoofer to your amplifier's power output is crucial to ensure proper performance and avoid damaging your subwoofer.
Next, you need to match the subwoofer's mounting depth to the available internal volume of your box design. The mounting depth is the length of the subwoofer from the front of the mounting flange to the back of the magnet structure. It's essential to ensure your box design has enough internal volume to accommodate the subwoofer, including the mounting depth, to prevent fitment issues.
Furthermore, the subwoofer manufacturer recommends the appropriate box volume for optimal sound quality. These recommendations are based on the subwoofer's specifications, such as the size of the subwoofer, the type of enclosure, and the desired bass response. Following the manufacturer's box volume recommendations will help maximize your subwoofer's performance.
Another consideration is the configuration of the subwoofer, whether it is a single subwoofer or a dual subwoofer setup. The configuration of the subwoofer will determine the appropriate box design. For example, a single subwoofer may require a sealed box, while a dual subwoofer setup may require a ported box design. Choosing a subwoofer configuration that complements your sound system and the desired bass response is essential for a well-balanced sound.
In conclusion, choosing the right subwoofer for your box involves considering the specifications of the subwoofer, matching the mounting depth to your box design, following the manufacturer's recommendations for box volume, and selecting the appropriate configuration for your system. Researching and making the right choice will ensure that your subwoofer performs optimally and delivers the bass experience you desire.
Essential Tools and Materials for How to Make a Subwoofer Enclosure

So, as we further discuss how to make sub boxes for deep bass, it's crucial to understand the importance of the subwoofer box design and have chosen the correct subwoofer for your system. Gathering the essential tools and materials for building your subwoofer box is the next step. Here are the tools and materials you will need to get started:
- Jigsaw: A jigsaw is a versatile power tool that will be your best friend for making the necessary cuts in the wood panels of your subwoofer box. Use a jigsaw with a fine-toothed blade for clean, precise cuts.
- Screws, Liquid Nails, or Wood Glue: These are the primary methods for joining the panels of your subwoofer box together. Choose the method that suits your preference and provides a robust and secure bond for your box.
- Silicon Caulk: Silicon caulk is essential for sealing the inside edges of your subwoofer box to prevent air leaks. Air leaks can significantly affect the sound quality of your bass, so make sure to caulk all the internal seams of your box for a proper seal.
- Router: While not essential, a router can be a helpful tool for creating speaker wire connectors and terminal cup holes in your subwoofer box. It allows for a clean, professional finish and makes wiring easier.
- Measuring Tape: Accurate measurements are crucial for building a subwoofer box that meets the specifications of your subwoofer. Use a measuring tape to measure the internal volume of your box to ensure the appropriate box volume for your subwoofer.
Safety Measures while Handling Tools
Before diving into the construction of your subwoofer box, it's essential to prioritize safety. Here are a few safety measures to keep in mind when handling your tools:
- Always wear appropriate safety gear, such as goggles and gloves, to protect your eyes and hands from hazards.
- Use pipe or bar clamps to secure the wood panels during cuts to prevent them from shifting, reducing the risk of accidents.
- Follow the manufacturer's instructions for the proper use of your power tools. Using power tools without proper knowledge can lead to accidents or damage to the tools.
- Be cautious of the sharp edges of the wood panels to avoid cuts or other injuries. Sanding the edges of the panels can help to smooth out any rough edges for a safer workspace.
- Keep your work area clean to prevent tripping hazards and make the construction process more accessible. A cluttered workspace can make it challenging to maneuver your tools and increase the risk of accidents.
By following these safety measures, you can focus on constructing your subwoofer box with peace of mind, knowing that you are taking the necessary precautions to ensure a safe working environment.
Planning Your Subwoofer Box Design

Now that your tools and materials are ready, it's time to start planning your subwoofer box design for optimal deep bass. Planning your design is crucial to ensure that your box meets the specifications of your subwoofer, provides the desired bass response, and fits seamlessly into your car audio system. Let's explore the different types of subwoofer box designs to help you decide on your build.
How Does the Design Impact the Sound?
The design of your subwoofer box significantly impacts the sound quality of your car's audio system. Let's explore how each box design influences the sound:
- Ported Box Design: A ported box design offers louder bass, thanks to the ported design, which allows for more air transfer. However, the bass quality and accuracy may be slightly compromised compared to a sealed box design.
- Sealed Box Design: A sealed box design provides a tighter, more controlled bass response, producing more accurate bass reproduction. However, a sealed box design may require more amplifier power to achieve the desired volume levels.
- Bandpass Box Design: A bandpass box design emphasizes a specific frequency range for a unique sound signature. It can deliver a more pronounced bass, but the system's overall sound quality and accuracy may be compromised.
- Infinite Baffle Box Design: An infinite baffle box design, due to the ample enclosure space, can provide deep, impactful bass. However, the design may not be suitable for all vehicles, as it requires a proper seal in the car trunk or a large enclosure.
- Transmission Line Box Design: A transmission line box design enhances the bass quality and extends the bass response of the subwoofer. However, designing a transmission line box can be more challenging to design and construct accurately. If you want to learn more, check our blog for more articles.
Choosing the right box design for your subwoofer depends on your preferences, the sound quality you desire, and the specifications of your subwoofer. It's essential to consider the pros and cons of each design to make an informed decision for your build.
Step-by-Step Guide to Constructing Your Subwoofer Box

Now that you have a solid understanding of the importance of a subwoofer box in achieving deep bass, how to choose the right subwoofer, the essential tools and materials, the safety measures, and the different box designs, it's time to dive into the step-by-step process of constructing your subwoofer box. Let's get started! Before we start, Do you have all the build materials needed to complete your sub-enclosure?

Embarking on the journey to build your own subwoofer box is an exciting endeavor that marries creativity with technical acumen. This process begins with a clear understanding of your enclosure's desired cubic feet or cubic foot volume. This critical factor influences the speaker's ability to reproduce lower frequencies accurately. The volume of the enclosure plays a pivotal role in achieving that deep, resonant bass that audiophiles crave.
Whether your aim is a compact, small box that fits snugly in your space or a larger enclosure that allows for more substantial sound waves, starting with a clear plan is essential. This initial phase sets the foundation for a project that enhances your listening experience and gives you the satisfaction of having crafted something truly unique.
Kickstarting Your Project: Crafting a Basic Subwoofer Enclosure
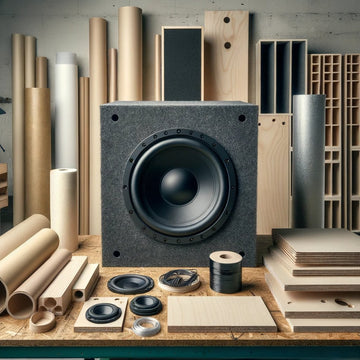
The initial phase of your subwoofer box project involves meticulous planning and precise calculation of the total area and volume your speaker enclosure will occupy. Choosing the right materials is paramount, with medium density fiberboard (MDF) being popular due to its excellent acoustic properties and durability.
Determining the depth of the box is crucial as it impacts the overall volume and, consequently, the sound quality of your subwoofer. During this stage, consider the box size and how it will house your subwoofer speaker, ensuring ample space for the speaker hole and internal components. Sketching out your design with these factors will guide you in creating an enclosure that meets your sound quality expectations and aesthetic preferences.
Blueprinting Your Build: Calculating Volume Requirements

Calculating the volume of your enclosure is a critical step in ensuring your subwoofer performs optimally, especially when reproducing lower frequencies. The box size plays a significant role in the subwoofer's frequency response, with larger enclosures often providing deeper bass.
However, whether a large ported enclosure or a more compact sealed box, the box's design will also affect the sound output. Taking the time to accurately calculate the cubic feet required for your desired sound profile will pay off in the long run, ensuring your subwoofer delivers the expected performance.
Initial Planning and Design
Accurate Volume and Enclosure Type Selection:
- Begin with a thorough analysis of your subwoofer's Thiele/Small parameters. These parameters dictate the optimal enclosure size and type for your specific driver, influencing how it will perform in terms of bass response and efficiency.
- Decide on the type of enclosure: sealed for tight and accurate bass, ported for more volume and efficiency in the bass response, or bandpass for a specific frequency range. Each has its advantages and design complexities. WinISD is a free solution to get started.
Detailed Sketching and Blueprinting:
- Use detailed drawings to map out the dimensions and layout of your enclosure, including internal bracing, the subwoofer and port positions, and any other components like terminal cups or passive radiators.
- Consider software tools for a more precise design process, allowing for easy adjustments and a 3D view of the enclosure. This can be invaluable for visualizing how all pieces fit together. Sketchup will get you started.
Gathering Your Gear: A Checklist of Essentials

Once your final design is in place, it's time to gather the materials and tools needed for the build. This includes medium density fiberboard (MDF) for the enclosure, a reliable saw for making precise cuts, screws for assembling the panels, and silicone caulk for sealing the box. Ensuring you have all the necessary components before construction will streamline the building process and help avoid unnecessary interruptions.
Choosing Optimal Materials:
- Beyond the standard MDF, materials like Baltic birch plywood offer excellent strength and acoustic properties, albeit at a higher cost. Weigh the benefits of each material in terms of sound quality, durability, and aesthetics.
- Consider using specific acoustic damping materials for the interior to minimize resonance and standing waves. Materials like polyfill can effectively make the box appear larger acoustically to the subwoofer, improving low-frequency response.
Precision in Practice: Laying Out Your Cut Lines

The accuracy of your cut lines is paramount to the success of your project. Carefully measure and mark the MDF panels where each cut will be made, ensuring that all pieces will fit perfectly to form a sturdy, rectangular box. This step requires patience and precision, as even minor discrepancies can lead to gaps or misalignments that may compromise the sound quality of your subwoofer.
Precise Panel Cutting:
- Invest time in measuring and marking your panels accurately, considering the saw's blade thickness in your measurements to ensure precision cuts.
- Use a straight edge or guide with your saw to maintain straight lines, especially for longer cuts. This can significantly impact the fit and finish of your enclosure.
The Preliminary Step: Drilling Guide Points
Before assembling the cut panels, it's essential to drill pilot holes at the designated screw locations. This will facilitate the process of screwing the panels together, preventing the MDF from splitting and ensuring a tight, secure fit. The placement of these screw holes is crucial for the structural integrity of the box and should be planned carefully during the design phase.
Secure Drilling and Fastening:
- Pre-drilling pilot holes are crucial for preventing the wood from splitting when inserting screws, especially near the edges. Use a drill bit slightly smaller than your screw diameter for a tight fit.
- For an even stronger bond, consider using wood glue along the joining edges before screwing the panels together and adding clamps until the glue sets for additional strength.
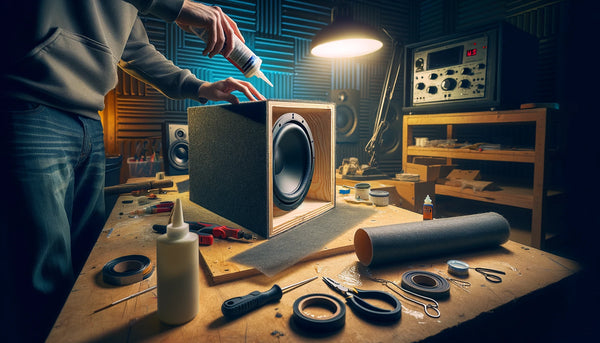
Bringing It All Together: From Bare Bones to Carpeted Finish
With all the pieces cut to specification, the next step is to assemble the box by attaching the panels using the pre-drilled screw holes. Applying silicone caulk to the interior seams of the box will seal it, making it airtight and enhancing the sound quality of your subwoofer. Once the structure is assembled, you can finish the exterior with carpeting or paint to match your style and the car's decor.
Airtight Sealing and Effective Damping:
- Ensure every joint and seam inside the box is glued with wood glue and then sealed with silicone caulk to prevent air leaks, which can significantly degrade sound quality.
- Internal bracing should be strategically placed to reinforce the box without reducing internal volume. Braces can also help break up standing waves inside the box, contributing to a cleaner sound.
The Final Touches: Sealing and Testing Your Creation
After the subwoofer box is fully assembled and finished, the last step is to install the subwoofer speaker into the precisely cut speaker hole and secure it in place. It's crucial to ensure the speaker is mounted correctly and the enclosure is sealed tightly to prevent air leaks, which can significantly affect sound quality. This might involve adding additional silicone caulk around the speaker rim to ensure an airtight seal.
Once the speaker is installed, the final step is to connect the subwoofer to your audio system and conduct thorough testing. Play various music tracks or audio tests to evaluate the subwoofer's performance across different frequencies. Pay special attention to the lower frequencies to ensure the enclosure delivers the deep, resonant bass you aimed for. This testing phase is vital for identifying any issues that might require adjustments, such as additional sealing or modifications to the enclosure.
- Sand the box thoroughly, starting with coarser grit sandpaper and progressing to finer grits for a smooth finish. Pay special attention to corners and edges.
- Choose a finish that complements your interior and personal taste. Apply a primer first for better adhesion and a smoother finish for paint. Use spray adhesive for a secure fit for carpeting and trim precisely for a professional look.
You can achieve a custom-built subwoofer box that enhances your audio system with superior bass and sound quality through careful planning, precise construction, and thorough testing. This project provides a rewarding DIY experience and offers the satisfaction of enjoying a high-quality audio component explicitly tailored to your preferences and needs.
The craftsmanship in building your subwoofer enclosure goes beyond just creating a functional piece; it's about adding a personal touch to your audio system, ensuring that every beat and bassline is experienced just how you like it. As you enjoy the fruits of your labor, remember that the journey doesn't necessarily end here. The world of DIY audio allows for continuous learning and improvement. You might find yourself revisiting your design, experimenting with different materials, or even building a larger ported enclosure to refine the sound quality further.
Additionally, sharing your project with others can provide valuable feedback and inspire new ideas for future builds. Engaging with the DIY audio community can open up a wealth of knowledge and tips for enhancing your designs and achieving even better sound performance.
Building your subwoofer box is as much about the journey as the final product. It's a testament to the power of DIY, showcasing how a combination of technical knowledge, creativity, and dedication can lead to remarkable results. Whether you're enjoying your favorite music, immersing yourself in a movie, or enhancing your gaming experience, the subwoofer box you've created will constantly remind you what you can achieve with effort and passion for audio excellence.
Enhancing Your Bass: Advanced Modifications for Optimal Subwoofer Performance

Exploring advanced modifications for subwoofer boxes can significantly enhance the performance and customization of your audio setup. These modifications often involve more complex design considerations and construction techniques. Still, they can substantially improve sound quality, particularly for audiophiles seeking the utmost bass precision and depth. Here are some advanced modifications you might consider:
Building a Ported Enclosure
Ported (or bass-reflex) enclosures are designed with a vent (port) that allows air to move in and out, enhancing the system's efficiency at lower frequencies. This design can produce more pronounced bass compared to sealed boxes.
- Design Considerations: The size and length of the port must be carefully calculated based on the Thiele/Small parameters of the subwoofer to avoid unwanted port noise and to ensure the proper tuning frequency.
- Construction Tips: Use a flared port to minimize air turbulence noise. Ensure the internal volume accounts for the space taken up by the port.
Internal bracing can reduce unwanted vibrations and panel resonance, coloring the sound and reducing clarity. Strategic placement of braces inside the box can reinforce its structure without significantly affecting the internal volume.
- Design Considerations: Braces should be placed where panels are most likely to resonate, typically the center of larger panels. Keep the bracing symmetrical to avoid creating internal standing waves.
- Construction Tips: Use the same material as the rest of the box for consistency in expansion and contraction. Cutouts in the bracing can help maintain air volume and reduce weight.
- Expert tip - Ideally, you want no panel over 12" in any direction without a brace. The breaking up of larger panel sizes will substantially reduce the resonance of the panel itself.
Incorporating Acoustic Damping Materials
Damping materials inside the box can absorb internal standing waves and reduce reflections, leading to clearer bass with less coloration.
- Material Choices: Common materials include acoustic foam, polyester fiberfill, and damping mats. Each has different absorption properties and is suited to different applications.
- Installation Tips: Line the walls or fill the box with appropriate damping material. Avoid overstuffing, as this can affect the box's adequate volume and, consequently, its tuning. Generally, 50% of the enclosure size, loosely filled, is optimum.
Implementing Passive Radiators
Passive radiators can be used in place of ports in a bass-reflex design, especially when space constraints prevent using an adequately sized port. A passive radiator is essentially a driver without a voice coil and magnet, tuned to vibrate at specific frequencies.
- Design Considerations: To achieve the desired bass extension, the passive radiator must be appropriately tuned with the active driver. The weight of the radiator can be adjusted to change its tuning frequency.
- Construction Tips: Ensure the passive radiator has enough clearance to move freely. It should be mounted on a sturdy part of the enclosure to handle the vibrations.
Exploring Advanced Materials
Beyond MDF, other materials can be used for building subwoofer boxes, each offering unique acoustic and aesthetic properties. Materials like Baltic birch plywood, high-density fiberboard (HDF), and specific composites can provide different sound characteristics and durability.
- Material Considerations: Research the acoustic properties of alternative materials. Some may offer better rigidity, resonance characteristics, or moisture resistance than MDF.
- Construction Considerations: Different materials may require different tools or construction techniques. Some materials may be more complex to work with or require special adhesives.
By delving into these advanced modifications, you can customize your subwoofer box to suit your audio preferences and room acoustics. These enhancements can lead to a more refined bass response, making your listening experience more immersive and enjoyable. However, it's essential to thoroughly research and plan these modifications, as they can significantly alter your subwoofer's sound characteristics and performance.
Finishing and Customizing Your Subwoofer Box

Now that your subwoofer box is constructed and the subwoofer is installed, it's time to add the finishing touches and customize your box to your personal preferences. Here are a few tips to help you achieve a sleek, personalized look for your subwoofer box:
Painting Tips for a Sleek Look
- Use an appropriate primer to ensure proper adherence of the paint to the wood panels of your box. Primer provides a smooth surface for the paint to adhere to, producing a professional finish.
- Apply multiple thin coats of paint, allowing each coat to dry before applying the next, to achieve a smooth, even finish for your subwoofer box. Thin coats of paint will prevent drips, runs, and uneven coverage.
- Sand the box between coats of paint to remove any imperfections, ensuring a flawless finish for your subwoofer box. Use fine-grit sandpaper to gently sand the box, being careful not to sand through the layers of paint.
- Consider using automotive spray paint for a durable and glossy finish for your subwoofer box. Automotive spray paint is designed to withstand the rigors of the road, providing a long-lasting, professional look for your box.
- Apply a clear coat to your subwoofer box for protection and a glossy appearance. The clear coat will help to protect the paint and give your box a finished, high-end look.
Adding Personal Touches to Your Sub Box
In addition to painting, there are several ways to add personal touches to your subwoofer box to make it unique to your style and preferences. Here are a few ideas to consider:
- Incorporate LED lighting inside your subwoofer box for a visually appealing effect. LED lighting can enhance the aesthetics of your box, creating a vibrant, eye-catching display of your bass.
- Install a ported box design for an enhanced bass response if it aligns with your sound preferences. A ported box design can provide a more pronounced bass, emphasizing the low-frequency range of your subwoofer.
- Add sound-dampening material to the internal panels of your subwoofer box to reduce resonance and distortion. Sound-dampening material, such as polyfill, can help improve your bass's overall sound quality, resulting in a cleaner, more accurate sound.
- Customize the exterior of your subwoofer box with vinyl wraps, decals, or car wrapping to make a bold statement. Vinyl wraps and car wrapping allow for endless design possibilities, allowing you to create a subwoofer box that stands out from the crowd.
- The subwoofer box configuration best suits your sound system's specifications and preferences. Whether it's a single subwoofer, a dual subwoofer setup, or a custom configuration, the box configuration can significantly impact your system's sound quality and bass response.
Can a DIY Subwoofer Box Save Money?

One of the most common questions car audio enthusiasts ask is, "Can a DIY subwoofer box save money?" The answer is a resounding yes. Building your subwoofer box can save a significant amount of money compared to buying a pre-made enclosure, and it allows for customization to your specific sound preferences. Here's how a DIY subwoofer box can save you money:
- Material Cost: DIY subwoofer boxes can be built using cost-effective materials, such as plywood or particle board, readily available at hardware stores. These materials are much cheaper than a pre-made subwoofer enclosure, allowing you to build your box for a fraction of the price.
- Installation Cost: By building your subwoofer box, you can avoid the additional costs of a professional installation, which can add up quickly. With proper research and planning, a DIY subwoofer box can be a budget-friendly option, allowing you to allocate funds to other components of your car's audio system.
- Customization: One of the significant advantages of building your subwoofer box is the ability to customize it to your specific sound preferences. Pre-made subwoofer boxes may not offer the exact specifications or design options you desire, forcing you to compromise your sound quality. With a DIY subwoofer box, you can design and build a box that perfectly complements your sound system, resulting in a genuinely personalized audio experience.
In conclusion, a DIY subwoofer box can save you money, allowing for customization to your sound preferences and providing a sense of pride and accomplishment for your car audio system.
What are the Common Mistakes to Avoid While Building a Subwoofer Box?

As you learn how to build your subwoofer box, you will find it to be a rewarding and cost-effective project. There are a few common mistakes to avoid to ensure the best possible outcome for your build. Here are a few mistakes to keep in mind:
- Box Volume: Avoid using a box volume that is too large or small for your subwoofer specifications. Using the appropriate box volume, as the subwoofer manufacturer recommends, ensures optimal sound quality, bass response, and overall system performance.
- Thickness of the Wood: Don't overlook the thickness of the wood panels for your subwoofer box. The wood panels' thickness directly affects the box's internal volume, so choose the appropriate thickness to achieve the desired box volume for your subwoofer.
- Port Length: Using a ported box design, calculate the proper port length for your specifications to avoid distortion and sound quality issues. Using the wrong port length can negatively impact the bass response of your subwoofer, resulting in a muddier sound.
- Secure Panel Bonding: Secure the panels of your subwoofer box together using screws, wood glue, or bracing to prevent the panels from vibrating or loosening, which can affect the sound quality of your bass. Properly securing the panels ensures a tight, airtight enclosure for your subwoofer to operate optimally.
- Edge Sealing: Don't forget to seal all edges of your subwoofer box to minimize air leaks and improve bass response. Air leaks can significantly affect the sound quality of your bass, so make sure to caulk all edges of your box to achieve a proper seal.
By avoiding these common mistakes, you can ensure a successful build of your subwoofer box, resulting in a high-quality sound system that delivers deep, impactful bass for your car audio experience.
Which type of subwoofer box design is ideal for achieving the deepest bass?
While the content does not explicitly state which box design is the best for the deepest bass, it suggests that the choice of subwoofer box design (such as ported, sealed, or bandpass) significantly impacts the sound quality and bass depth. Each design has its unique characteristics that can affect the depth of the bass.
What are the recommended materials for constructing a subwoofer box?
Medium-density fiberboard (MDF) is implied to be a suitable material for constructing a subwoofer box, due to its excellent acoustic properties and durability, making it a popular choice among audiophiles for custom subwoofer enclosures.
How can I enhance the depth of my subwoofer's bass?
To enhance the depth of your subwoofer's bass, consider building a custom subwoofer box tailored to your specific needs. A well-designed subwoofer box can amplify the depth and clarity of your music, providing a more immersive listening experience.
What size subwoofer should I choose for the deepest bass in my car audio system?
The size of your subwoofer should complement your box design and personal preferences for deep bass, with larger subwoofers generally capable of producing deeper bass frequencies. An in depth article exploring the subject can be found here.
Conclusion

To wrap up, building a subwoofer box requires careful planning, precision, and the right tools. It plays a crucial role in enhancing the sound quality of your audio system. You can create a customized box that meets your needs by choosing the right subwoofer, understanding different box designs, and following safety measures. Don't forget to add personal touches and finish it with a sleek paint job. While building a DIY subwoofer box can be a rewarding experience, it's essential to avoid common mistakes that can compromise the performance. If you want to learn more about advanced techniques and expert tips, check out our comprehensive guide on subwoofer box building.
Are you looking for more info on Car Audio Subwoofer Enclosures? Dive deeper with our Subwoofer Enclosure Essentials: A Comprehensive Guide.